Food

Everything I Ate At Disneyland in August 2025

Disneyland 2025 Beignets Haunted Mansion

To me, Disneyland is all about the treats. And the rides—there are so many iconic rides that I love so much. But the snacks really make it for me. There is nothing quite like going on a few rides then taking a break to people watch and eat a snack. It’s truly my favorite part of visiting Disneyland.

We went to Disneyland in August 2025—from August 18 to August 20. Let me start by telling you the saddest part of those dates: Haunted Mansion was closed, Star Tours was closed, AND Radiator Springs was closed. That’s a lot of our favorites. We didn’t realize it when we booked those dates (fwiw, we booked in January!) and if I’d known, I probably would have adjusted. But it was what it was and we still had snacks to look forward to, right? Let’s talk about everything I ate during our trip.

Day 1 - Arrival

During this trip, we stayed at Pixar Place (full review coming soon). We arrived, got to our room, briefly refreshed, and then realized we were fully starving. Usually, our first day meal is Tortilla Joe’s, a Downtown Disney icon; however, the Downtown Disney location closed earlier this year, which was devastating. We needed a new first night tradition—and I think we found it in Naples. Naples has been in Downtown Disney for a long time, but we’ve never eaten there. They were quick to accommodate our 9 person group (no small feat) and the food was fantastic.

I had the chicken caesar salad, which was fantastic. Both Forrest and Violet got the kids pepperoni pizza—and I have to say, it was one of the best pizzas I have ever eaten. It was incredible. Forrest also ordered the calamari appetizer and it was fantastic; some of the best, most tender calamari I have ever had.

On our walk back to the hotel, we got Forrest a churro—his absolute favorite Disney treat—and he picked Oreo cheesecake. It was decadent and so, so good. Great choice on his part.

Day 2 - Disneyland

Is there a better feeling than waking up your first day at Disneyland? I was so excited, I was awake at 4am, drinking coffee, fully dressed. Once everyone else was awake (at a very reasonable 6:30am), Forrest and I ran downstairs to the Sketchpad Cafe to grab some breakfast. I got a bagel with cream cheese; Forrest got a chocolate croissant; and I got a balance box for Danny and Violet to share. The balance box was a premade box that included: hummus and pita bread, veggies (carrots & cucumbers), and a boiled egg. Violet ate the boiled egg and Danny ate the hummus, pita, and veggies. The Sketchpad Cafe was a great place to grab some quick snacky items or a lunch, as they had lots of premade wraps and salads.

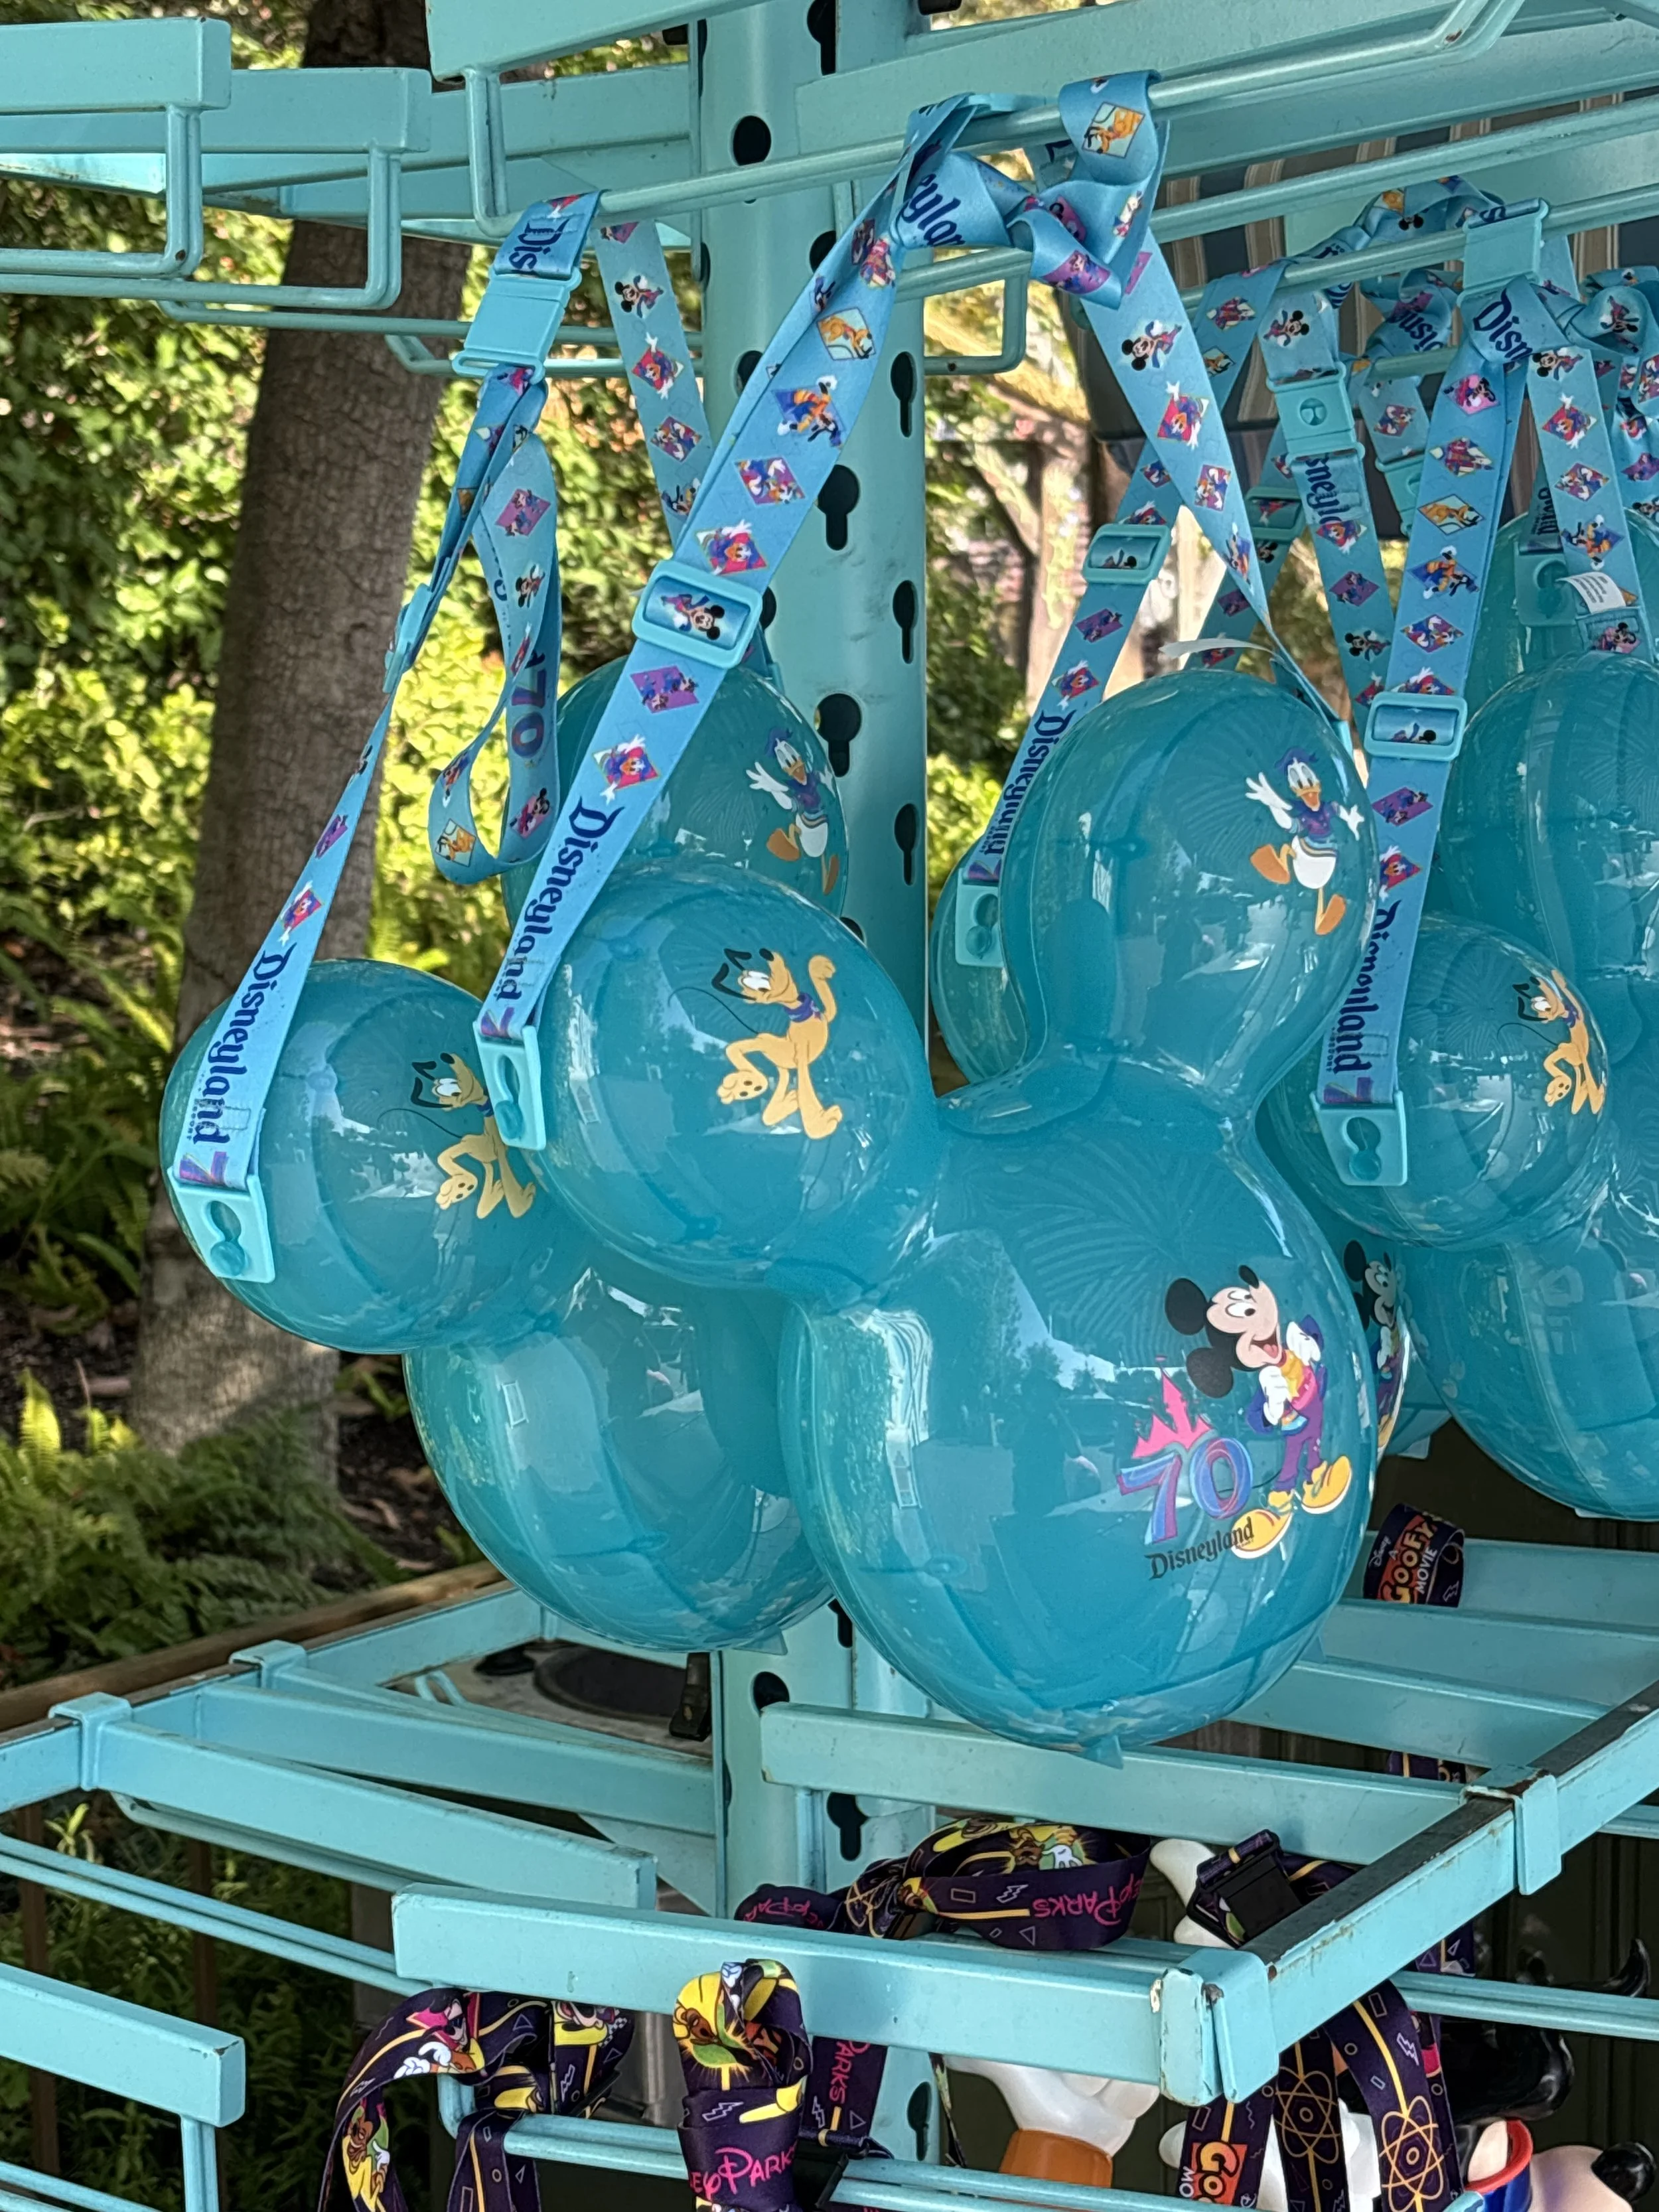
Once we were in the park, it was on. The first snack I got, after about 3 hours in the park, was popcorn: if you know me, you know I LOVE Disneyland popcorn. Actually, I love popcorn in general, but Disneyland popcorn is so good. Danny bought it for me while I was on It’s a Small World with Violet; he also got me one of the souvenir popcorn buckets. (It’s a Mickey Balloon bucket that lights up.)

Disneyland 70th Anniversary Popcorn Bucket

After a lot more rides and after Danny took Violet back to the hotel for a nap, Forrest and I went to Pizza Port. Forrest got a slice of pizza and I got one of the side salads—I love the Pizza Port salads, I know that sounds weird. It was just a light snack, as we had specialty dining at 1:40.

At 1:40, we went to the Plaza Inn for a specialty dining that also got us reserved seating at the parade. If I had to go back in time, I would not have booked this; it’s not that it wasn’t good, it’s that it was really expensive for kind of a stressful experience and we ended up not really needing the reserved seating. I originally was going to write a full review of this, but I don’t think I need to; consider this my mini-review. The menu is pre-set as well for this dining and I wasn’t particularly impressed with what was offered. For the adults, we received meatloaf with mushroom gravy, mashed potatoes, and pea puree; a baby wedge salad with ranch dressing; and a Paint the Night dessert. The meatloaf was pretty dry; the mashed potatoes and mushroom gravy was good; the pea puree was a choice; and the baby wedge salad was good. The dessert was a solid OK. For the kids, they got mac and cheese, chicken tenders, a roll, a bag of baby carrots, a Motts applesauce, and a dessert as well. I just wasn’t particularly impressed and was a little frustrated with myself that I wasted money, but the kids did enjoy it.

At the end of the day, Violet was very cranky, so I stayed behind while Danny and Forrest went the parade. (Note the frustration about wasting money—I didn’t even go to the parade!) They brought me back a Mickey pretzel with cheese and mustard, the perfect end to a night.

Day 3 - California Adventure

Confession: I have not attended a character breakfast since I was… 14? And I was way too old for the characters at that time. However, Violet is a Mickey and Minnie superfan and I knew she would love this. And she did. We attended the Autumn Adventures breakfast at Storyteller’s Cafe, which is located in the Grand Californian. Was it expensive? Yes. Was it worth it? Also yes. The buffet was incredible and the cast members working at Storyteller’s were fantastic. I cannot recommend it enough. Violet and Forrest got to meet Mickey and Minnie, Chip and Dale, and Pluto and they had so much fun.

After breakfast, we used the Grand Californian entrance into California Adventure. After a few rides, Violet ended up falling asleep in her stroller while we were on Soarin’ Over California (my father-in-law had stayed behind to watch her). Danny took Forrest to ride more rides, while I ate fries from Smokejumpers Grill. Violet was asleep for so long, I managed to walk from California Adventure to Downtown Disney, go into World of Disney to buy a few things, and then walked to Disneyland. In Disneyland, I walked all the way to the Adventures of Winnie the Pooh, where I ate popcorn while Violet slept another hour and a half.

When she finally woke up, I treated myself (and her) to a frozen lemonade and a pretzel with cheese & mustard.

In the evening, my in laws watched Violet and Forrest while Danny and I went into the park solo. We went to Rancho Del Zocalo… this is a restaurant we have seen so many times in the park, but we never ate there and we both wanted to. And we did. I had the Burrito Sonora and Danny had the Soy Chorizo Tacos, and we shared an Esquites Bowl. It was incredible, super fast and very filling. 10/10, recommend this for a dinner in the park.

After that, we treated ourselves to some beignets and a Mint Julep before going on some rides.

Day 4 - Disneyland

I woke up on this day and cried because it was our last day. I was fully exhausted, but i felt like we’d finally hit our stride at Disneyland with 2 kids for the first time!

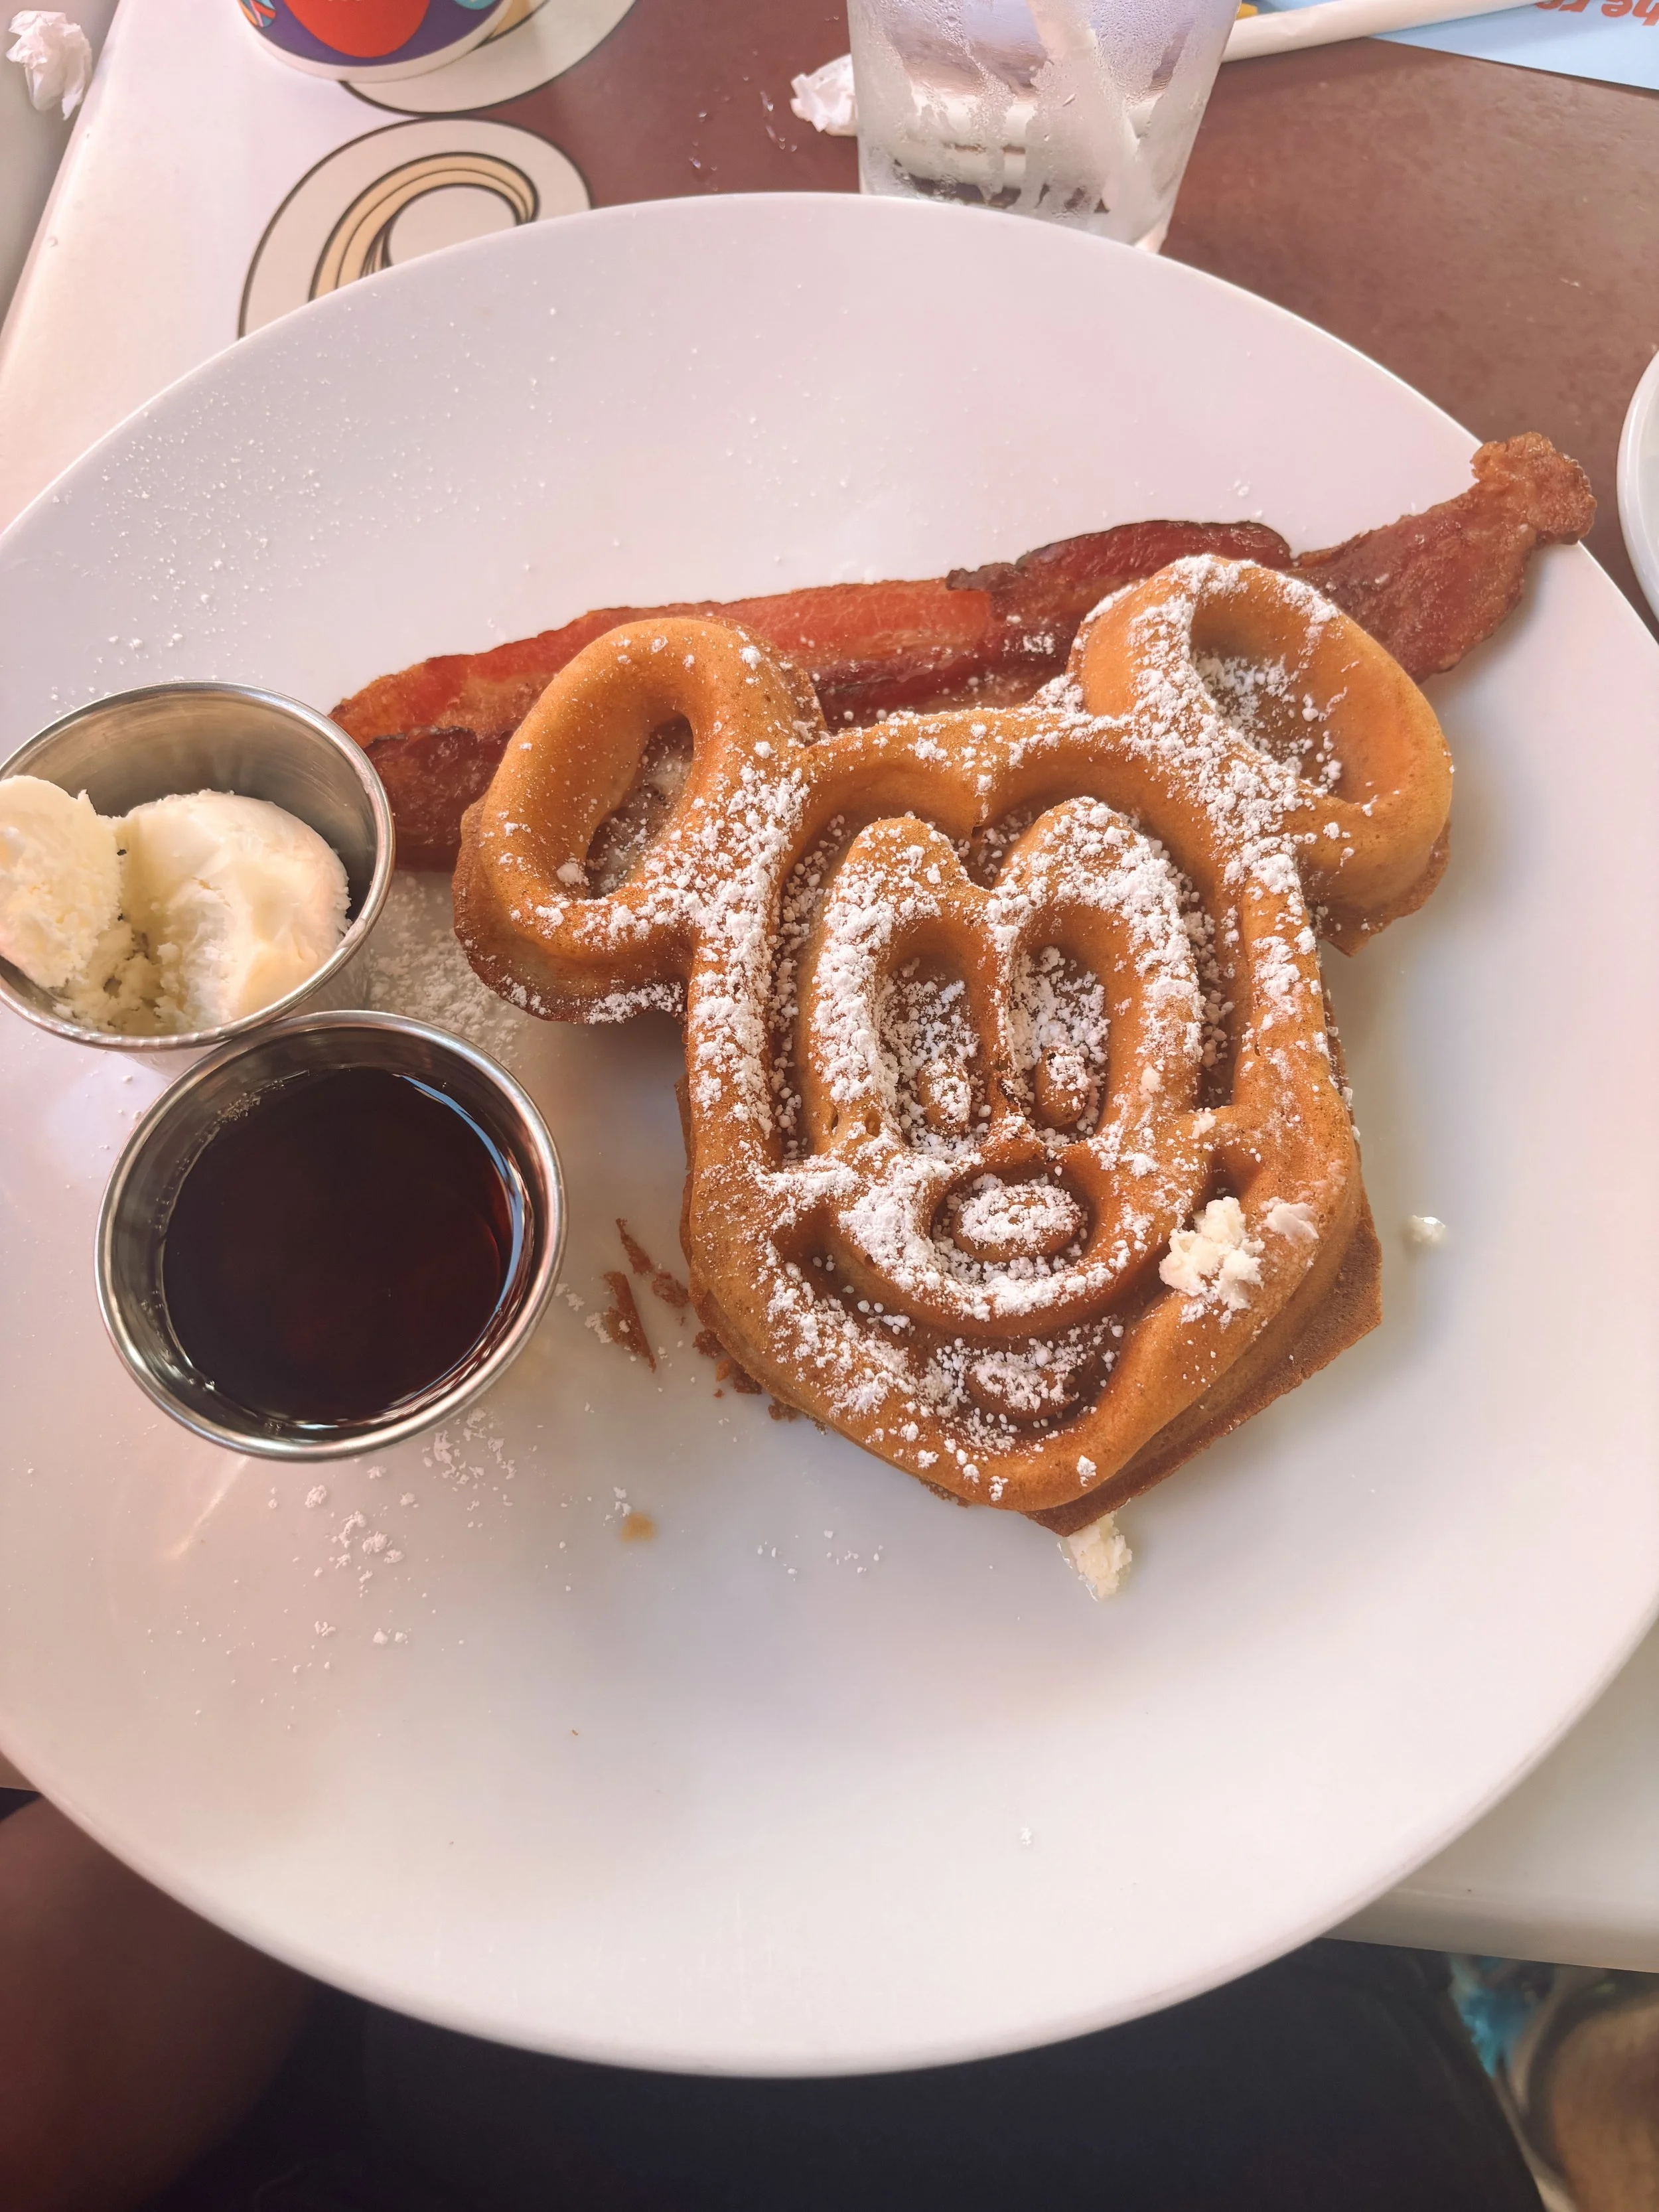
We went to Carnation Cafe with Danny’s parents for breakfast; I’d made this reservation first thing because it’s our favorite breakfast place. And it’s becoming tradition to get breakfast there on our last day. We all got the Mickey waffles (except Danny, who got pancakes). They were delicious, as usual. Carnation Cafe - Mickey waffles

Mickey Waffles at Carnation Cafe Disneyland California

After that, we went on a bunch of rides, then got Dole Whip. I got a Dole Whip float, which I prefer, because I feel like I need the slightly tart pineapple juice to go alongside the Dole Whip.

Violet needed a nap, so I spent time with Forrest. He wanted Pizza Port for lunch again (it’s his favorite): we both got pizza, pepperoni for him, cheese for me, plus the garlic breadsticks.

After a long nap and some more rides, we all went to Hungry Bear Jamboree for dinner. I got the Smoked Brisket Sandwich, which I wanted to love; however, the brisket they gave me was almost entirely fat, so it was barely edible. The fries were good though. Danny got the Barbecue Salad, which looked so much better than what I got and came with a corn rib. We got funnel cake fries to split as a family. Forrest got the kids chicken fingers and said they were the best he’d eaten on the trip; he also appreciated that they have a ranch dispenser, which is rare in the park.

At the end of the night, Danny’s dad offered to watch Violet and Forrest while we went into the park with Danny’s mom. We got a pretzel with cheese from the Refreshment Corner on Main Street (Danny and I call this the Coke Corner, but we can never really remember why). I don’t like the cheese sauce they use at the Refreshment Corner specifically and they didn’t have mustard packets, so that was a bummer. However, Mickey Pretzels are my 2nd favorite snack after popcorn, so it was a fitting end to 3 days of eats.

Brown Butter Snickerdoodles

snickerdoodle cookies on a red and black plaid background

Can I tell you a little dream I’ve had lately? I got it into my head a few weeks ago to open a farm stand. You’ve probably seen them popping up if you live in a small town: self-service stands where you can buy produce, honey, sourdough, etc. I’m not a sourdough baker (yet, I restarted my starter this past week so wish me luck), but I do love baking everything else: rustic Dutch oven bread, cookies, cinnamon rolls, you name it.

I’ve toyed with the idea of selling holiday cookie boxes the last few years—mainly at the request of my husband’s coworkers—and I’m looking for a bit of a productive hobby. Something I’ve never done before and that gets me off the internet a bit.

That is all to say: I’ve been testing recipes the last few weeks and wanted to share one that I’ve perfected.

These brown butter snickerdoodles are everything you love about the classic snickerdoodle: sweet, cinnamon-y and soft. The addition of brown butter gives them a more caramel flavor.

Ingredients:

Dry ingredients

  • 2 ½ cups all purpose flour

  • 1 teaspoon baking soda

  • 2 teaspoons cream of tartar

  • ½ teaspoon cinnamon

  • ¼ teaspoon salt

Wet ingredients

  • 1 cup unsalted butter (2 sticks)

  • 1 cup packed dark brown sugar

  • ½ cup granulated sugar

  • 1 large egg plus 1 egg yolk

  • 1 teaspoons vanilla extract

  • For rolling mixture: ¼ cup sugar and 2 teaspoons cinnamon

Instructions

First, brown your butter: add butter to a large saucepan and place over medium heat. The butter will begin to crackle, and then eventually foam. Make sure you whisk constantly during this process. After a couple of minutes, the butter will begin to brown and turn a nice golden amber color on the bottom of the saucepan and the foam will dissipate. Continue to whisk and remove from heat as soon as the butter begins to brown and give off a nutty aroma. Immediately transfer the butter to a medium bowl to prevent burning. Set aside to cool for 5-10 minutes or until cool enough to touch. I personally pop it in the fridge to speed up this process.

Once brown butter is cool, add all of it to the bowl of an electric mixer, along with the dark brown sugar and granulated sugar. Mix on medium speed for about 1 minute.

Next, add in the egg, egg yolk, and vanilla and beat on medium speed until well combined, smooth and creamy; about 1-2 minutes.

In a separate bowl, whisk together the flour, baking soda, cream of tartar, 1/2 teaspoon cinnamon, and salt in a bowl. Slowly the dry ingredients to the bowl of the electric mixer and beat on medium-low speed just until combined.

Cover dough with plastic wrap and chill in the fridge for 2-3 hours or up to overnight. When I first made these, I did not chill the dough and the results weren’t my favorite; the texture was off. You can also put in the freezer for 30-45 minutes, but I promise you don’t want to skip this step.

Once ready to bake, preheat the oven to 350 degrees F. Let your dough sit at room temp for about 10 minutes, then begin rolling into balls—about 2 tablespoons of dough for each one. But if you’d like bigger cookies, go for it.

Once all your dough is formed into balls, mix 1/4 cup sugar and the 2 teaspoons cinnamon in a bowl. Roll dough balls in cinnamon-sugar mixture, then place on cookie sheet, 2 inches apart.

Bake the cookies 8-12 minutes or until the edges of the cookies begin to turn golden brown. I found that closer to 11 minutes was the perfect temp for my oven. They will look a bit underdone in the middle, but will continue to cook once out of the oven.

Let the cookies cool for 5 minutes on the baking sheet, then move to a wire rack. This recipe makes approximately 24 cookies.


Let me know if you try this recipe! My son was a big fan—but he loves snickerdoodles anyway—and I loved them as well.

I Tried Little Spoon... So You Don't Have To

What feels like ages ago, I tried Little Spoon meals for Violet: we were right in the middle of weaning from breastfeeding and trying to increase the amount she was eating. And like a lot of parents, I worried about her getting the full range of nutrients she needed. At the time, it wasn’t something I was ready to quite commit to: she was picky and cranky about not breastfeeding anymore and the timing was all wrong.

Flash forward to today and our lives are much, much different. Violet attends daycare twice a week and I needed something easy (and allergen friendly!) to pack for her lunches. Finally, I had the opportunity to join Little Spoon again.

This time we signed up for the lunchers option: these are almost like Lunchables, but obviously much healthier. In our first order, we paid $43 and received 8 total lunchers in the varieties of Easy Cheesy Pizza, Chicken Dunkers, and Brunch Lunch.

Here are Violet’s (age 2) unbiased reviews.

Easy Cheesy Pizza

From Violet, this one got an 8/10. From mom, it gets a 7/10, only because Violet is the messiest eater of all time and giving her a sauce cup is a minor disaster waiting to happen. She looooved the Unreal milk chocolate gems (I’m a HUGE Unreal fan as well and love seeing them in Little Spoon products). She ate two of the flatbreads with sauce and cheese, then polished off the cheese and asked for more of the chocolate gems. But alas, she had already eaten them.

Chicken Dunkers

Violet’s rating: 9/10

Mom’s rating: 10/10 (any way I can get more veggies into her is a win)

This Luncher comes with 5 “chicken super nuggets”) (that means they include antibiotic-free chicken, cauliflower, kale, carrots, and chia seeds) alongside probiotic yogurt ranch dressing, pizza-seasoned pretzels, and a brownie that is sweetened with applesauce. All of these are literally fantastic—like so, so good. Please make an adult size, Little Spoon!

Brunch Lunch

Violet’s rating: 10/10

Mom’s rating: 8/10 (Messy!! But cute)

This Luncher comes with a small smoothie bowl, granola, 4 chicken and veggie sausages, and a zucchini muffin. Violet is not quite at coordination levels for a smoothie bowl yet, so I put her smoothie into a cup with a little extra water. I added some yogurt to the granola and she LOVED that. The sausages were a surprise hit because she is pretty hit-and-miss with sausages. And of course, she won’t ever say no to a zucchini muffin.


What’s our final grade for the lunchers? For me, they’re a 9/10 and for Violet, they’re also a 9/10. She LOVES most of the elements of them and I love that she’s getting the fun of a Lunchable without the high sodium or sketchy ingredients (i’m looking at you, pepperoni pizza variety).

If you’d like to try Little Spoon, whether you’re getting purees, first bites, lunchers, or pouches (I’ll be sharing our pouches review soon), you can use my referral code for $20 off your first order.

Everything I Made This Weekend: January 26, 2025

weekend meal prep january 2025

Well, well, well. Another week, another food prep. I look forward to the weekend because I genuinely love meal prepping… it’s one thing that I do to really make our lives easier each week and it never fails to actually do that. My goal is always to prepare a few breakfast and lunch items, a sweet treat, and then anything that we can use for snacks.

This week, I also wanted to share what I bought for our groceries—obviously, I won’t be listing everything, but the big pieces that help. I am on a freezer food buying ban currently (I wrote about my goal to clean out our freezers on my newsletter this week), but that won’t stop me from stocking up on stuff, you know.

Everything I Bought

Danny got paid Friday which means I got both our usual weekly grocery delivery and went to Costco. I had originally planned to go to Costco in person on Friday morning, but the timing did not work out (Forrest had a half day and I had several important things to do in that 4 hour span of time). Instead, I got an Instacart delivery, which yes, I know is more expensive, but damn, it’s convenient.

Here are the biggies I purchased that will help us throughout the week:

From Walmart:

  • Salmon (Alaskan, never Atlantic)

  • Canned pineapple (for Hawaiian chicken this week)

  • 2 bags of potatoes

  • Meatballs

  • Egg noodles

  • Enchilada sauce (enchiladas are an easy staple for us)

From Costco:

  • Rotisserie chicken (obviously)

  • Eggs (yes, I was blessed by the egg gods and my Costco had eggs!)

  • Brussels sprouts

  • Spring mix

I did also visit our community sharing program this week (it’s a food bank!) and I got:

  • Some cans of beans

  • Chicken thighs

  • A ham

  • Fish fingers

  • 5 avocados

  • A bunch of older bananas

  • Apples

I utilize food banks because 1) the more people who use the programs, the more funding those programs will get and 2) the income requirements for food banks are much, much higher than you would ever suspect. For example, the income limit for a family of 4 to use the community sharing is just a little under $8,000 a month. That’s… a lot. That’s nearly every single family of 4 I know. So if you’re reading this and stressing about grocery prices, go ahead and visit that food bank. I promise it’s not as scary as you think it is.


Alright, those are the basics I bought and received this week. Let’s get to the good stuff: what I made!

Breakfast Burritos

Danny is a breakfast burrito fan. Last week, I made him both sandwiches and burritos and while he likes both, I knew he preferred the burritos. (He bragged about them to his students. That’s a compliment.)

This week, I made a quick guacamole with some avocados I had plus the leftover tomatilla salsa I made two weeks ago. I had about 2 tablespoons left in one container and wanted to get it cleaned out, so it was quick and easy to add avocado, lime juice, and some red onion.

For the rest of the burrito, I partially cooked a potato in the microwave, chopped it up, and then crisped it in ghee before adding a few leftover bell peppers diced up. Then I scrambled the eggs. I cooked the bacon in our toaster oven and added 1 slice to each burrito, followed by the egg and potato, some cheese, and a healthy amount of the guacamole. Wrap up and repeat. I made 5 burritos in total for Danny to have this week, which means he won’t be secretly stopping at a fast food place for a breakfast sandwich.

Rice & Chicken Fried Rice

As I mentioned, I got a rotisserie chicken from Costco. This is an every-other-week purchase for us: we love rotisserie chicken and I try to use all of them. However, I have a TON of chicken stock saved up, so I knew I wouldn’t make chicken stock this week.

After I shredded as much meat as possible off the chicken, I decided to make Danny some chicken fried rice. I had already planned to pre-cook some rice for lunches and dinners throughout the week, so it was easy to make fried rice.

I sautéed some frozen veggies (peas, carrots, and corn) then added some of the shredded chicken, before adding 4 eggs and scrambling them up. I added about 1 1/2 cups of the rice I had cooked, then about 3 tablespoons of soy sauce, a splash of rice vinegar, and a drizzle of sesame oil. Once it was mixed up and looking good, I divided it into 3 containers for 3 lunches this week. Super easy.

Miscellaneous

I always have a few bits-and-pieces that aren’t full blown things I’m cooking or baking that I make each weekend. Here they are this week.

  • Boiled eggs: Violet and I are both big boiled egg fans. She often eats 2 of them a day (breakfast and lunch or sometimes lunch and snack) and i often each 1 a day. So we go through a lot of eggs in our house (hence the constant hunt for eggs). I boiled 6 eggs for this week, which I’ll try to make last until at least Wednesday or Thursday.

  • Rice: as I mentioned, I pre-cooked some rice for the week. I use a rice cooker and made 2 cups of rice. I always just use water with a small amount of butter, garlic, and soy sauce for a little flavor. It turns out perfect every time. Highly recommend a rice cooker in your home!

  • Pre-washing fruit: I have oranges and apples for snacks this week, plus some strawberries and blueberries. I like to get berries pre-washed and doused with a little bit of watered down vinegar to keep them from going bad in .5 seconds. This way breakfast for Violet is as easy as peeling a boiled egg and plopping some berries on her plate (this is her favorite breakfast—even better if there is a banana bread muffin there too).

  • Pre-mashing banana: As i mentioned, I got a bunch of bananas from community sharing and they aren’t… the best bananas. They are bruised and a little rough looking, but that’s ok: we’re a banana bread household. I peeled and mashed all the bananas to freeze in 1 cup increments for future banana breads. Doing stuff like this is so, so simple and makes me feel so accomplished. Who would have thought I would ever get excited about having mashed banana in my fridge?


Banana muffins

I know: I mentioned banana bread too many times for this to be a surprise. But yes, I made banana muffins. This weekends meal prep has been a little lighter than usual, but I knew I needed to make some muffins. They’re a great quick breakfast and snack; they are easily carried along in the car; Violet can eat them independently; they’re a sweet treat without being a flat out dessert… banana bread is just the perfect vehicle for getting kids to eat something healthy.

As always, I use the most simple recipe from Better Homes & Gardens recipe collection (I have that classic red-white-and-blue book).

Violet loves these so much, they’re often the first phrase out of her mouth in the morning. “Banana bread muffin?” she will ask, blearily, as I’m bumping into her room because it’s 4:30am on average.


And friends, that is that. It was a lighter meal prep this week. Don’t forget to subscribe to my newsletter for more food writing, general musings, and more.

Lazy Sunday: Everything I Made This Weekend

I originally sent this out as a Substack newsletter, but I’ll be moving these posts here for now.

Oh, hey, look who it is! It’s me, writing for once!

Happy Sunday after the first full week of 2025. Let me tell you—it was a bit of a doozy for me. I don’t want to get too into it, but for the sake of transparency: in this first full week of January I started AND quit a new job.

Honestly, that’s pretty impressive. Again, don’t want to get too into it, but I was mislead into accepting the job—which I think was purposeful, as I was the 4th hire for this role in the span of a year.

After a lot of thought and discussion about the last year, Danny and I came to the conclusion that I will aim for part-time employment. In a post-COVID world that has had a serious backlash to the working conditions that came during lockdown, life has gotten way, way harder for mothers in the workforce. It’s near impossible to find a flexible role anymore: the amount I’ve had to argue about my children in the past 2 1/2 years has been astronomical. I just don’t think school pick up is the end of the world—after all, I work in marketing. I’m not a doctor. No matter how much someone feels like something is an emergency, it’s not an emergency. It’s never that serious.

There are a lot of things I’m willing to compromise on when it comes to working. But I’m not willing to compromise on my kids and I’m not willing to overschedule my life in order to work at a “butts-in-seats” kind of place.

This is all to say: 2025, what a year already!

So anyway, I’m settling into being a partial stay-at-home mom for the time being. I have some freelance work and a part-time gig already lined up, but I’ve decided the next year is about healing for me.

Ok, that’s the general life update. Let’s discuss why we’re here today: cooking.

It’s been one of my goals for 2025 to make more things homemade, to do more food prep to make our lives easier, and to get back to cooking and baking, one of my favorite hobbies. A lot of this is a money saving endeavor (groceries are… expensive?), but I also just enjoy cooking and baking on the weekend. I haven’t really done it for the past several…. years (?) because, let’s be honest, I’m tired. I’m really tired.

So here’s everything I made this weekend.

Rotisserie Chicken - a Classic

If you go to Costco and don’t get a rotisserie chicken, what are you doing? Full disclosure, I had to Instacart my Costco stuff this weekend—I’ve had a cough for about 2 months now and I really don’t want to get sick again—so my rotisserie chicken was at the mercy of Dylan. While Dylan struggled to identify eggs, he did pick a good rotisserie chicken.

I shredded the rotisserie chicken into roughly 2 cup portions (I got about 3 containers) to use in lunches and dinners throughout this week. Then, I did my usual: make chicken stock with the leftovers.

If you haven’t make chicken stock, it can seem really daunting. I just use my crockpot.

Here are the simple instructions:

  • In your crockpot, place your rotisserie chicken carcass. (As a note, you can also do this with any bone-in chicken leftovers—like if you make a half-chicken or a quarter piece).

  • I usually add 2-3 carrots, just cut into large pieces, and whatever amount of onion I had. This time, I had a leftover half onion that I didn’t want to go bad, so I chopped it roughly and tossed it in.

  • I add 1 tablespoon of kosher salt, 1 tablespoon of pepper, and 3-4 cloves of garlic as well. This time I did add some fresh ginger I needed to use up.

  • Then, you add water to cover the chicken, or as close as you can if it’s a big chicken.

  • I set my crockpot to low for about 10-12 hours. It will smell incredible all day.

I’m currently learning how to can chicken stock, but you can also just freeze it when it’s done.

Speaking of when it’s done, you’ll want to let it cook before you strain out all the physical pieces. I usually double strain through a mesh strainer and then portion it out.

Included here: I cooked up a pound of ground beef I’d defrosted in my fridge; I’ll either use it for a dinner this week or freeze it. I often like to batch cook several pounds of ground beef at once to have ready for weeknight dinners…but I didn’t quite plan that far ahead. Maybe next week.

Roasted Tomatillo Salsa

I got a bag of tomatillos this week, so I knew I needed to make some salsa as they were already looking rough. Plus, I had some jalopenos leftover from making a dupe of Chipotle’s corn salsa last week. (If anyone would like a round up of what I made to make Chipotle bowls, let me know!)

Tomatillo salsa is the easiest salsa to make. Here’s what I did. (You might notice all my measurements are general and approximate. It’s your salsa. Do whatever you want.)

  • Peel your tomatillos and rinse well.

  • On a baking sheet, place tomatillos along with a chopped white onion (can be rough chopped!) and 1-2 jalopenos. I personally cut the jalopeno I used in half and removed about 75% of the seeds.

  • Add oil to baking sheet and toss, then salt and pepper.

  • Roast at 350 degrees for about 25-30 minutes, until everything is soft. Take out of the oven and let cool.

  • Once cool, add to a blender with the juice of 1 lime and about 1/4-1/2 cup of water. Blend.

I separated into two small containers. I’ll use one container for enchiladas this week and the other to make some tomatillo ranch soon.

Cranberry Sauce

Cranberry sauce, in January? In my world, yes, because I kind of use it as jam.

I got a bag of cranberries this past week (for free, just like the tomatillos) so I decided to make some cranberry sauce. I follow a really general recipe for it, but cranberry sauce is painfully easy to make. You can really do whatever you want.

I used:

  • 1 bag of cranberries (16oz)

  • 1/2 cup of water plus 1/2 cup of orange juice

  • The zest of 1 orange

  • 1/2 cup of sugar.

Combine everything in a sauce pan and bring to a boil. Boil for about 10-15 minutes, stirring and breaking up the cranberries. When it was thick and most of the cranberries had burst, I let it cool, then blended it a little with my immersion blender. This made about 2 cups of cranberry sauce, so I froze half and kept the other in my fridge. Perfect for sandwiches this week.

Banana Bread Muffins

I had some decrepit looking bananas that needed to GOOOOO so it was banana bread time. Typically, I like to bake a loaf of banana bread, but this time I baked muffins so I’d have individual portions. I follow a super basic recipe from Better Homes & Gardens cookbook; it’s this one here. I do usually omit the lemon zest (because I very rarely have it) and add mini chocolate chips and flax seed instead of nuts.

These are great for a quick breakfast on busy days or a snack for Violet. I also like to pack them in Forrest’s lunch throughout the week. He’s notoriously a picky eater, but he’ll always eat a banana muffin.

What’s Left from Last Week?

Last week, here’s everything I made that I still have for this week:

  • Chipotle’s corn salsa

  • Egg, bacon and cheese breakfast sandwiches on pretzel rolls and english muffins

  • Egg, potato, and sausage breakfast burritos

  • Cilantro lime rice

The corn salsa and lime rice will be easy to morph into burrito bowls with rotisserie chicken, and I’ll be able to use them with enchiladas this week. That’s a win-win to me.

And that’s it, folks! Everything I made this weekend to make the week a little bit easier. I might start writing these weekly as a type of round up and I’m hoping to share everything I make for dinner throughout the week. Is this interesting? I don’t know, but it’s what I feel like writing about and I promise I’d write more this year.

Thanks for reading, as always, and let me know what I should add to my weekly meal prep rotation.

Save Money & Time With These Dinner Tips

I’ll be honest, y’all: the price of groceries currently has me shaken. For years, I’ve routinely spent about $75 a week at our usual grocery store, with 3 Hungryroot deliveries a month, a Costco trip every 6 weeks, and a few supplementary stops when needed. I don’t think we’ve ever spent more than $500 in a month on groceries. However, those $75 trips have become $100+ trips and our every-6-weeks Costco stock up that used to be $120 or so is now $200-300. We are routinely hitting $600+ on groceries every month and we’ve definitely scaled back.

It’s an incredibly stressful time for families. The rising cost of foods, especially specialty foods, means that lots of people are making difficult choices. Add in consistent supply chain issues and shortages (like the formula shortage) and families are continuing to shoulder an incredible burden, both financially and mentally each month.

This is a time where we can all help each other. Everyone probably has thought they’ve tried everything regarding food costs and cutting back—but there might be something they’re overlooking. There might be something I’m overlooking or something that you’re overlooking. Like I said: we all can help each other. If you have a great tip for cutting costs, drop me a line on Instagram @michellelocke6! I’d love to compile some of these tips into a post or IG story.

I have a few ways I’ve cut costs recently and I wanted to share. I like to think these tips can also be time-saving: i know for many families like mine, you’re working on a tighter budget, but without as much time to get the things you need. That means you don’t have time to run to a ton of different grocery stores or you might be trying to limit the amount of time you carry around, say, a newborn baby who is vulnerable to all the viral mess going around right now.

1. Use Ibotta.

Ibotta is basically a coupon app that gives you cash back when you shop at certain stores. In October alone, I earned almost $100 and since then have earned about $225 total. It’s not nothing. They pair especially with Walmart and Target, so I use the app mostly at those stores. There are often cash back offers on the same things every week (like my favorite brand of kombucha and tuna packets, two things I buy nearly weekly), but there are also often new offers, as well as bonus incentives. It’s a small way to get a little extra money back when you’re doing your weekly grocery shopping.

2. Find a grocery service you like.

The cost of grocery stores can be incredibly variable from city to city, town to town. For example, I think overall, stores like Albertson’s and Safeway tend to be more expensive, especially in smaller towns. The Safeway closest to me definitely charges a lot more for certain things than anywhere else. I used to exclusively shop at Safeway, because it was the most accessible store for me (specifically pre-pandemic). For a while, I switched to Fred Meyer, which has some fairly decent deals on certain things, but not on others—however, they offered grocery pick up during the pandemic, which wasn’t available at other stores.

However, I’ve recently switched to Walmart delivery for my groceries. My weekly shop at Fred Meyer had started to climb into the $150 a week territory—which I just couldn’t fit into our budget. Walmart is averaging about $100 a week for the same things (give or take on brands). Plus, I signed up for the Walmart+ service which offers free delivery, as well as additional cash back offers. I got a deal on it—it’s usually about $100 for a year of Walmart+, but I got it for $50 in October. Walmart is not my favorite grocery store and my local Walmart (in a small town) tends to have pretty limited stock—but it’s the most affordable store by far right now.

3. If you need a specialty diet, find an online service you like.

This is again very dependent on your budget and what you’re willing to pay. If you have a specialty diet, online delivery services like Hungryroot can be a great addition to your budget. One small box a month is $65 and gives you 33 credits to use: that can get you stocked up on lunch supplies, some produce, and a few extras. I find Hungryroot works best as a supplement to my additional groceries. If you’re curious about what I pick up, I do weekly Hungryroot hauls on my Instagram story!

If you’d like to try Hungryroot, you can still use my code PAUSES2021 for an additional amount off your first box. Definitely a great deal right now, even if you just want to try it once or twice!

4. Don’t hesitate to visit a food pantry.

You get what you give. Food pantries are designed to help everyone in need—and if you need just a little extra to stretch you to the next week for grocery shopping or the next paycheck, then food pantries are 100% something you shouldn’t be ashamed to use. They often have shelf stable products—like pastas, jarred sauces, and canned goods—that you can use to make some simple meals to get you through the week. They also often have breads and peanut butter, perfect for kid lunches or snacks.

There is no shame in using resources like these, especially when times are hard. And when things improve or when you have a little extra money, you can always give back to food pantries and help others in need—it’s a win-win situation.


How to Meal Plan on a Budget

How to Meal Plan on a Budget | Writing Between Pauses

Welcome to my new series, Meal Planning March! I’m excited to share all the tips and tricks I have for meal planning. It’s one of those things that most people know will help them eat better, eat cheaper, or just have less stress—but can feel overwhelming to get started! In this series, we’ll talk budgeting, creating meal templates to reduce decision fatigue, and more!

When you think of meal planning, what comes to mind?

Do you think of those complicated printables you see on Pinterest? Or do you think of those cutesy templates that are almost too simplified?

Or, are you like me and do you immediately want to go lie down?

I make so many decisions every single day: how to respond to comments for my work, how to respond to emails, how to do this, things I need to research, to do lists that I need to prioritize… it can be hard to add one more decision to my day, like deciding what to make for dinner or, worse, deciding what to make for 7 days worth of dinners.

So how do I make meal planning easier? And how do I not spend thousands of dollars every single week considering every possible meal option?

Let’s start with the second question: budget.

Setting Your Weekly Grocery Budget

For my family, we typically spend about $50-75 on groceries every week. Then, every 6 weeks or so, we do a big Costco shop that is between $100-200 (it depends on if we need dog food and toiletries, like paper towels, at the same time).

On this note, we also buy meat through co-op systems, like splitting a cow or pig from a local farmer with other people. That saves us a ton of money and we usually don’t buy meat week-to-week—the only exception is turkey or chicken, if we’re using those that week.

This is all to say: setting your weekly budget is hugely personal and one of the most challenging parts of meal planning. If you’re like me and a little obsessed with saving money, it can also be a huge headache when you end up spending a ton on groceries that you end up not using.

Here are a few factors to consider when creating your weekly budget:

  • Be realistic about how much food you need to buy.

  • Be realistic about what you will eat. I usually stick to buying 2-3 fruits to have for snacks every week—not a selection of every fruit I like. If it’s in season, even better. The same goes for vegetables; rather than buying a few of all the veggies I like, I pick my few rockstar veggies that I like in everything, typically broccoli, carrots, and spinach.

  • Do you need all those snacks? I know lots of people buy lots of snack foods every week. And while some weeks I definitely go hogwild in the snack aisle, I don’t think it’s necessary. We usually keep pretzels, granola bars, and fruit snacks stocked and that’s pretty much it, as we try to snack on whole foods otherwise. If a significant portion of your grocery bill is going towards a ton of snacks, it might be time to re-assess, as they can’t be used in meal preparation.

Another huge part to consider: how much can you afford to spend each week? For us, we could probably spend a bit more on groceries (and/or I could spend less time shopping sales and looking for coupons), but we have found that our budget gets us what we need, and isn’t too time consuming for me to shop at this point.

Creating a Meal Plan with Budget in Mind

There are a few foods that are cheaper to make. Things like bean and rice bowls are highly affordable. Conversely, anything with a meat-based protein (or plant-based protein that is highly specialized, like Beyond Burger) is going to be more expensive. Pastas, rice, and most grains can be bought in bulk and make meal planning a lot easier.

Here’s what I do:

  • Each week, I sit down with a cookbook and PInterest and start searching for things that look good. I keep in mind what I have on hand—typically, a lot of beef, some freezer items, and salmon that I buy from a local fishery—and pick meals based on those things.

  • I also pick recipes that include more fresh ingredients, rather than canned.* While canned foods are cheaper, I don’t typically like them—but that’s just me!

  • Recipes with less ingredients tend to draw me in more than time-consuming or multi-step recipes, probably because they’ll end up costing more overall.

My favorite cookbook right now for meal planning is Danielle Kartes’ Rustic Joyful Food: Meant to Share. These recipes are all big, meaning they make a lot (and are therefore easy to freeze extra or simply cut in half). She also tends to create recipes that don’t contain very expensive ingredients and that’s one thing she notes in her book as well.

Once I have a list of things I want to make, I start writing out what I don’t have for those recipes. If the list starts getting too long, I will re-assess what I’ve picked to make and swap things around to save for later.

My Best Money Saving Tips

  • Buy in bulk if you can and if you have the storage. It’s more cost up front, but if you break it down, it lasts longer for less. However, that being said: the up front cost can be off-putting and the storage aspect can make it tough.

  • Shop the sales. If there is a big sale on chicken or turkey, buy a few and plan meals around those for the month. I get weekly emails from my grocery store to better help me see what’s going to be on sale when it’s time to go shopping.

  • Repurpose leftovers. Here’s an example: after I make tacos, I always have extra meat, rice, and beans. I usually will turn those into a layered taco casserole the next day just to change things up. If you make a roast on Sunday, you can work those leftovers into your meals for at least one or two extra days—think roast beef sandwiches, chili, beef stew, or shepherd’s pie. Super simple!

Have tips you want to share? I’m all ears! Leave your thoughts in the comments below!

Everything You Need to Know About Hungryroot

Everything You Need to Know About Hungryroot | Writing Between Pauses

New Year, New Me—except just like in January and February of years past, I’m writing about Hungryroot. Some things really never change. For me, one of those things is how much I love getting groceries delivered to my front door. (The pandemic has also definitely increased this love for me!)

If you know me, then you know I love Hungryroot. I’ve gotten at least 2 Hungryroot deliveries every month for the past… 2 years? If you want to read a bunch of my old posts about Hungryroot, here’s a round up!

Hungryroot has added a ton of new items in the last 6 months—pretty much since I last wrote about them! Every week when I customize what’s coming in my shipment, I get super excited to see what new items I can add and try. With winter setting in, the pandemic not letting up, and things feeling darker than usual, one way you can take care of yourself and reduce your stress is to get the things you need delivered. This is a huge privilege, obviously, but it’s one that I encourage you to use if you need it.

Here are my top 5 favorites right now (and how I use them!).

Roasting Vegetables with Herbs - these aren’t necessarily a new item, but they are seasonal and I had been looking forward to them all summer. They make the besssst soup. I usually just roast or steam them, blend them up with veggie stock, add the herbs, and simmer on the stove for a few minutes. So quick and easy.

Microwave Ready Potatoes with Herbs from the Little Potato Company - these are an every single order item, easily. We love them in our house! I’ve used them for potato salad, for quick evening dinners, everything. I usually microwave them (5 minutes is perfect); let them sit for another 5; then slice all the potatoes in half and put them sliced side down in a hot pan with butter. Top with the included herbs and ugh! They’re so, so good.

Vegetable and Beef Blended Patties - another absolute winner, these patties are a combination of ground beef and vegetables, primarily mushrooms and kale. They are so good as burger patties. However, you can also break them up and use them as taco meat—a great option for kids who need a little extra veggie!

White Flour Tortillas from Maria & Ricardo’s - these are my absolute favorite tortillas. They’re just so good, they taste fresh, and they crisp up so deliciously for quesadillas. We always have a pack in our fridge.

Dark Chocolate Covered Almonds from Skinny Dipped - I know everyone has had these almonds, but it is such a treat to get them delivered every month with my groceries! I usually add a small handful of these to my oatmeal in the morning—that just add such a nice crunch and it’s like eating a dessert, to be honest. They’re the perfect sweet snack for the afternoon.

You may have noticed: Hungryroot has expanded the brands they offer! You can get Beyond Meat, Skinny Dipped items, oatmilk, cold brew coffee, bread, lunchmeat, salmon and shrimp, veggies, packaged breakfasts and lunches… brands you recognize, foods that look delicious.

If you want to try Hungryroot, they are having a really, really great January deal right now: 40% off your first order with the code PAUSES40 at Hungryroot. If you get the small box, that would make your first delivery around $42—which is a great deal. Visit Hungryroot, check out all the new options, and let me know what you think!