Is It Time for NaNoWriMo Editing?

Is It Time for NaNoWriMo Editing? | Writing Between Pauses

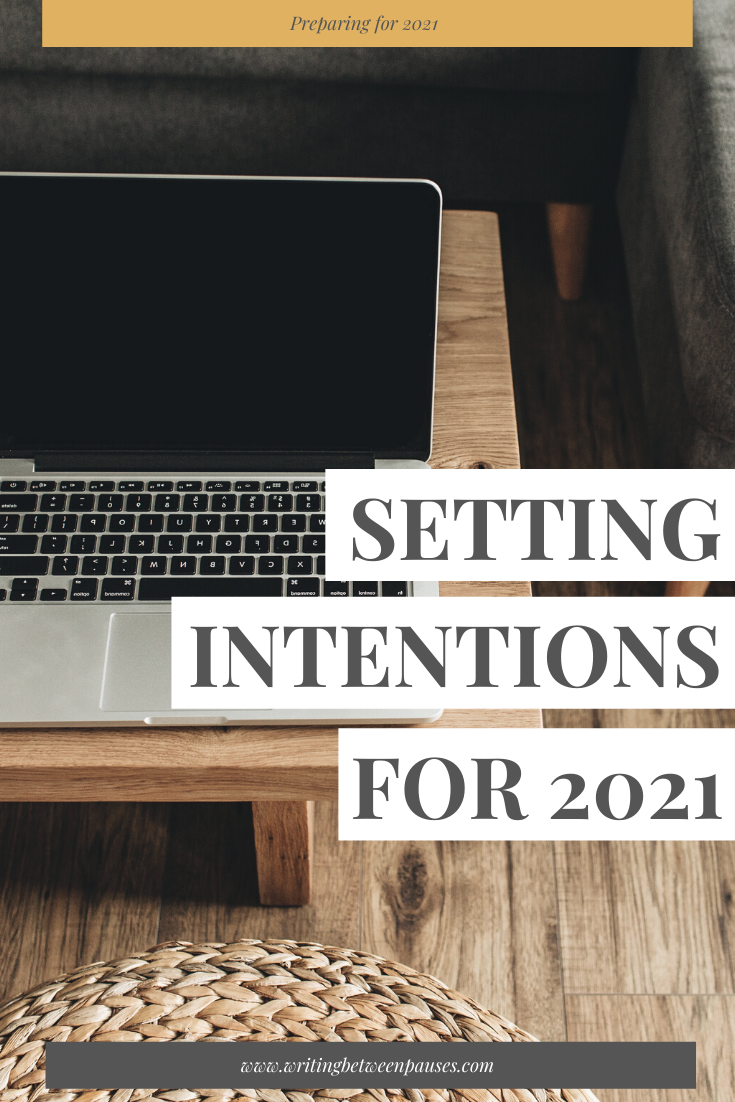
I write about NaNoWriMo a lot. It’s no secret that I really love doing NaNoWriMo every November, even though it often leaves me a bit burnt out. And also that I never plan to publish anything professionally, at least right now. For me, NaNoWriMo is more about having fun and really writing for 30 days—and less about producing something I think people want to read. (This might be the imposter syndrome talking!)

However, I’ve never really touched on what comes after NaNoWriMo. You know, the part where you let your novel sit for a little while then you go back to it. And edit it. And keep writing on it.

I’ve done that. (I promise! I probably reread all my NaNoWriMo novels at least twice a year.) But I never really talk about doing it or write about doing it. (Oof, writing about writing, am I right?) It’s just something I do, piece by piece, for several months, until it’s time for the next NaNoWriMo novel.

And just like NaNoWriMo, I have my own specific process for editing my NaNoWriMo novels. Obviously, I come from the unique place of not intending to publish anything, but just wanting to write something really good that I personally enjoy reading. I thought I would share my process in case it is helpful for others.

1. Find a beta

Betas are, in the writing world, people who edit your work for you. The term popularly comes from fanfiction—and I have a group of people I’ve known for years who beta stories for people nearly every single weekend. It’s just something they enjoy doing and they are very good at it. So if you are a writing hobbyist, and you really want to improve, and you don’t just want someone to read your work and tell you its awesome, look for a beta. There are so many great ones out there and you can get great plot and grammar feedback. Many betas have their areas of expertise, so even having 2 or 3 people read over your NaNoWriMo novel and make notes can make a huge difference.

2. Write a list of scenes

One thing I usually do a few months after November is going through what I’ve written and making a list of each scene. I can then use that list to guide me as I do my big reread and note where I want to rewrite a scene, move it around, or take it out completely. I can take notes on that list about what I want to change, and how, and why.

3. Reread, reorder, & rewrite

Once I have a lot of notes about what I want to do (as well as feedback from my betas of what worked and what didn’t), I start the often rather difficult process of doing those things. For me, this part is really tedious—it’s what I hate most about editing. But having a list of the original order of scenes allows me to know what I moved and where and why, so I can keep better track of what I’m doing without getting confused. Usually during the process, I start doing way more than I originally intended, then make myself tired. I tend to cap editing at about 2 hours a week, because otherwise I will absolutely get burnt out.

4. Print it out

If you read that last sentence, you’re probably like, “hold on… you only edit for 2 hours a week?” Yeah. Alongside all the writing I do, for this blog, for my freelance work, and for my job, doing too much makes me go bonkers pretty fast. And there is nothing worse than being absolutely frozen on a deadline for a job that pays, you know? Steps 2 and 3 usually take me a good 3-4 months (I haven’t even started them yet for my most recent NaNoWriMo novel, I’m not ready!). But, once I get that first round done, I will print out my NaNoWriMo novel and read through it with a pen. At this point, I will start noting what I want to add to it, if anything. Sometimes, I want to add in scenes I had originally removed, but have them rewritten and in a totally new place. Or written a totally new way. This step is one of the most fun parts for me, but can also be quite tedious—like when I randomly decide to change the voice about halfway through.

Once I finish this step, I start writing again—compiling my notes from my printed copy. Then, I start the editing process over again: betas, the list, and more writing. I recently thought about restarting this process for my NaNoWriMo novel from 2014—it’s one of my favorites, but needs the most work, as well as a load of research to fix some major errors.

What’s your NaNoWriMo editing process like?

Revisiting Hungryroot: Is It Worth It?*

Revisiting Hungry Root: Is It Worth It? | Writing Between Pauses

About a year ago, I wrote a blog post about Hungryroot that has quickly become one of my most popular posts ever. And it goes without saying, it’s for good reason. Food delivery is a super popular option (I’ve tried several myself), and having one that is plant-based and able to take into account various allergies and diet requirements is pretty exciting. I’ll talk about this a bit more in a minute, but Hungryroot has really moved beyond meal delivery. Hungryroot is unique in that they send healthy, clean-ingredient, nutrient-dense foods that can be enjoyed with other Hungryroot products or combined with foods you have in your fridge.

When I first tried Hungryroot, something that something that stuck in my craw was their note that all their meals are under 500 calories; why 500 calories!? Well, the truth is most of these meals are intended to be altered or have additional elements. For example, their Veggie Chili is 200 calories for the entire container—but you should eat it alongside a salad and maybe some crackers. They’re not telling anyone to eat just 500 calories for an entire meal. This isn’t a main point of the Hungryroot brand anymore and I’m loving their encouragement to modify and add to the items they offer. As well, they’ve recently added proteins available—their smoked salmon is so good!

Here’s what Hungryroot has to say about their new rebrand:

Hungryroot is a brand of nutrient-dense, clean-ingredient grocery staples that make it easy to eat healthy. We send you a variety of foods, from fresh-cut vegetables and versatile sauces to delicious proteins and wholesome desserts all tailored to you. We deliver on auto-pilot to your home, and since everything we send is based on your preferences, Hungryroot gets better as we get to know you.

I was excited to revisit Hungryroot and even more excited to find out they have an advocate program. Danny and I have been trying to eat primarily plant-based in 2019; not for any reason other than we know it is better for our bodies in terms of nutrition and we know it is better for the planet. We decided to try Hungryroot again because we were curious about the new items they offered—as well as any new recipes to give us ideas for the future!

Instead of providing just meals, they allow you to choose piecemeal what you want. One week, you might choose some of the suggested meals and a few treats; and the next week, you might choose all pre-cut veggies and a few oatmeal cups! It just depends on what you want to do. I love the idea of this, as grocery delivery isn’t available in my area, and being so busy (working 3 jobs, taking care of a toddler!), it is a huge help to get groceries delivered to my house.

IMG_7477.jpg

What I Liked

My first box arrived in the middle of January—the perfect time, really, because Danny and I were feeling really tired of everything I usually cook that’s more plant-based and healthy. The first dish I made was the kohlrabi noodles with pesto and salmon. It was so good—even Forrest ate some of it, and getting him to try new things is always a challenge. The salmon in particular was really delicious.

I think that’s one of the most exciting things about Hungryroot now, is the option to add protein sources. They offer salmon and chicken sausage right now. Both are delicious! (I actually went and bought some local chicken sausage after seeing some of the available recipes!) If you struggle with buying proteins, this is a great option. Danny and I don’t like to purchase meat products that come from most stores, instead choosing to buy locally; this can be more expensive for sure. The salmon and chicken sausage, however, are really delicious and perfect for using in tons of dishes.

Other items that we’ve loved have been the veggie chili (Danny in particular loves this) and the Spicy Black Bean Butternut Noodles. I also really love their dessert options too! The Black Bean Brownie Batter remains my absolute favorite thing they offer—it’s the perfect sweet treat. In our most recent box, we got the Vanilla Bean Snickerdoodle dough and, oh my goodness! I decided to bake it into cookie form with Forrest—I let him put some chocolate chips on top—and they are so good. And it’s nice to have a sweet snack that is also giving me some nutrients.

We also really loved their grab-and-go breakfast options—the Maple Raisin Pumpkin Pie oatmeal was so good. Even Forrest liked that one. I ordered two of those in our first box and it was worth it. If I could buy a whole palette of it, I would. They have other oatmeal options as well, alongside a variety of granolas and other meal replacement options. If you’re like me and grabbing breakfast often means hitting up a Starbucks (let’s be real, that Bacon & Gouda sandwich is delicious, but not very good for me!), then these grab-and-go options are really great to have around.

I’m really excited to try some of the other foods—such as their new wraps and flatbread options, because they look really delicious.

So, Is It Worth It?

Originally, in my first blog post, I concluded that Hungryroot wasn’t worth it—because I felt like the recipes weren’t totally worth it.

However, this time, I think my conclusion is different: I think if you’re looking for Hungryroot to send you everything you need to make big meals, that’s just not realistic... because it’s not really what they’re about anymore. Think of Hungryroot as a brand of fresh, healthy food products that can be used to supplement your groceries. 

But it is a great way to explore some things you’ve never tried before, try out some side dishes, have groceries available when you’re too busy, and learn how to cook things that are plant-based and delicious. In that sense, it is absolutely worth it.

I think if you’re a really practiced cook, and just need some new ideas, this is also a great way to give you some options. As well, if you’re just learning to cook and aren’t sure how to cook, say, brussel sprouts… this is a great way to learn, see what you like, and gain some experience cooking! And lastly, if you’re super busy and feel like you’re hitting the drive thru more often than you’re turning on your stove, Hungryroot gives you the option to have something healthy waiting for you in the fridge, even if you only have energy to cook some butternut squash noodles and add some jarred marinara sauce. (Honestly, it’s delicious though! Highly recommend.)

The best thing about having Hungryroot really is being able to make something on the fly. As an example, Danny and I both love their salad blend (it has kale, cabbage, and a bunch of other stuff); so I used that to make a Mexican salad with our own dressing. I would never buy all the pieces for that salad to make on my own—with only two of us, it would just be too much waste! But having Hungryroot gave me the option and it was delicious. It is so convenient to have a box of veggies and grab-and-go options dropped on my doorstep when I need it!

I’m really excited to be able to offer my readers a discount for their first two boxes. Use the code PAUSES40 for 40% off your first order when you sign up at Hungryroot.

*Disclaimer: While this post is not sponsored by Hungryroot, I am a part of the Hungryroot advocate program. That means, I receive a small referral for each person who uses my code. However, all opinions remain my own! Posts like this, and programs like this, help me keep Writing Between Pauses running. To learn more about my disclosure policy, click here.

Help! My Foundation Looks Terrible

Help! My Foundation Looks Terrible | Writing Between Pauses

Very rarely do I answer individual “reader” questions on my blog. It’s not because I don’t want to, but because very rarely are the questions people ask me something that I think can apply to most people. When it comes to blogging, I try to keep things applicable across the board so that as many people can find answers as possible.

But sometimes, I get a question that is so universal, I realize I’ve been neglecting writing about it.

Probably the number one question I get—from family and friends, in Twitter DMs, on Instagram, and in blog comments—is this: my foundation looks terrible sometimes. What am I doing wrong?

If you’re someone who wears foundation, you’ve undoubtedly had a moment where you’ve glanced in a mirror and thought, holy shit, what have I done to my face?

For me, it’s always in the tiny mirror in my car. Suddenly in natural light, I’ll notice how orange I look, or how splotchy, or how dry. It’s not flattering and often hard to fix on the fly while out-and-about.

So this question is about those moments: what’s gone wrong and how can you keep it from happening?

Potential Issue #1: Tools

Oftentimes, foundation that goes bad (in terms of: being splotchy, looking like a mask, or being oddly textured on the skin) is a matter of the tool that was used to apply it. Using the right tool for the right type of foundation is key and often requires a little bit of trial and error, what you prefer, and your skin’s texture. (That is: I’m not going to prescribe a specific tool for a specific type of foundation because it can be really variable.)

However, one really key aspect of any foundation tool is this: it has to be clean. So wash your foundation brush or sponge often (at least once a week) and let it dry completely. Always used a beauty blender-like sponge damp (not wet, not dry).

Play around with the tools you use to see what is causing the problem. I have found that using a foundation brush, then a damp make up sponge gives me the best texture, as well as easier application—that’s just what works best for me.

Potential Issue #2: Foundation Formula

Some foundations just don’t work on certain skin types. It doesn’t mean there is anything wrong with the foundation or your skin. It’s just the way the cookie crumbles, after all. A prime example: a lot of people with dry skin simply can’t use the Fenty Beauty foundation. It doesn’t mean that it is a bad foundation or that no one should use it; it’s just a matter of being incompatible skin types and formulas.

If you find that your foundation separates, disappears, or oxidizes, it’s just a bad formula for your skin type.

If you find that your foundation makes you look drier than the Sahara, makes your skin feel and look tight, and is more like a mask than anything else, it’s just a bad formula for your skin type.

Finding a foundation that matches your skin (both in tone, texture, and type) can be a long and somewhat arduous process. But here’s my advice: take a skin quiz on Sephora or Ulta, go in to the store, and ask for some samples. It’s the only way to really test a lot of foundations and see how they wear on your sin. That’s what I did for this blog post on foundation matching and it helped me find my perfect match: Too Faced Peach Perfect Foundation.

Potential Issue #3: Incompatible Products

If your foundation separates, disappears, oxidizes, or otherwise looks like trash really soon after applying, there might be another culprit: your baking powder or your primer. Or both.

When wearing foundation, I often recommend wearing it once without primer and just powder. Once with primer and no powder. Once without anything. And then, once with both. (You can do this, obviously, on days when you’re just at home.) This will help give you an idea of whether your products are even compatible.

Some primers just don’t play nice with certain foundations, depending on their chemical make up. This is beyond my skill level; if you’re better at science than me, you can totally research this further. But some primers don’t work with every foundation (and they, like foundations, don’t work on every skin type). So testing everything separately to see how it plays with your foundation can help you figure out if it’s the foundation itself that doesn’t fit your skin type or if your primer is causing your foundation go bad.

With powder, some are too heavy for certain foundations and can either whisk the foundation away when you brush or pat it on. Or, they turn grayish. Again, this is just a matter of the chemical compounds not playing nice together. It’s funny to think that every time we put on make up, we’re working with chemistry in a small way: we’re layering our skin (which has its own oils, of course) with multiple different chemical make ups, and sometimes they just don’t work together.

Potential Issue #4: Expired Products

If you use foundation really slowly, you might notice that after a while, it starts to look different.

When I was in college, I went through a phase of leaving my foundation bottle open. It dried it out and made it more mattifying. (This was back when I was using basic Covergirl foundation. Not my best moment, surely.) This was not great for the product itself, but I liked how it looked on. However, after a while, it also started to smell really bad. Why? Because my foundation had expired from being left out in the open and from just being kind of old.

I write the date I first open and use something on every make up product I own. (Or, I write it on a list if it’s a smaller package.) Then, I really try to keep to expiration dates on the packaging. You know the little compact looking mark on packages that has a 6m or 12m inside of it? That’s how long you are meant to keep it. For some things, it doesn’t matter—like mascaras—but for foundation, I do try to stick to it.

Expired foundation can be the culprit behind foundation that is separating or oxidizing really bad.

Potential Issue #5: Skincare Issues

Remember how I said when we do our makeup, we are kind of being chemists? This is another example.

I started using a glycolic acid serum that I really like—but I noticed that if I used it before I put on foundation, my foundation would pill. That’s right: instead of laying on my face, it would ball up as I used my brush. No bother, I thought; I’ll just use a sponge. Nope, my foundation was coming off in layers then!

As it turns out, that product just didn’t play nice with my moisturizer or foundation. I had to stop using it if I wanted any of my other products to work.

If you’re noticing problems with your foundation, certain items of your skincare may be the culprit. This is another case where you’re have to test with and without each product to see how it plays with your foundation. If you’ve narrowed down every other factor, this is probably the one—you’ll just have to see what product is making your foundation go off!

My Top 3 Favorite Liquid Lip Formulas

My Top 3 Favorite Liquid Lip Formulas | Writing Between Pauses

Liquid lipsticks are here to stay, it seems. Even as we transition to the trend of glossier lips, I still find most beauty gurus and influencers are using liquid lipsticks as a base—them using gloss on top.

I’m still not a fan of lip gloss. I lived through the early 2000s as a teenager, thank you very much, with my hair nearly semi-permanently attached to my lips thanks to thick, sloppy Victoria’s Secret glosses. I’m not ready to revisit that era, just as I will never revisit low-waisted jeans, peasant tops, or skirts over jeans.

I am, as you probably know, a big fan of a liquid lipstick. Liquid lipstick has all the things I love about lipstick (color payoff, looking put together even when I’ve just rolled out of bed) and corrects all the things I don’t like about lipstick (having to reapply 4000 times before and after eating, risking having it all over my face at any moment).

When it comes to formulas, we all have our favorites. Some people hate a really powedery feeling formula and some people love it. Some people don’t like super drying formulas. And if you’re like me, and you’re getting older, and you find liquid lipsticks feather, you start to get incredibly frustrated by the options out there.

I’ve done the legwork, the research, everything. I’ve tried all the liquid lipsticks I can find and I’m here to tell you my 3 absolute favorite formulas.

But first, let’s talk a bit about my criteria for my favorites.

1) I like a quick drying formula. I don’t like waiting around for my lipstick to dry before I move on.

2) I like long lasting formulas. I should be able to drink coffee and 1) not get it everywhere and 2) not have to reapply afterwards.

3) I like somewhat comfortable formulas. That is, it doesn’t feel like I’ve put a clay mask on my lips.

best liquid lipstick formula

Favorite Formula #1: Wet’n’Wild Liquid Catsuit

If you’ve read my blog before, you know that Wet’n’Wild Liquid Catsuit is one of the best liquid lip formulas… at least in my book. Fast drying? Check. Comfortable? Absolutely. Staying power? Yes. And even better? They cost $5. $5!!! For one of the best liquid lips out there. I’ve written about them a lot before, so I don’t need to say much more except that… if you want the most bang for your buck, get to your nearest Target, Walgreens, or Walmart, and buy at least the shade Rebel Rose.

Favorite Formula #2: Anastasia Beverly Hills

I buy ABH Liquid Lips exclusively at TJ Maxx or Marshalls, because they alway shave a ton. So while I can’t speak to the price range (they’re $20 normally), I can say with confidence that they are one of my favorite formulas. They dry down really fast and are very comfortable. I would actually say the ABH formula is the most comfortable formula of the 3 I’m writing about today. It feels like you don’t even have lipstick on—that’s how comfortable it is. They have great color pay off, of course, and are incredibly long lasting. Plus, the fact that you can often find them for a discount is a huge bonus to me; I’m never one to spend $20 on a lipstick unless it is the holy grail… and these kind of are holy grail liquid lipsticks.

Favorite Formula #3: Too Faced Melted Mattes

When I bought the Christmas set of liquid lipsticks from Too Faced, I didn’t have super high hopes for them. I just really liked the theme. However, they have quickly become some of my favorite liquid lipsticks and the shade Sugar Cookie is actually one of my daily go tos. It’s the perfect pale pink nude. Melted Mattes check all the boxes, of course: they are fast drying; they are long lasting; and they feel relatively comfortable. I do have issues with darker shades, like the Cinnamon Bear shade, feathering—so I make sure to use a liner. However, at $21 a pop, they aren’t something I buy a lot of. However, if you can find gift sets, you often get deluxe sample size (which are plenty big) for a pretty affordable price. I always keep my eyes peeled for them!

What I Learned from My December Slump

What I Learned from My December Slurp | Writing Between Pauses

I didn’t mean to just stop blogging for most of December. I just sort of… found myself forgetting. Part of this was intentional—I wanted to spend less of December rushing around, trying to get a million things done and more time with Forrest, with Danny, with the important people in my life. And part of this was unintentional—I helped plan a wedding, attended that wedding, made more Christmas cookies than I probably should have, and in the evenings, I was so tired that it never even occurred to me that I needed to be writing those Blogmas blog posts I had planned in approximately June.

Part of why I fell behind was that I didn’t do enough forward planning.

And another part of why I fell behind, and stopped blogging, and struggled to restart was that I was just plain burnt out.

The first week I missed, I told myself that I’d work on it and I’d get my blog posts written over the weekend. I was just busy, I thought. That’s it! Nothing big!

But by the 2nd week of one measly blog post, I knew it: I was burnt out. I needed to take a break or I was at risk of just breaking myself.

I decided to keep doing just the bare minimum. I know that sounds awful. We are trained to believe that the “bare minimum” is the worst thing you can do aside from just quit, but I knew I was at risk of not just not being able to blog for myself, but for my day-to-day work. You know, the stuff that pays my bills.

A big part of me felt incredibly guilty and bad for the fact that I wasn’t blogging, wasn’t really doing much on social media, and definitely was just trying to get by. I had brands I was talking to, content I needed to create… but I was tired. It was the holidays. And sometimes, I know I do things when I don’t want to at a detriment to myself. So a very small part of me said: this is ok, you need this.

And I did. On January 1, I felt better than I had in months. I didn’t feel the pressure to be constantly writing, constantly working on something. But another part of me still held that guilt. I haven’t been posting on Instagram like I know I should. I haven’t been returning emails as promptly as I usually do and that’s what made me start to feel really guilty.

I had been burnt out and I was teetering on the edge of too much, absolutely too much. Giving myself a break was what I knew I needed to do—but there was still that niggling little voice that told me I was just being lazy. I think this is something that everyone my age struggles with; we’ve been told to work hard, constantly, our entire lives. And we also rely on our 24/7 gigs to get by (or at least I know I do). It makes us unable to do certain small things (like the fact that I’ve been meaning to mail a package for exactly 3 weeks) and it’s honestly just really bad for our mental health.

So, I had a slump. It happens. I took a break. I feel better. But what did I learn?

1. It’s Not That Urgent

I have about 5 emails in my inbox right now that the sender has marked urgent. That’s what it says in all caps in the subject line: URGENT, Brand Collab. Or URGENT, Want to do a giveaway?

And, bless you brands, and your brilliant PR teams, but those things aren’t urgent.

I often struggle with others perceptions of me. I don’t want to be appear lazy or like “one of those” influencers or bloggers. I want to appear capable, down-to-earth, responsible, and dedicated. I reply to emails within 2 days, always (that’s my rule). But sometimes even my two-days-and-I-swear-I’ll-get-back-to-you, I’ll get emails after 24 hours with, “is everything ok? I’m concerned.”

I understand that for many people their jobs are putting them under pressure to get a response. It happens at my day job, it happens in my gigs, and it definitely happens for this blog. But as a society, we really need to put our foot down. Sometimes, when I email a brand back, they won’t reply for a week. For 2 weeks. Then they expect a 3-day turnaround for content. I just don’t have the time! Everything I do revolves around a calendar and right now, that calendar is full. My 30 minutes of email time is all I’ve got.

I’ve realized a lot of this means I need to put up boundaries. In initial emails to brands, I need to tell them about my 2-day rule: If I haven’t replied in at least 3 days, send me a follow up. But don’t badger me. And please, it’s not urgent, we’re not performing surgery here or changing the world. All the reliance on the word urgent, when it’s not, just makes me anxious.

2. It’s Ok, You’ll Survive

About 18 months ago, my husband asked me why my blog was so important to me.

And my answer was: who am I without a blog?

I’ve always been the girl with the blog. I’ve always been that girl.

I don’t believe in being an artist without creating. And a lot of influencers, bless them, are artists without creating. Without naming names, there has been an influencer in the news, after being profiled on a Twitter thread, who is one just like that: she talks about giving creativity workshops, about creating art, but she doesn’t seem to actually create an art. She doesn’t publish, she doesn’t blog, she doesn’t even post on Instagram anymore. I feel bad for the callout, because who isn’t a bit of a poser at 22, but good gravy.

I’m a writer. It’s what I do. And a big part of me believes that if I were to stop blogging, I would lose my last tenuous connection to writing. I know this isn’t true. I know that I write more in my dayjob than most people do in their lifetimes, but it’s an unshakeable notion. I need to be writing, I tell myself, so I can at least convince myself that I’m creating.

But that ignores all the ways I do write. During my slump, during my break, I wrote a lot. I journaled, and wrote a few poems, and wrote a few short stories. I had ideas. And I’ve realized that sometimes blogging, as much as I love it, eats up the time I could spend reading, writing things that light my brain up, and being creative. It’s a hard balance to maintain: writing for work, writing for my blog that I love, and writing the stories I want to read. I don’t really know how to combine them quite yet, but I realize this now: It’s ok, I can survive without this if I have to.

3. I Don’t Know What To Do With Empty Time

This is perhaps my starkest lesson. After the holidays, when I cleaned up our house, took down the tree, and spent several frantic hours cleaning, I realized that, once I’m done, I don’t know what to do. What do people do with free time? Even in my downtime, when dinner is over and Forrest is playing and I don’t have any cleaning or work to do, I find myself getting antsy. I have to be doing something. I struggle to watch TV shows. Sometimes, I even struggle to sit still to read. I like being productive. I like moving. I like producing things. While many assure me there are worse ways to be, I realize I need to work on the fact that I always feel like time needs to be filled. That I have to go somewhere or do something. It’s ok to just sit and look out the window. It’s ok to play on my phone. It’s ok. It’s all ok.

3 Must-Have Products for Gentle Exfoliation

3 Must-Have Products for Gentle Exfoliation | Writing Between Pauses

As far as exfoliation goes, I think I’ve worked my way through all the stages.

Stage 1: This is where we all start. Our skin is relatively perfect, but maybe we’ve recently turned 13 and started reading Seventeen. Suddenly, we become aware that something is wrong with our skin and we need to scrub all the layers off. That ad for St. Ive’s Apricot Scrub starts looking mighty tempting and plus, it’s only like $5, so your mom will definitely buy it for you. Or maybe she still has a tube of it in the shower—bonus! You start using it religiously, even though it kind of hurts. It does smell good, at least.

Stage 2: we’ve grown, we’ve evolved, and yet that tube of St. Ive’s is still mocking us, calling our names. But it leaves our skin so smooth. We read blog posts about other things and have our doubts… but St. Ive’s… so smooth.

Stage 3: We throw away the St. Ives and try to find something else. It might the most expensive thing the sales associate at Sephora recommends to us. We aren’t sure if it is any better than St. Ive’s, but hey, it’s worth a shot.

Stage 4: We stop exfoliating because we read a bunch of scary articles about it. Microtears!? Advanced aging?! No thanks.

Stage 5: We accept exfoliating—a gentler, kinder form of exfoliating—back into our lives.


For years, I read things saying that exfoliating would make my acne worse, or better. That it would worsen my scarring, or make it better. I never felt like I had a straight answer.

If you’re looking for a straight answer, I’m not sure I can provide one. Here’s what I can say: if exfoliating in any way makes you feel like your skin is better, why not do it? If you don’t connect exfoliating to any ill effects, go for it. Some skin types will benefit more from exfoliating than others—and deciding if it is for you is entirely personal.

So, when it comes to gentle exfoliating, I’ve narrowed it down to 3 products that I can’t live without. If you’re looking to up your exfoliation routine, I recommend these. And the best part? They’re all highly affordable.

1. A Face Sponge or Brush

I use a charcoal konjac sponge I got at TJ Maxx to gently exfoliating with my favorite cleanser a few times a week. It was about $2.99 if I remember right, but you can find very similar products at Wal-mart, Ulta, Target, and much more—all for under $10, mostly under $5. I have used a face brush in the past (a $6 one from Sephora brand) and while I liked it, I found it was much more difficult to keep clean. No matter what, it should be something that’s not super harsh.

Exfoliating products for winter

2. A Gentle Exfoliating Product

I love my Holika Holika Pig Nose exfoliator; as I said when I reviewed it, it’s an acidic exfoliator that doesn’t require scrubbing, but rather helps to pull dead skin away. I use this a little less than once a week now—maybe once every 10 days or so—on my T-zone and chin. It has made a huge difference in the appearance of my acne scars, as well as my pores. It’s one of my favorite products of 2018! It only costs about $2.99 if you can find it at TJ Maxx or Marshalls, but you can also order it from Amazon quite affordably.

Other products might work better for you. I’m quite intrigued by the new L’Oreal Pure Sugar scrubs, so they’re on my list to try. One thing I do try to avoid is 1) plastic microbeads, as they are terrible for the environment and 2) anything with walnut shells, as they are too harsh to use on my skin.

3. A Great Cleanser

We tend of think of exfoliating as something we should do only once a week… because that’s what we’ve been told. But the truth is, when you wash your face, you exfoliate. It’s just a natural part of the process. We know now that that thing about hot water opening pores and cold water closing them is a myth (I know, that’s a hard one to shake!); and we also know that we don’t need to physically scrub our skin all the time for it to be properly exfoliating. A combination of good daily cleansing, acidic exfoliation, and using a sponge a few times a week can help us have great skin that doesn’t get dull due to congested or dead skin.

I really like Pure Clay cleansers, as well as the Body Shop’s Tea Tree Oil facial cleanser. One important thing I started doing in 2018? Washing my face for 60 seconds each night. Yes, that’s right: 60 seconds. On average, we tend to only wash our faces for 15 seconds, perhaps 20. But if you spend a little more time rubbing small circles with your fingers over you skin with your cleanser for 60 seconds, you’ll notice a huge difference in your skin’s texture. Trust me.

I Tried Personalized Shampoo from Formulate & It Changed My Life*

I Tried Personalized Shampoo from Formulate & It Changed My Life | Writing Between Pauses

When I first received an email from Formulate several weeks ago, I was immediately excited. I had been looking into the myriad of personalized shampoos available—I knew that my scalp issues meant I needed something personalized, but I was put off initially by the cost of other brands I found, as well as their often wishy-washy stance about being cruelty-free.

But from the moment Caroline from Formulate emailed me, Formulate felt different. Firstly, they’re very upfront about their cruelty-free and vegan stance, as well as being paraben free, sulfate free, dye free, and preservative free. I was really excited to try Formulate and I especially couldn’t wait to start washing my hair with the shampoo they sent me.

The process of creating my shampoo (and conditioner, of course) was really easy. I actually filmed it on Instagram (you can watch it in the Formulate highlight!). I love a good quiz, so walking through picking what I wanted from shampoo, telling them about my hair and scalp, and more was not only fun, but helped me think about what I want from a shampoo.

I don’t know about you guys, but sometimes I get so caught up in wanting my hair to look a certain way that I forget other things—like nourishing my scalp, preventing split ends, and preventing breakage. It was nice to be able to pick 5 things for my shampoo and conditioner to really target. The quiz and sign up process took me maybe 15-20 minutes.

The most interesting part of the quiz was when it asked for my zip code. This was so they could pinpoint where I live and adjust my formulation to the humidity, average temperature, and climate of where I live.

You know what else was nice? Being able to pick from a bunch of beautiful scents—as well as the strength of the scent. How a shampoo smells is really important to me, but I always find myself disappointed when I use a shampoo that smells great, but it doesn’t make my hair smell like that later.

I picked the Verdant scent for my shampoo from Formulate; Verdant is a combination of lilies, grass, and Eucalyptus. It’s flowery and herby at the same time. I also picked Strong scent—hoping that it would make my hair smell 24/7 like lilies. (Spoiler alert: it totally does!)

It took about two weeks for my shampoo and conditioner to arrive from Formulate. In the age of Amazon 2-day shipping, that feels like a long time. However, it gives the scientists at Formulate time to look over your quiz, analyze where you live, and make the best possible shampoo and conditioner for you.

The box my shampoo arrived in was beautiful. The shampoo bottles themselves look really cute. There is something so shallow about aesthetic packaging, but I think we all prefer things that look good, right? They also came with two pumps to use, which is good, because I am not good at pouring shampoo! Another cool thing about the bottle design is that both shampoo and conditioner have Braille on the side. You so rarely see this in beauty products, so it is nice to see packaging being adjusted for those who require Braille in their daily lives.

From the first use, the thing I noticed the most was the smell! I’m so glad I went with Verdant; I absolutely love the smell of it. And the smell sticks around for a very long time. (I did, of course, pick Strong for a reason!)

The second thing I noticed was that this isn’t a shampoo that foams up. Like most sulfate free shampoos, it feels more like a thin conditioner. I’ll be sharing some tips next week about washing your hair with sulfate free shampoo, because, trust me, there is a small learning curve! If you’re used to standard shampoos, there is a period of time with sulfate free shampoos where your hair has to adjust to a new formula. I’ll talk about that in my blog post next week, so stay tuned!

(Don’t forget to sign up to win your own formulation! Click here to enter.)

Formulate shampoo review

The Benefits to My (Poor, Sensitive, Abused) Scalp

If you’ve read my blog for a long time, you know that I’ve really struggled with my scalp for the last year or so. It’s been a hell of a journey: I’ve tried just about every shampoo and conditioner under the sun. I spend more money on oils for my scalp than skincare. I’ve tried hyaluronic acid serums on my scalp (helped!), I’ve spent a small fortune on medicated shampoos, and my dermatologist is honestly really sick of looking at my scalp and saying, “I think it’s just dry.”

When I tell you that my shampoo from Formulate has fixed my scalp, it feels a little bit like an exaggeration, but it’s not. One of the big factors I selected for my shampoo was scalp health; I have a very sensitive, dry scalp that has gone through some trauma the last year and it needs healed. So Formulate chose vitamin E oil, along with other soothing ingredients, to help heal my scalp. And it did! From the very first wash, my scalp felt less tight and itchy. After about two weeks, my scalp wasn’t flaky anymore. I’ve had a few flairs, probably from dry weather and me deciding to use a hair mask that I knew would probably make my scalp itch, but nothing like the past. I can honestly say that that is life changing. Not having an itchy, flaky scalp all the time is a huge deal.

Aside from my beautiful scalp (prettiest scalp on the block, if you will!), I’ve also noticed a huge change in my hair texture. I’ve always had very silky, fine straight hair. It has a little bit of a wave to it in some spots; my hairdressers have always described this as “straight-relaxed” hair, meaning it basically conforms to the shape of my head. (A nice description, I think.)

Since I started using my shampoo from Formulate, I’ve noticed a major change in my hair texture. I’ve always had a lot of hair—like an absurd amount, despite how fine it is—but it was pretty lank and took a lot of effort for it to have volume. I’ve had a ton of volume since I started using Formulate and my hair feels a little more wavier—less pin straight and more relaxed, and it doesn’t conform to my head so much. (I know that’s a weird way to phrase that, but how else do I describe that!?) I can only speak for people who have straight hair, but this is a huge improvement for me.

Is Formulate Shampoo Good

Wash Less, With Better Hair

Over the past few years, I’ve been trying to reduce the number of times I wash my hair per week. I know it’s drilled into us that maximum cleanliness means showering (and washing your hair) every single day. However, that can often cause, or make worse, scalp problems, as well as dry out our hair. (And it goes without saying: this all totally depends on your hair type!) I have managed to get down to 3 washes a week, but I’d like to reduce to about 2 washes a week because I find that’s when my scalp and hair feels best.

The great thing about Formulate is I feel like it helps me stretch the time between washes. My hair stays shiny and clean feeling for a lot longer, because I don’t have that residue build up caused by sulfates in shampoo. My hair is generally less oily, but still moisturized and pretty for several days in a row. No oily hair days!

As I mentioned, there are definitely some growing pains associated with going sulfate-free. I read a lot of articles as I started using Formulate and I will share more about this in a follow up blog post, but the number one thing I learned is that it will take several washes (about 3-4 weeks worth) for your hair to feel “normal” again. Using sulfate-free shampoo isn’t like using regular shampoo, but it does leave your hair just as clean (promise).

I can honestly say that the improvement to my scalp has made me want to never switch from Formulate! That alone is enough, but the scent, the way my hair looks and feels, the vegan and cruelty-free stance… it all makes me want to support a great company like Formulate.

The Second Formulation

I loved my Formulate shampoo and conditioner from that first use (honestly, the scalp benefits alone! I know I keep mentioning it, but it really is so huge for me). However, there were a few things I wanted tweaked.

That’s what is so great about Formulate. They work with you really closely in the first few weeks to help ensure that the shampoo and conditioner you use is perfect for you. The more you pay for a shampoo, the better your results often are; as someone who loves saving money, I’ve realized over time that… you pay for what you get, especially if you have a sensitive scalp or difficult hair! Formulate really makes your money go far though.

My initial feedback for Formulate was that I felt like my conditioner weighed my hair down a little bit and left a residue, specifically on the back of my head, that was hard to rinse. I also felt like my shampoo was just a little too drying on my hair. I sent my feedback in and a few days later, a second set of shampoo and conditioner was on its way to me. And the changes were HUGE! No more residue from my conditioner and the shampoo left my hair feeling silky and hydrated again. I’m so happy with my results from Formulate. And I know that if i start noticing any other issues, I can send them a note and get my shampoo and conditioner tweaked to improve.

Personalized shampoo review

This all leads me to the most exciting part of this collaboration with Formulate: I have a giveaway going!

You can enter to win your own formulation by clicking the button below. You’ll be able to personalize your own shampoo and conditioner and get the hair you’ve always dreamed of!

Have you ever tried customized shampoo and conditioner? What did you think?

Disclaimer: As indicated by the asterisk (*) in the title of this post, this post is a collaboration between Formulate and myself. I received product free in exchange for an honest review and promotion on social media. However, all opinions remain my own! Posts like these help me keep the lights on here at Writing Between Pauses. To learn more about my disclosure policy, click here.

3 Tips for Using Sulfate-Free Shampoo

3 Tips for Using Sulfate-Free Shampoo | Writing Between Pauses

Sulfate-free shampoo is all the rage in beauty communities. Jonathan Van Ness, from Queer Eye, advocates using sulfate free shampoos, as sulfates are believed to coat and potentially damage our hair. I’ve written about going sulfate-free before, and a few things you need to know about going sulfate-free.

My perspective on sulfate-free shampoos is that there are going to be some people, and some hair types, that benefit from sulfates and some that don’t. For example. I think my hair actually thrives with shampoo with sulfates; I have pretty manageable, easy hair and I don’t use product very often, so I didn’t have to worry about build up. However, my scalp really hates sulfates because it’s incredibly sensitive, which is why I went sulfate-free about 6 months ago.

However, I don’t think going sulfate-free is right for everybody. If your shampoo works for you, then keep using it, honey!

But if you’re curious about trying sulfate-free shampoos, there is a bit of a learning curve to starting using them. The big difference between shampoos with sulfates and those without is that sulfate-free shampoos don’t foam. It’s more like using a thin conditioner. That first wash can be a little bit confusing if you’re not aware that your new shampoo won’t get sudsy. And for some people, that sudsy, squeaky clean feeling is really important to them! So, here are a few if my tips and advice for using sulfate-free shampoos.

1. You Need A Lot of Water (& Less Product)

We all have our own process for washing our hair. I know for me, I’ve been washing my hair a specific way for years and I rarely deviate from my routine. It’s something I don’t ever really even think about. I know how to rinse shampoo out of my hair, I know how to wash my hair, these are things I know. But once I started using sulfate-free shampoo, it felt like everything changed.

Here’s the thing about sulfate-free shampoo: like I said, it’s like using a thinner conditioner. It doesn’t foam up like soap does. So the process of washing my hair fundamentally changed and I had to change along with it!

One thing I learned, through a lot of trial and error, was that I needed a lot more water in my hair before I started washing it with sulfate-free shampoo. I also learned that I needed to spend a lot more time rinsing my hair, making sure I got all the shampoo out. If I don’t do these two very important steps, I end up having leftover product in my hair—which isn’t a great feeling.

As well, you need significantly less sulfate-free shampoo starting out than a standard shampoo. Just a single pump or dollop to start out, then working through your hair with plenty of water.

2. Growing Pains

The first few washes with sulfate-free shampoo often are what make people think sulfate-free shampoo isn’t for them. I know for a while I definitely thought I’d made a mistake; my hair no longer felt smoothy or silky, or even clean. It felt… weird. Dry, a little frizzy, and generally not as nice looking as I expect my hair to look. However, if you power through and keep on keeping on, eventually your hair will recover from the shock of not having sulfates anymore.

The thing about sulfates, for some hair types, is that they can coat the strands of your hair; when you stop using them, your hair has to shed all that built up product and residue. Some people can switch effortlessly, depending on their hair type, and others have a few days or weeks of growing pains.

So, with sulfate-free shampoos, remember: you’re going to have a period of adjustment.

3. Condition, Condition, Condition

Going sulfate-free means that your hair is more likely to get dry, especially if you use heat styling products or live in a climate that is hot and dry. Conditioning is a huge step. Using a matching conditioner to your shampoo will be important, plus adding a weekly hair mask to help keep your strands looking fresh. I like using the Shea Moisture Manuka Honey mask once a week after shampooing.


Next week, I’ll be sharing a review of Formulate, a sulfate-free customized shampoo system that I have been loving lately. I’ve shared some details in my Instagram stories and you can watch the highlight here. Until my blog post next week, you can sign up for my giveaway with Formulate here.