Everything I Know About Being Prepared for an Emergency

Everything I Know About Being Prepared for an Emergency | Writing Between Pauses

On February 24, around 12pm, it started snowing.

It snowed for the rest of the day without stopping. By the time it got dark outside, we had 2-3 inches. My husband and I excitedly talked about a potential snow day (he is a teacher after all and sometimes, they do get excited to have a snow day!) as we got ready for bed. However, our lights started flickering on and off around 8pm. They kept going off, then coming back. Twenty minutes later, it would repeat. We went around unplugging things, sure that if they went off, they’d be on within a few hours like always. We started a fire in the wood stove and left it for the night.

We climbed into bed and fell asleep. At midnight, the lights went out for real. At 2am, Forrest woke up, terrified in the dark. I brought him to our bed and as he went to sleep, I realized I could hear strange sounds outside. Crashing sounds. I shrugged. i hadn’t looked out a window. I didn’t know then that it was still snowing.

It snowed into the next morning. We got up at 6am and got the wood stove going again. As I let Remus out, I realized that branches were falling off the trees. Those were the crashing sounds. When we stood outside, we could hear not just branches falling, but entire trees. The cedar tree right next to our house was swaying. As it got light outside, we saw how bad it was: multiple large branches had fallen off the cedar tree.

I got dressed in a snow jacket and gloves, pulling on my boots. My mom and I had been texting all morning; their driveway was blocked and my dad had gotten his truck stuck trying to find a way out. I started down our driveway, slightly terrified by how many trees were falling around me, to find that we were also blocked in. 4-5 trees had fallen across our driveway. The snow was almost up to my knees then and still coming down.

Throughout the day, I packed up our emergency supplies: a suitcase of clothes, our box of important documents, things for Remus. If we needed to leave, I told myself, we would be able to. I kept repeating that to myself, even though I knew our car couldn’t get down our driveway. The cedar tree outside our house lose 5-6 large branches, but none hit our house. By the time it stopped snowing, everything was a mess: our internet satellite dish was snapped basically in half, our backyard was a mess, we had no power and very little food, and we couldn’t leave.

That was Monday, February 25. The next day, my parents were able to help us clear the driveway and we were able to go to their house. The day after that, we were able to get to town and buy canned soup and extra water. And the day after that, my parents’ power was restored. Our power wouldn’t come back until Sunday, March 3. It was such a relief when it did.

During the week of the snowstorm, Oregon’s Governor, Kate Brown, declared a state of emergency. All the power companies were completely overwhelmed; the road I live on, for example, had almost every single section of power line damaged by a falling trees. On the road just beside my house, all the trees had fallen into the road, blocking on lane on a tight corner. The roads were covered in snow and ice, almost no one could get down their driveway unless they had a larger truck, and as I live in a rural area without city water, none of us had access to running water.

Before the snowstorm, Danny and I had often talked about being prepared for emergencies. We talked about things we needed to get, how we should have some batteries saved up, but we never did it. I did have about 6 gallons of water saved in our pantry, but that was it. When our power went out, we weren’t ready—and we definitely weren’t ready to be without power for 7 full days.

When we finally got our power restored, I got so many questions about being prepared for an emergency on Instagram that I knew I had to write about it. But I do want to start with a disclaimer: I’m definitely not a doomsday person at all. I think being prepared for an emergency is something we all have to account for; we never know when a big storm will hit, leaving us all without power for a long amount of time. It never hurts to be ready, even if it never happens.

With that out of the way, here’s what I learned during the big snowstorm.

1. You’ll Need Way More Water Than You Think

When our power went out, I had maybe 6-7 gallons of water saved up. For reference, most people say to be prepared, you need 1 gallon of water per person in the house (as well as any pets) for each day. That means if we were to be prepared for 2 weeks without water, we would need 4 gallons of water per day for 14 days. That’s 56 gallons of water! For the average person, it’s just not possible to store that much water, so my advice is: keep as much water as you are able to store. For us, the floor of our pantry is now dedicated to water storage: every time we use up a thing of juice or a gallon of milk, I clean the container out well, sterilize it, and fill it with fresh water. I have about 20 gallons right now, which is much better than 6!

One more note on this: some people think if they have city water, they won’t need to worry about this as their water will still run even if their power goes out. However, many people further into town during the storm did not have access to water as the sewers became backed up. Whether you have city water or a well, you should stockpile clean water no matter what, just in case something detrimental happens to the water supply.

2. Have Lots of Food On Hand

Because we were without power for so long, we had to throw away everything in our fridge and freezer. It was all unusable and went bad fast. (More on this later.) That meant, we only had a little bit of food available. I tend to prefer to eat fresh foods: fruits and vegetables, meats and cheese. You know, the basics. We survived on oatmeal and peanut butter sandwiches for the first few days, until I got some cans of soup at the grocery store.

My stash of canned food was shockingly low. Because we have a wood stove, I was able to cook food like oatmeal or make soup, but I didn’t have much. My advice is to always have a supply of good canned food available, as this will stay good the longest, as well as things like canned milk and canned broth. We also were able to make coffee with a French press, which sounds like a luxury, but it was often the one thing I looked forward to!

3. Make Sure to Empty Perishable Items

If your power goes out and there is no estimate for it to return (by the second day of the storm, our utility company was saying to be prepared to be without power for up to two weeks), you’re going to want to throw away your perishable items ASAP. This will save you a huge headache, as it means you won’t have anything rot or drip all over your fridge or freezer. It will also make clean up once power is restored a lot faster. It feels awful to throw away so much food—as an example, I had to throw away a bunch of Costco freezer items I had literally just bought, including a $20 box of chicken nuggets. I nearly cried. But trust me, it can’t be saved. It can’t be saved.

4. Keep a Large Cooler Available

Well, ok: remember when I just said, it can’t be saved? Well, that’s kind of not true. Some stuff can be saved.

If you’re in the middle of a winter storm, my advice is to get a large cooler and fill it with snow; put it outside; and put as much perishable food inside as you can. This is how Danny and I saved our milk and coffee creamer. We could at least keep that routine for Forrest (having milk ASAP in the morning), which was good. In the summer, this wouldn’t work obviously, but it made me feel better to at least save even 5% of our fridge.

5. Everything You Need a Stockpile Of

I don’t need to explain this at all, but here’s a list of everything you need to have a stockpile of:

  • Flashlights (probably one big, sturdy one; one lattern; and several small, easily portable flashlights)

  • Batteries (of all kinds)

  • Candles

  • Matches

  • Medical supplies (any medications you take, as well as you’re preferred pain reliever, bandages of all kinds, gauze, tape, scissors, antiseptic ointment and wipes, soap to wash wounds, and more)

  • Pots and pans that can be used over direct fire or on a wood stove (that means, no Teflon coating or plastic handles/lids)

  • Blankets and towels

  • Antibacterial wipes to wash hands

  • Gasoline or diesel fuel for your car and/or generator

  • Wood (if you have a wood stove or fireplace)

  • A power pack to charge phones and any communication devices

  • A hand power or solar powered radio

6. You Need an Alternative Heat Source

We were incredibly lucky to have a wood stove, as it kept us from being too cold and we were able to cook on it. Even during the summer, we would be able to use our wood stove to cook and boil water to clean with. It goes without saying: an alternative heat source is incredibly important for any emergency preparedness.

If you aren’t able to add an alternative heat source into your home, investing in a generator is another option; there are lots of generators available these days and they are relatively easy to set up (you just need a specific outlet on the outside of your home).


Whew! That’s it (at least for now). There is a lot more about emergency preparedness that I could write about—and I definitely haven’t covered everything you need to be prepared for an emergency. But these were all the notes I kept track of while we were without power.

Have something to add? Let me know in the comments!

Real Mom Talk: Does My Child Need a Set Schedule?

Real Mom Talk: Does My Child Need a Set Schedule? | Writing Between Pauses

When Forrest was first born, I had this (slightly) bad habit of obsessively reading blog posts about baby schedules.

I would read first-person blog posts that detailed 3- to 4-month-old schedules. Articles about how to set a schedule for a baby. And everything in between. I would read about the pros and cons of feeding on demand, the different ways to setting schedules, certain schools of thought regarding baby scheduling.

As he got older, I started to get less obsessed with the idea that I was doing him a disservice of not having a very set schedule—but I still thought about it a lot. And I still tried to keep things regular. Thursdays were Grocery Store Days, followed by a walk in the park. Fridays were “Fun Days” where we might go to the mall, a book store, the coffee shop, anywhere.

Now that he’s in school, we do have a much more set schedule, some of which revolves around making sure we always do the same few things every single day (like washing our hands, going potty, picking up our clothes—you know, basic stuff).

I’ve always been told that kids thrive on structure: having a schedule is vitally important. But there is so much information out there about scheduling our kids: when is it too much? When is it too little? What if your kiddo gets bored? What if your toddler gets overwhelmed? How do you know what to do?

As I wrote in my blog post about TV time, I’m not an expert. I’m just one mom who thinks about these things… a lot. I’m always trying to make the “right” decision—and often, we don’t know what that decision is.

I do want to share what I’ve learned along the way when it comes to schedules, and then I’ll conclude with… are they really necessary? Or can we be a little more loosey-goosey with our kids?

1. The Infant Months

For me, having an infant was about one thing and one thing only: both of us surviving. That’s especially true of the newborn months.

When Forrest was a newborn, I was in the unique position of not really getting to experience those first 3-4 calm, sleepy weeks. The thing about newborns (as in, brand spanking new newborns) is they sleep a lot. Like… nearly all the time. If you’re at home and comfy, cozy during those times, it’s a really simple, beautiful part of your life. For us, we were still in the hospital for the first week; then, the second week we were running up to the hospital every single day for blood tests. Then, the third week we had mutiple doctor’s appointments still. (For my preeclampsia, I had three check up appointments to ensure my blood pressure had returned to normal and I was no longer leaking protein.)

We were all over the place those first few weeks, which meant it was so hard to know when the hell we were supposed to do anything. I was barely able to be home during the day and then I was essentially awake all night (following an incredibly strict feeding and pumping schedule 6 times through the night).

Looking back, if I had been able to have a more “normal” newborn phase, I definitely would have been able to keep a better schedule. As it was, I was frequently pumping in the car on the way to and from doctor’s visits, carrying a breast pump, multiple bottles, and a cooler every single place I went. God, it was exhausting!

This is all to say: for us, a schedule just simply wasn’t possible for the first month or so. And then, by the time he was 2 and 3 months old, I still felt absolutely frenzied. I was exhausted all the time, sleeping 4 hours or so every night, and still pumping. (I don’t think I will ever be able to convey simply how much I was pumping in those first months. And it didn’t even establish a good supply! Thanks, body!)

As odd as our experience was, I think most people struggle with schedules for infants. When Forrest was a bit older, we implemented the Play-Sleep-Eat routine, which is less a schedule and more just an order of doing things (to avoid associating eating with sleeping). We kept that routine from about 4 months to about 7 months, when we switched entirely to formula feeding (which gave me significantly more time to do things while he slept or played, instead of just frantically pumping).

2. Young Toddlers

As he got closer to a year, that’s when we started getting more of a schedule going. We would wake in the mornings, have a bottle (or once he was about 13-14 months, a sippy cup), eat breakfast, then play until naptime. Then after nap, we would go to the grocery store, go on a walk, and head home for lunch, then nap. That was pretty much our routine until he was about two or so.

Young toddlers (I would say this age group is whatever age your baby starts to walk until about 2 1/2) are really easy to schedule. In fact, I would say they need a schedule. They like the feeling of security it gives them. And I know for Forrest, whenever we deviated from our schedule, he was much fussier and struggled more to do just about everything. (And it should be said: some days we just had to deviate the schedule for whatever reason.) Here’s a little bit more information about why toddlers crave schedules and routines:

Creating a regular routine is an essential way to give toddlers the security of knowing “what happens next” in their day. It also develops the prefrontal cortex, the planning and executive function part of the brain.

(Source)

In short: getting a routine in place by 14-18 months will help your child be better at time management later, as well as helping them emotionally mature.

3. Preschoolers

Preschool age is usually considered about 2 1/2 to 4, so Forrest is right smack dab in the middle of it. Everything about schedules for young toddlers still holds true, but it’s important to deviate the schedule as they mature and grow older. Here is a sample of our usual day right now:

  • 6am, wake up and have milk

  • Breakfast

  • Play time

  • 8:30am, Forrest gets to watch Daniel Tiger

  • 9:30-10am, naptime

  • 11:30am, lunch

  • Forrest goes to preschool in the afternoon

  • After preschool, he’s allowed to pick a movie from our selection and watch it while I make dinner

  • 4pm, dinner

  • 5pm, play time

  • 6pm, wind down, read books, no TV or screens

  • 7pm, bedtime

That’s it. It’s very simple and easy to remember. And it should be said: no schedule for any one child is prescriptive. As I said, I’ve definitely fallen into the trap of looking up other toddler schedules and thinking, Am I doing everything wrong? The answer is, probably not. Fo thrives with this schedule and does really well. On days where he isn’t at school, we might spend the afternoon at the park or go to the library, it just depends. By age 3, some kids have given up naps entirely, depending on how well they sleep at night—however, Forrest just isn’t quite there yet.

Again, having a schedule helps kids stick to a routine and learn time management. However, Forrest is definitely at the age where he’s more likely to get bored—so I spend more time trying to think of creative things to do during playtime (like painting suncatchers, doing small lessons, and more). That’s a bit more active than during his younger toddler days, when he was content to wandering around with a spatula!

4. So Are Schedules Necessary?

Short answer: kind of.

The longer answer is that it very much depends on your child. It’s one thing to look up information and see that schedules help children mature emotionally and mentally—and it’s another thing to actually implement that! Some people, and of course, some children, feel too claustrophobic with a strict schedule! This is the problem with all parenting advice: it really is so intensely personal to your child. Just as we can’t prescribe a specific eating method to every child, it’s impossible to prescribe a way to keep your child occupied during the day—even if perhaps you desperately want to do so for a bit of routine yourself!

I think one thing to consider is to not think of it as a schedule—but as a routine. Having a set routine is different from having a set schedule, but both are very good for children. Doing the same few things every single day in the same order helps ground your child. Healthy sleep routines (such as bath-book-bed) can help encourage your child to sleep more soundly, because they know what to expect. The same goes for each day of the week! Forrest knows we go grocery shopping on Thursdays, he knows he gets to go to school on Fridays, and he knows he gets to go to the park on Saturdays. That’s just our routine!

Just as with all parenting blog posts I write, I feel like I ended this one rather wishy-washy as well. But it’s the truth: I can’t tell you whether your child needs a schedule or not. You know your child best. There is no harm in working on getting a set pattern to your day (especially if it helps you get things done as well!) and if it doesn’t work out, it doesn’t work out! No harm, no foul.

I’ll turn it over to you now. Does your child have a set schedule or routine? What does it look like? And what do you think, are schedules a necessity or too much?

My Favorite Accessory For Looking Put Together (Even When I Don’t Have Time)*

My Favorite Accessory For Looking Put Together (Even When I Don’t Have Time) | Writing Between Pauses

Before I had Forrest, I spent a lot of time on my wardrobe. I shopped frequently and spent a lot of time picking out outfits. However, once the chaos of motherhood descended, a lot of that got pushed aside.

As Forrest has gotten older, I’ve only gotten busier. I blog, of course; I freelance; and I work for a digital marketing agency. Between parenting, working, cleaning my house, and taking time for myself (I have to cross stitch sometime!), I find myself with less and less time every single day it feels like!

That means that usually, I have to pick one area to focus on. If you know me, you know that that’s often my makeup; I feel most put together when I get my lipstick and mascara on… even if I’m wearing my comfy joggers and a hoodie!

Recently, however, I’ve been working on creating simple “uniforms” for myself to wear to work everyday. These outfits consist of:

  • A few dresses that I just feel good in

  • Jeans, flowy tops, and nice cardigans

  • Trousers, blouses, and jackets

A lot of this has been my attempt to stop wearing leggings every single day! It’s hard to dress up leggings, that’s for sure, but I knew for my work, I needed to start focusing more on how I present myself, even when I don’t feel 100% great or I’m running on less than 3 hours of sleep.

JORD Watch Cora Polaris

The time I have for looking put together is often minimal. In the morning, I am usually getting Forrest dressed while I make my coffee, then putting on makeup while I assure him that we will, in fact, get to my mom’s on time. I am often super behind on laundry, which means sometimes I’m running around looking for my favorite black H&M jeans in the middle of letting my setting powder bake.

That’s why having a few set uniforms for myself makes every morning go just a little bit easier. What I decide to wear is basically already picked out--I just have to remember what’s on my roster for the day! If I have a meeting, I might go for a dress or a jacket with my jeans instead of a top and cardigan. If I’m just going to be working in my office, I’ll wear jeans and a t-shirt which I can throw a cardigan on top of if I need to run out.

One thing that makes every outfit pop and look just slightly more put together is a great accessory. And lately, that great accessory has been my new JORD Watch. When JORD reached out to me about writing a post, I was so excited; I’ve been drooling over some gorgeous timepieces recently. I wear a Fitbit Versa most days, which isn’t really the most high end of looks, so I wanted something I could wear to a meeting or a night out that was more functional than jewelry, but prettier than a Fitbit!

Rose Gold Watch

The JORD watch I chose is the Cora Polaris in Koa and Rose Gold. Like most people, I’ve been obsessed with rose gold the last few months, so this was a no brainer when it came to choosing! I love how subtle the rose gold is and the Koa wood is so absolutely stunning. Here’s a little bit about Koa:

“Koa is a species native to Hawaii and is widely considered to be the most beautiful of the native hardwoods. Though softer than several of our used wood species, Koa machines exceptionally well and finishes smooth with a beautiful natural sheen. Depending on the harvest season, Koa wood will produce tones that range from medium gold to reddish brown, similar to Mahogany.”

The color of the watch is gorgeous; the Koa wood is a warm-toned, which goes beautifully with the rose gold pieces of this timepiece, but goes with everything I own. It doesn’t look out of place. I’ve gotten so many compliments on this watch the last few times I’ve worn it to meetings or to work.

The thing I love most about JORD is their focus on sustainable practices when it comes to creating beautiful timepieces. That means you can feel good about your purchase, because you know it’s going to a company that absolutely loves what they do and does everything with sustainability in mind.

Because these watches are made with wood, it does require a little bit more care. Thankfully, every JORD order comes with instructions for care--which boil down to using Tung Oil or Lemon Oil on your watch, as well as ensuring that you store it properly between wears.  

Watch with Red Plaid Dress

Nothing makes me feel better these days than being complimented on my outfit--and I’ve definitely had more of those moments since I started wearing my Cora Polaris watch from JORD. I’m so excited to have the opportunity to receive this watch from JORD-- and I’m even more excited that I have the opportunity to offer this same feeling to one of my followers.

Click here to enter my giveaway to receive $100 OFF a watch from JORD. As well, when you enter, you’ll still receive a 10% off code for any order from JORD as well--which means, even if you don’t win, you still can order a JORD watch!

Disclaimer: As usual, an asterisk (*) in the title of this post denotes that I received this item in exchange for review and promotion. However, all opinions remain my own. Posts like this help Writing Between Pauses keep going! For more information about my disclosure policy, click here.

My Tips for Packing to Travel with Kids for Spring Break

My Tips for Packing to Travel with Kids for Spring Break | Writing Between Pauses

It goes without saying: almost everyone loves the idea of traveling, but the actual traveling is hardly anyone’s favorite part of it. Moving from A to B, B to C, and C to every other letter of the alphabet definitely takes more patience than anything else.

Now add to that a child, who may or may not be old enough to understand patience (or might just not feel like it at that moment), and things get really sticky. I’ve written about traveling with young toddlers before in the form of everything I learned about taking a (mostly) solo road trip and my 4 tips from when we went to Disneyland (and drove the whole way).

We were just recently looking at our photos from our trip to Disneyland. It’s funny to think that was two years ago—and Fo looks so small in all the photos! He was a younger toddler then and now he’s a kid—and things are definitely different now.

When we first had Forrest, it felt like we might never be able to travel again. Even just a trip to the mall felt like I needed to pack an entire army—and if we did travel anywhere, it felt like I had to pack up my whole house and just take it along. We ended up at our destination with bags and bags and bags of stuff for just a few days! And don’t get me started on the pain in the ass it was to take along all my pumped milk, plus my pump, plus formula, plus bottles… I still remember trying to label the tops of my expressed milk to take in the car on our first spring break road trip after having Forrest, pumping in random parking lots throughout the 9 hour drive there, and much more.

I’ve definitely been able to streamline things as Forrest has gotten older, especially when it comes to packing. I thought I’d share my tips for how I keep everything organized in the car. If you’re planning to travel (for the first time or the 100th time) with kids this Spring Break, this one is for you.

1. Invest in Boxes

The best decision I made before going to Disneyland nearly two years ago was buying 2 clear packing containers. They are about a foot deep, measuring 12 inches by 10 inches at the lid. They aren’t super big, but they aren’t teeny tiny either. I used them to pack supplies for Forrest on our trip and so they would be easy to stack and see inside of.

When I tell you I use these every single road trip now, I’m not joking! They make it so easy to keep supplies together. I tend to keep all our travel stuff in one of them; that includes things like sunblock, our emergency kit, some non-perishable emergency snacks, and things like that. I also keep the small DVD player we use in the car for Fo in that bin as well, just so I always know where it is!

2. Everyone Gets One (1) Bag

I’ve definitely made the mistake in the past of packing In a way that doesn’t make a lot of logical sense, like packing one bag for clothes and one bag for makeup. In general, I know if I need more than one suitcase, I’m probably overpacking and need to talk to myself about what I’m doing.

Overpacking is a great way to ruin your spring break (especially the traveling portion), so our rule now is: everyone gets one bag, even Forrest. He gets one bag for clothes and toys. That keeps us from overpacking and means we have room for everything else we need, or any souvenirs we might pick up on our trip.

3. Keep Snacks Contained

My husband Danny and I are very big on travel snacks. It gives us something to do as we drive (especially on a long road trip) and also makes it easy to keep Forrest occupied (“throw him another snack”). I know this isn’t the healthiest way to travel, but honestly, what’s the fun in having a super healthy Spring Break? (Ok, there might be some fun in it.)

We often have this issue of snacks getting absolutely everywhere in the car: bags of candy in the glove box, bags of chips open in the backseat, you know the drill. Suddenly, I need to vacuum my car really bad.

We designate one spot for snacks in the car (as well as where we store extra drinks and water) and really stick to it now. This keeps me from absolutely feeling like I’m losing it and also keeps the car clean. We usually choose the space behind the passenger seat, as it’s easy for Danny to get out and grab (as I usually drive).

4. Think About What You’ll Need Access To

Have a DVD player for your kiddo? Keep movies within arm’s reach of the passenger seat.

Know you want to drink lots of water? Keep water bottles handy within reach.

Pack your car so that you have access to the things you know you’ll need to grab as you drive—and don’t worry about the rest. Charging cables and extra battery packs can be kept in the glovebox or console; books can be kept in door pockets. Pack accordingly.

5. If you’re stopping midway, think of what you’ll only need for that night.

We often have a bin (throwback to item one on this list!) that is just things we need for at night. Oftentimes, we break up long drives with a stay overnight along the way—traveling with a toddler, it’s just easiest for us. We don’t want to totally unload the car, so we usually just take what we need: our bags, our snacks, and the overnight bin (as well as anything valuable, like laptops). That means leaving in the morning is way less hectic as we don’t have to repack the entire car.

6. Remember a Trash Bin

All those snacks, as well as stops along the way, wiping faces, and more… you need a trash bag. I usually grab 4-5 plastic Target bags and stow them in the car, then we use this as trash bags through the drive, throwing them away whenever we stop. It just makes it so much easier to keep the car clean if you have a specific spot to put trash.

Beauty Review: Maple Holistics Silk18 Shampoo*

Beauty Review: Maple Holistics Silk18 Shampoo* | Writing Between Pauses

About a year and a half ago, I wrote a review of Maple Holistic’s Tea Tree Shampoo (one of my favorites). You can read that here.

As you all surely know by now, shampoo is one of my bugbears. I have a very sensitive, dry scalp; shampoos will work for a little while to relieve the dryness, then stop. I have reviewed so many shampoos and while they all worked for a while, eventually, my scalp went back to its usual: dry, flaky, itchy, sensitive.

When Maple Holistics reached out to me about reviewing their Silk18 Shampoo*, I was excited… but aware that like most shampoos, my dry scalp will probably acclimate to it. I’ve started to realize that I need to focus more on nourishing my scalp between washes, instead of expecting the shampoo to do all of the world.

My review of this was slightly complicated by the power outage at the end of February. I wasn’t able to shower for the first 4 days, by which time I was on day 7 with no washing. My scalp felt great and I realized I needed to start giving myself more time between washes. I used the Silk18 Shampoo for that first shower and oh my gosh… it felt amazing.

I really like Maple Holistics for a lot of reasons; the first one is that all of their products are cruelty free and ethically sourced. This helps me feel a lot better about the products I use, even if I can’t guarantee it for everything that works me & my hair! I also like that their products contain natural, soothing ingredients that are low on a toxicity scale, which helps keep our waterways clean.

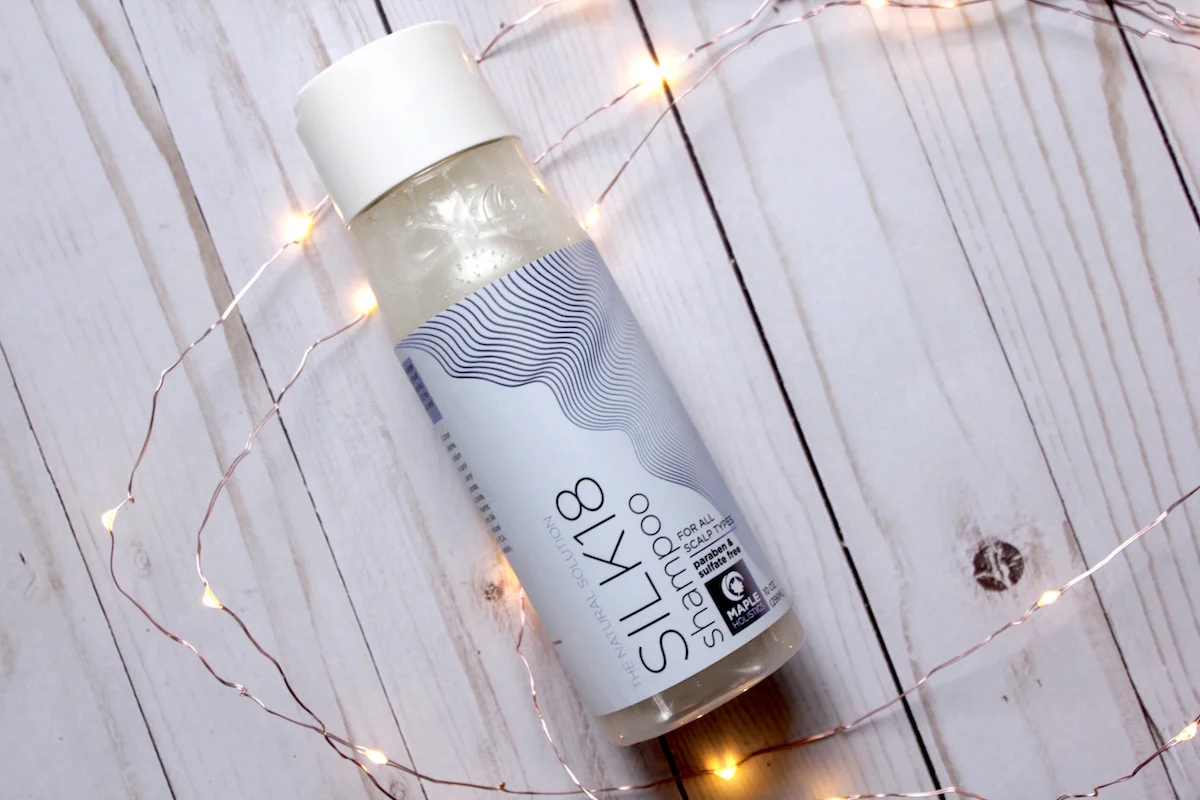
Maple Holistics shampoo

The Silk18 Shampoo from Maple Holistics promises the following:

Achieve stronger, smoother, more luscious hair with silk18 shampoo. Infused with a rejuvenating blend of 18 silk amino acids which help fortify hair follicles and strengthen strands to protect hair from dryness, breakage, damage, split ends, and hair fall. The nourishing formula gently cleanses dandruff, excess sebum, and impurities to leave your hair and scalp feeling fresh but not stripped. Enriched with argan and jojoba oil to add supreme softness and a luminous shine. Our shampoo is sulfate and paraben-free making it great for all hair types, color treated hair, and sensitive skin.

All of those things are definitely true. I have slightly drier-than-average hair (although not bad compared to my scalp) that can get slightly frizzy and ugly after a few days (usually if I wear it in a bun too much). However, this shampoo definitely gave my hair most luster and shine than any other shampoo I’ve used recently, which is a definite plus. I used it in combination with my Formulate conditioner, which was really, really lovely.

Good shampoo for oily scalps

You might be wondering, what about your scalp? Well, it didn’t help my dry scalp as much as I would like—but it didn’t make it worse. When it comes to shampoo, that’s really all I can ask for! Some shampoos definitely make my scalp feel awful and this isn’t one of them.

So what’s my final verdict?

I love this shampoo for my hair. I like it for my scalp. I have found that using it in combination with my blend of half Head & Shoulders and half my Formulate shampoo on my scalp, then this on my ends… I get the absolute best wash I’ve gotten in a while. I’m currently working on washing my hair much, much less often to see if that will help my scalp health overtime. (I’m talking… like washing my hair every 10 days here, which seems like so long!) If you have drier hair, this is a great shampoo to try for a little extra moisture here at the tail end of a very, very cold winter season.

You can try the Maple Holistics Silk 18 Shampoo yourself by purchasing here.

Disclaimer: As always, as asterisk (*) in the title of this post denotes that I received this product in exchange for review. However, all opinions remain my own! Posts like this help me keep the lights on at Writing Between Pauses. To learn more about my disclosure policy, click here.

Monthly Wrap Up: February 2019

Monthly Wrap Up: February 2019 | Writing Between Pauses

If you’ve read my blog for any stretch of time, you know two things about me: I love Fall the most and February is always the worst month. I’m not going to say that how much February sucks is because of astrology… except I am. Mercury Retrograde almost always hits at some point in February, plus it is Pisces season.

This February was no exception to the rule: I got a lot done, but a lot of stuff went absolutely bonkers. Totally haywire. It’s so hard for me to even summarize February because… where do I begin?! I guess I should start with the Snow.

1. The Big Snow

Oregon Snow
Snow in Oregon

It started snowing on February 24 at about noon. It did not stop for over 24 hours. By the end, we had about 14-16 inches at our house; at my parents’ house just a mile down the road from me (but slightly higher elevation), they had closer to 18-20 inches. In some drifts, there were nearly 2 feet of snow! The roads were a mess. And what was worse: the weight of the snow itself caused trees to fall, branches to snap, and power lines to be severed.

Our power went out around midnight between Sunday and Monday. Monday morning, I woke up with Forrest (he’d gotten into our bed because he couldn’t sleep alone in the dark) and went downstairs, got a fire going in our wood stove, and then opened the door to listen. It was only then that I realized how bad things were; it was still snowing and everything was extremely quiet… but I could hear breaking and crashing sounds in the woods all around us. And worse, the power line that goes over our yard kept shaking violently, including the power pole. I was suddenly not just annoyed that I didn’t have power, but pretty scared.

Once it got light out, I walked down our driveway to see what it looked like. We had about 4-5 trees down across our driveway and the snow was deep. There was no way we could get out. Throughout the rest of the morning, branches fell off the huge cedar tree right next to our house, crashing into our backyard, fence, and porch. Thankfully, nothing big hit our house—but it was scary.

Trees down in Oregon

My parents managed to clear their driveway, but it was nearly dark by then. They finally came over Tuesday to clear our driveway and we went to their house for a little while, as they have a generator. The next few days were basically the same pattern: we’d go to their house every day. The roads were bad. Here’s what they looked like in my area. That’s just one section; there were so many places where the road was reduced to nothing because trees had fallen inward on both sides, taking down power lines.

After 4 days, my parents got their power restored, but we didn’t. The line from our power pole to our neighbors house was still disconnected, which meant there was something wrong with the transformer on our pole. We waited and waited. It felt like an eternity! We went to my parents’ house every day to get some work done, shower, and charge our devices.

On the plus side, I got way more sleep that week than any other time in my life! I read a lot, did a lot of embroidery, and learned that I definitely need to be better prepared for emergencies. I have a blog post about emergency preparedness that I’m working on, so stay tuned for that.

Thankfully, our power was restored on March 3, but our internet satellite dish had been damaged. Having power was so nice though; I did so much laundry, cleaned everything, ran the dishwasher 3 times, and vacuumed up all the debris around our wood stove. It’s been a wild ride, but I am very done with snow and February.

2. Books I Read

Gosh, having no power makes you really get into reading. Here is every book I read during the outage:

  • I Dreamed I Was a Very Clean Tramp, by Richard Hell

  • Find Her, by Lisa Gardner

  • Cutting Season, by Attica Locke

  • Verity, by Colleen Hoover

  • Carnegie’s Maid, by Marie Benedict

  • The Hazel Wood, by Melissa Albert

Whew!

3. What Else?

For the sake of space, here’s a few little things that happened in February:

  • My work is moving offices. However, unfortunately, our new office was not ready before the end of our lease… so we are all working from home for the entire month of March and last week in February. As you can tell, that meant my work week was an absolutely wash because of the snow—and I wasn’t alone. Going back to work was honestly the most exciting thing in the world, but I didn’t didn’t have internet until last Friday!

  • We got our taxes done and despite paying in extra this past year… we still owed to Oregon and got a very small return from Federal. We’re trying to crack the code here and figure out how much we need to overpay to make even!

  • We planned our coast trip for this summer and fantasized multiple times about running away to Disneyland. (Once I could get my car out of my driveway, it was definitely hard to not just start driving to somewhere, anywhere else.)

  • I started learning embroidery. It’s been really fun and I’ve been loving the process! You can follow me on Instagram to see some of my projects.

Well, that’s about it for February. I’m excited for March; I’m really ready to be in Spring (even though it’s not my favorite time of the year), but I want to be far from the possibility of snow right now!

Beauty Review: Holika Holika Piggy Nose Pore Strips

Beauty Review: Holika Holika Piggy Nose Pore Strips | Writing Between Pauses

I feel a little out of practice writing blog posts! If you’ve followed me on Instagram, you know we were out of power in the last week of February. The Willamette Valley got hit by a huge snowstorm—and by huge, I mean, I had about 16-18 inches of snow at my house, and in the town and city, it was 6-8 inches. That’s a lot for this area! We had thousands of people without power. Our Governor even declared a state of emergency!

Our power was thankfully restored on March 3, after 7 days without, but we had to have our internet repaired as well—and that didn’t happen until Friday! Talk about having a rough two weeks.

I wanted to write about these Holika Holika Piggy Nose Pore Strips. I’ve written before about the same brands, similarly named peeling gel. Which I love, of course; it leaves my skin so smooth.

I’m naturally suspicious of pore strips, because I know they don’t work. The dots we often see on our skin are actually sebaceous filaments, a natural part of our skin that we can’t get rid of; because of how common air brushing is, however, we think they are blackheads. But they’re not!

That being said… clearing that oil can help us reduce our pore size. It’s a double edged sword: it’s very cathartic to rip out those little oil plugs; but once you know that they’re always going to be there, you start feeling a bit… bad about it, for a lack of better term!

Let’s get on with the review.

Holika Holika Piggy Nose Pore Strips

I found these at TJ Maxx (of course) for $3. For 5 sheets, that actually is quite steep—it’s only 5 pore strips! However, they technically have 3 strips per sheet, that you do in a specific order, so… I’ll take it.

These are very similar to the Tony Moly 3-step pore strips as well.

Here’s the instructions as they read on the packet: “1. After cleansing, place step 1 on nose for 15-20 minutes. Remove slowly and wipe off any blackhead or impurities in pores. 2. Wet nose with water and place step 2 on nose. After 10-15 minutes, remove slowly from the edge. 3. After step 1 & 2, place step 3 on nose. Remove after 10-15 minutes and gently tap for better absorption.”

Even if you stay in the bare minimum time, these pore strips take 35 minutes total! That’s a lot!

The first step smells a lot like the Clean & Clear salicylic acid toner I used to use in high school. It also smelled slightly sweet, almost artificially, beneath the very sharp, chemical smell. I’m not sure what to make of that. It seemed to be designed to “bring up” the oil in your pores and open your pores a bit more. Without knowing based on the instructions, that’s my best guess. It didn’t burn my skin or feel any which way in particular.

Step 2 is the step where you actually “cleanse” the pores: aka, you rip that shit out. This step is so reminiscent of other pore strips; you wet your nose and apply the dry strip, adhering it to your skin; it dries; and then you peel it up, revealing a little teeny, tiny forest of oil plugs. This strip worked… I would say better than the Tony Moly strips and not as good as the tried-and-true Biore Pore Strips.

The third step seems to be a toner; I think it’s designed to further cleanse your pores, as the packet mentions “absorption”. This one smelled very similar to the first one, but was very dry. Step 1 is a very wet packet (almost like a face mask with a serum), Step 2 is dry, obviously, and Step 3 was, surprise, also dry.

Do pore strips work

So, did I like these pore strips? They’re a K-beauty brand, so I really like them as an alternative to Biore Pore Strips. I know I shouldn’t, but I really do love using pore strips every few weeks to help with my pore size (and congestion). Since they work about the same (if slightly less well) as Biore, I’m willing to make the switch to them.

My one concern really is with the amount. In a box, you only get 5 sets… which may last a while, but since they are $14 on Amazon for a box of 5, that is quite expensive, comparative to other brands. However, I did really like them and you really can’t beat cute packaging.

If you’re a pore strip user, this is a definitely a great, fun option to try. If not, I wouldn’t say, you need to go buy this; it’s definitely a novelty, purely for people who already love a good, guilty pore strip.

the 3 Beauty Basics Everyone Should Have

The 3 Beauty Basics Everyone Should Have | Writing Between Pauses

One of the criticisms I hear most about the beauty community—from Instagrams to YouTubers to bloggers—is: no one posts any beginners tutorials anymore.

We all share our favorite foundations with the knowledge that everyone reading probably knows how to apply foundation.

We review products with the understanding that everyone has a grasp of the basics.

That leaves a sizable gap in information; those who might be interested in reading beauty reviews are left out. What if they don’t know how to apply foundation? Or they don’t know how to use setting powder?

One blog post isn’t going to totally fill that gap. And it’s hard to tell the beauty community to take 20 steps back and explain the beginning. But starting to open up the beauty community to not just amateur artists, but those who want to learn, will help make it a better place.

For that reason, I thought I would share what I consider to be 3 beauty products everyone needs—regardless of their skill level, makeup level preference, and more. For me, this serves as starting a basis for getting into beauty; if you’ve never worn makeup before, but want to start, or you’ve never had a skincare routine before, but want to start, these are a good place to start in establishing your own routine.

1. SPF

I go on about this a lot, but it is worth restating over and over and over again: you have to wear SPF every day.

Back up, rewind, read it again: you have to wear SPF every single day.

This is pure protection for your skin. Using a daily SPF on your face, neck, and shoulders (and if you want to be truly dedicated, your entire body) is a great way to protect your skin and keep it looking amazing. Not only is moisturizer one of the best ways to prevent aging, SPF only helps in that regard. Take it from someone with melasma on their face: please, please, please wear your SPF every single day.

How do you choose the best SPF? For me, I try to find a non-greast facial SPF in as high of a rating as possible. Right now, my preferred one is Aveena, which is only 15 SPF, but it doesn’t make me break out. I also use an SPF spray (watch for sales of this at Ulta) throughout the day during the summer to keep my makeup set and to reapply. (Remember, if you’re outside in the sun, you have to reapply SPF every 45-60 minutes. An entire day in the sun should use at least an entire bottle of sunscreen!)

For more about choosing a good SPF, here are two blog posts I have written previously: Summer Skincare and Protecting Your Skin. And don’t forget to protect your eyes too.

2. A good brush set

Some people prefer makeup sponges. Some people swear by beautyblenders. But everyone uses brushes, in one way or another. If you’re just starting to wear makeup, the power of a good brush set cannot be overstated. Brushes can help you be more refined in your makeup application. You learn to blend and handle makeup. And, honestly, brushes just look pretty on your vanity.

Lots of people have different preferences for brushes. Personally, I’ve only ever bought ELF and Wet’n’Wild brushes (I’ve received others in my ipsy bags). If you want to build a brush collection, I highly recommend signing up for ipsy or checking for brush sets at Ulta. The brushes you should definitely have in your collection are:

  • A fluffy face brush

  • A smaller, denser blush brush

  • A large, fluffy eyeshadow brush

  • A foundation brush (kabuki-style)

  • A small eyeshadow brush

With those 5 brushes, you really can do just about anything. Obviously, you can add more to your collection as time goes on, but those really are a good place to start.

3. A good concealer

If you’ve never worn makeup before, it can be challenging to jump right into foundation. Foundation can be challenging to match correctly to your skin tone and skin type. Concealer is a little bit easier; it’s like taking a baby step into foundation, without having to fully commit. If you’ve never worn foundation before, and aren’t sure if you need it, then you might end up not wanting to wear foundation. Some beauty gurus famously don’t wear foundation (like JKissa).

Concealer is perfect; you can use it on your under eyes to brighten, cover any small blemishes, and tone down any redness. But without the cakiness that can happen with foundation. I personally love Tarte Shape Tape; it took me a while to love it, but now I do. I also love the ColourPop concealer.

Finding one that suits you and your skill level, as well as your specific skin type, can take a little trial and error. I love Paula’s Choice’s tips for finding a good concealer.