Beauty

Beauty Review: Maple Holistics Silk18 Shampoo*

Beauty Review: Maple Holistics Silk18 Shampoo* | Writing Between Pauses

About a year and a half ago, I wrote a review of Maple Holistic’s Tea Tree Shampoo (one of my favorites). You can read that here.

As you all surely know by now, shampoo is one of my bugbears. I have a very sensitive, dry scalp; shampoos will work for a little while to relieve the dryness, then stop. I have reviewed so many shampoos and while they all worked for a while, eventually, my scalp went back to its usual: dry, flaky, itchy, sensitive.

When Maple Holistics reached out to me about reviewing their Silk18 Shampoo*, I was excited… but aware that like most shampoos, my dry scalp will probably acclimate to it. I’ve started to realize that I need to focus more on nourishing my scalp between washes, instead of expecting the shampoo to do all of the world.

My review of this was slightly complicated by the power outage at the end of February. I wasn’t able to shower for the first 4 days, by which time I was on day 7 with no washing. My scalp felt great and I realized I needed to start giving myself more time between washes. I used the Silk18 Shampoo for that first shower and oh my gosh… it felt amazing.

I really like Maple Holistics for a lot of reasons; the first one is that all of their products are cruelty free and ethically sourced. This helps me feel a lot better about the products I use, even if I can’t guarantee it for everything that works me & my hair! I also like that their products contain natural, soothing ingredients that are low on a toxicity scale, which helps keep our waterways clean.

Maple Holistics shampoo

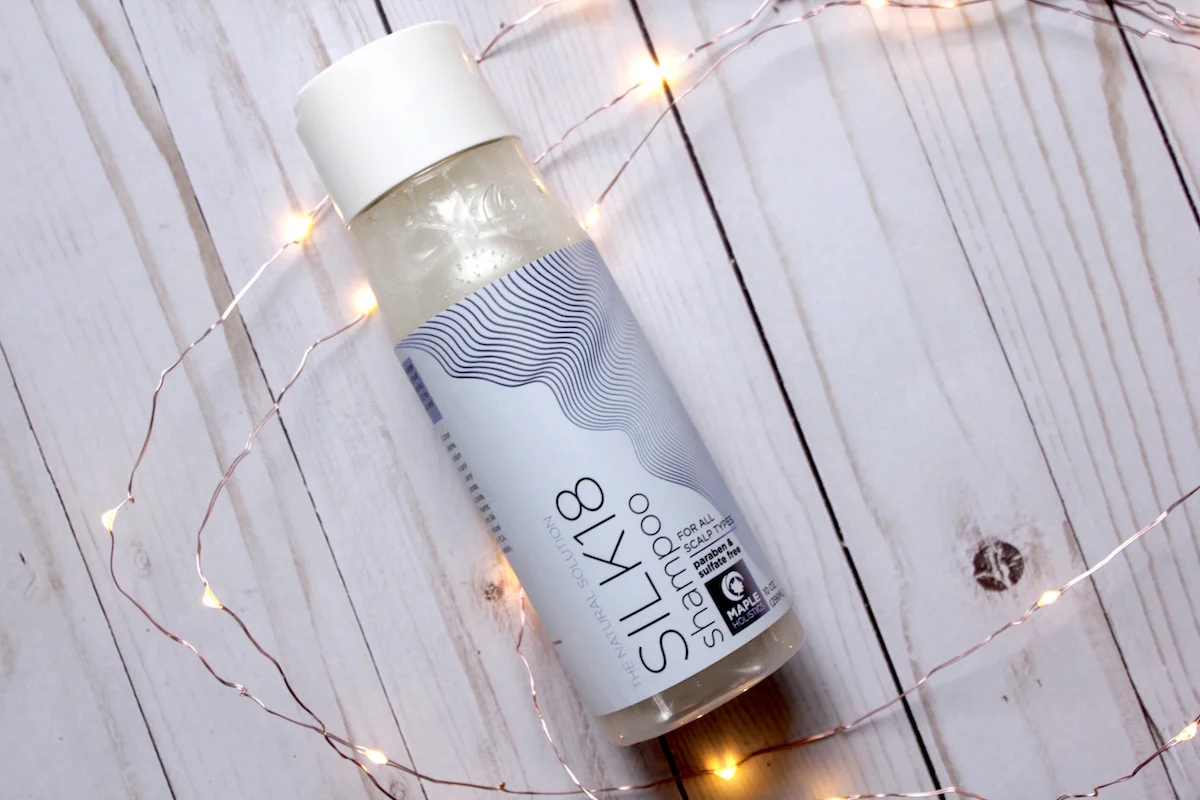
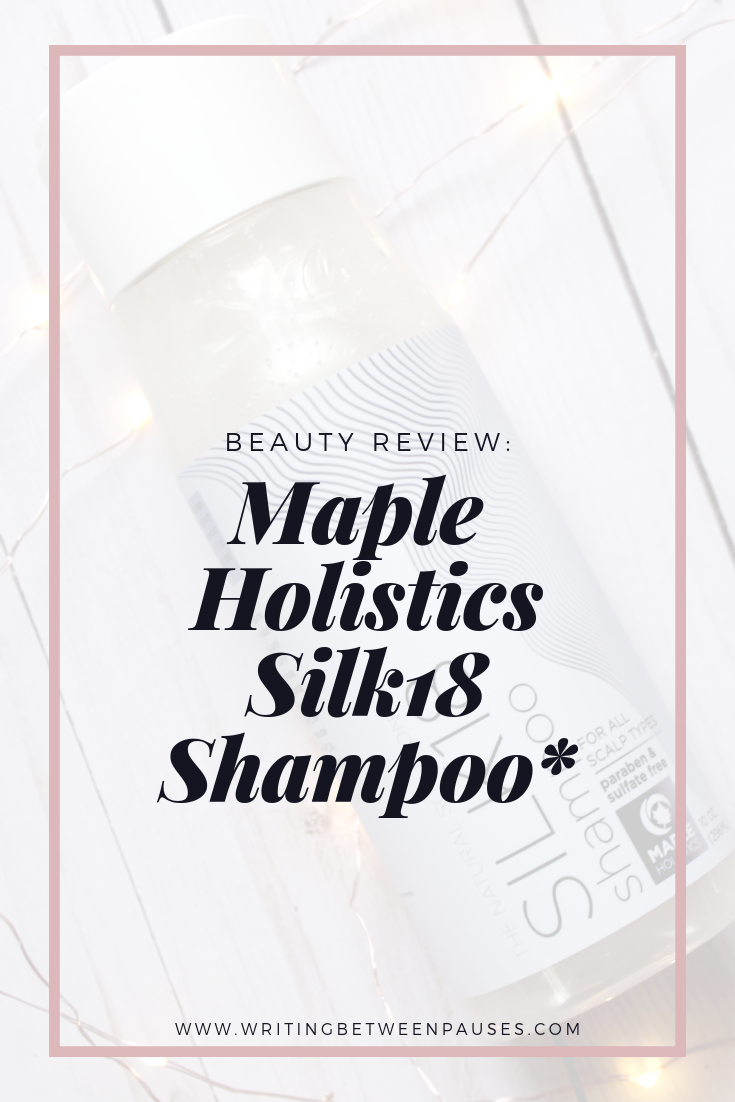
The Silk18 Shampoo from Maple Holistics promises the following:

Achieve stronger, smoother, more luscious hair with silk18 shampoo. Infused with a rejuvenating blend of 18 silk amino acids which help fortify hair follicles and strengthen strands to protect hair from dryness, breakage, damage, split ends, and hair fall. The nourishing formula gently cleanses dandruff, excess sebum, and impurities to leave your hair and scalp feeling fresh but not stripped. Enriched with argan and jojoba oil to add supreme softness and a luminous shine. Our shampoo is sulfate and paraben-free making it great for all hair types, color treated hair, and sensitive skin.

All of those things are definitely true. I have slightly drier-than-average hair (although not bad compared to my scalp) that can get slightly frizzy and ugly after a few days (usually if I wear it in a bun too much). However, this shampoo definitely gave my hair most luster and shine than any other shampoo I’ve used recently, which is a definite plus. I used it in combination with my Formulate conditioner, which was really, really lovely.

Good shampoo for oily scalps

You might be wondering, what about your scalp? Well, it didn’t help my dry scalp as much as I would like—but it didn’t make it worse. When it comes to shampoo, that’s really all I can ask for! Some shampoos definitely make my scalp feel awful and this isn’t one of them.

So what’s my final verdict?

I love this shampoo for my hair. I like it for my scalp. I have found that using it in combination with my blend of half Head & Shoulders and half my Formulate shampoo on my scalp, then this on my ends… I get the absolute best wash I’ve gotten in a while. I’m currently working on washing my hair much, much less often to see if that will help my scalp health overtime. (I’m talking… like washing my hair every 10 days here, which seems like so long!) If you have drier hair, this is a great shampoo to try for a little extra moisture here at the tail end of a very, very cold winter season.

You can try the Maple Holistics Silk 18 Shampoo yourself by purchasing here.

Disclaimer: As always, as asterisk (*) in the title of this post denotes that I received this product in exchange for review. However, all opinions remain my own! Posts like this help me keep the lights on at Writing Between Pauses. To learn more about my disclosure policy, click here.

Beauty Review: Holika Holika Piggy Nose Pore Strips

Beauty Review: Holika Holika Piggy Nose Pore Strips | Writing Between Pauses

I feel a little out of practice writing blog posts! If you’ve followed me on Instagram, you know we were out of power in the last week of February. The Willamette Valley got hit by a huge snowstorm—and by huge, I mean, I had about 16-18 inches of snow at my house, and in the town and city, it was 6-8 inches. That’s a lot for this area! We had thousands of people without power. Our Governor even declared a state of emergency!

Our power was thankfully restored on March 3, after 7 days without, but we had to have our internet repaired as well—and that didn’t happen until Friday! Talk about having a rough two weeks.

I wanted to write about these Holika Holika Piggy Nose Pore Strips. I’ve written before about the same brands, similarly named peeling gel. Which I love, of course; it leaves my skin so smooth.

I’m naturally suspicious of pore strips, because I know they don’t work. The dots we often see on our skin are actually sebaceous filaments, a natural part of our skin that we can’t get rid of; because of how common air brushing is, however, we think they are blackheads. But they’re not!

That being said… clearing that oil can help us reduce our pore size. It’s a double edged sword: it’s very cathartic to rip out those little oil plugs; but once you know that they’re always going to be there, you start feeling a bit… bad about it, for a lack of better term!

Let’s get on with the review.

Holika Holika Piggy Nose Pore Strips

I found these at TJ Maxx (of course) for $3. For 5 sheets, that actually is quite steep—it’s only 5 pore strips! However, they technically have 3 strips per sheet, that you do in a specific order, so… I’ll take it.

These are very similar to the Tony Moly 3-step pore strips as well.

Here’s the instructions as they read on the packet: “1. After cleansing, place step 1 on nose for 15-20 minutes. Remove slowly and wipe off any blackhead or impurities in pores. 2. Wet nose with water and place step 2 on nose. After 10-15 minutes, remove slowly from the edge. 3. After step 1 & 2, place step 3 on nose. Remove after 10-15 minutes and gently tap for better absorption.”

Even if you stay in the bare minimum time, these pore strips take 35 minutes total! That’s a lot!

The first step smells a lot like the Clean & Clear salicylic acid toner I used to use in high school. It also smelled slightly sweet, almost artificially, beneath the very sharp, chemical smell. I’m not sure what to make of that. It seemed to be designed to “bring up” the oil in your pores and open your pores a bit more. Without knowing based on the instructions, that’s my best guess. It didn’t burn my skin or feel any which way in particular.

Step 2 is the step where you actually “cleanse” the pores: aka, you rip that shit out. This step is so reminiscent of other pore strips; you wet your nose and apply the dry strip, adhering it to your skin; it dries; and then you peel it up, revealing a little teeny, tiny forest of oil plugs. This strip worked… I would say better than the Tony Moly strips and not as good as the tried-and-true Biore Pore Strips.

The third step seems to be a toner; I think it’s designed to further cleanse your pores, as the packet mentions “absorption”. This one smelled very similar to the first one, but was very dry. Step 1 is a very wet packet (almost like a face mask with a serum), Step 2 is dry, obviously, and Step 3 was, surprise, also dry.

Do pore strips work

So, did I like these pore strips? They’re a K-beauty brand, so I really like them as an alternative to Biore Pore Strips. I know I shouldn’t, but I really do love using pore strips every few weeks to help with my pore size (and congestion). Since they work about the same (if slightly less well) as Biore, I’m willing to make the switch to them.

My one concern really is with the amount. In a box, you only get 5 sets… which may last a while, but since they are $14 on Amazon for a box of 5, that is quite expensive, comparative to other brands. However, I did really like them and you really can’t beat cute packaging.

If you’re a pore strip user, this is a definitely a great, fun option to try. If not, I wouldn’t say, you need to go buy this; it’s definitely a novelty, purely for people who already love a good, guilty pore strip.

the 3 Beauty Basics Everyone Should Have

The 3 Beauty Basics Everyone Should Have | Writing Between Pauses

One of the criticisms I hear most about the beauty community—from Instagrams to YouTubers to bloggers—is: no one posts any beginners tutorials anymore.

We all share our favorite foundations with the knowledge that everyone reading probably knows how to apply foundation.

We review products with the understanding that everyone has a grasp of the basics.

That leaves a sizable gap in information; those who might be interested in reading beauty reviews are left out. What if they don’t know how to apply foundation? Or they don’t know how to use setting powder?

One blog post isn’t going to totally fill that gap. And it’s hard to tell the beauty community to take 20 steps back and explain the beginning. But starting to open up the beauty community to not just amateur artists, but those who want to learn, will help make it a better place.

For that reason, I thought I would share what I consider to be 3 beauty products everyone needs—regardless of their skill level, makeup level preference, and more. For me, this serves as starting a basis for getting into beauty; if you’ve never worn makeup before, but want to start, or you’ve never had a skincare routine before, but want to start, these are a good place to start in establishing your own routine.

1. SPF

I go on about this a lot, but it is worth restating over and over and over again: you have to wear SPF every day.

Back up, rewind, read it again: you have to wear SPF every single day.

This is pure protection for your skin. Using a daily SPF on your face, neck, and shoulders (and if you want to be truly dedicated, your entire body) is a great way to protect your skin and keep it looking amazing. Not only is moisturizer one of the best ways to prevent aging, SPF only helps in that regard. Take it from someone with melasma on their face: please, please, please wear your SPF every single day.

How do you choose the best SPF? For me, I try to find a non-greast facial SPF in as high of a rating as possible. Right now, my preferred one is Aveena, which is only 15 SPF, but it doesn’t make me break out. I also use an SPF spray (watch for sales of this at Ulta) throughout the day during the summer to keep my makeup set and to reapply. (Remember, if you’re outside in the sun, you have to reapply SPF every 45-60 minutes. An entire day in the sun should use at least an entire bottle of sunscreen!)

For more about choosing a good SPF, here are two blog posts I have written previously: Summer Skincare and Protecting Your Skin. And don’t forget to protect your eyes too.

2. A good brush set

Some people prefer makeup sponges. Some people swear by beautyblenders. But everyone uses brushes, in one way or another. If you’re just starting to wear makeup, the power of a good brush set cannot be overstated. Brushes can help you be more refined in your makeup application. You learn to blend and handle makeup. And, honestly, brushes just look pretty on your vanity.

Lots of people have different preferences for brushes. Personally, I’ve only ever bought ELF and Wet’n’Wild brushes (I’ve received others in my ipsy bags). If you want to build a brush collection, I highly recommend signing up for ipsy or checking for brush sets at Ulta. The brushes you should definitely have in your collection are:

  • A fluffy face brush

  • A smaller, denser blush brush

  • A large, fluffy eyeshadow brush

  • A foundation brush (kabuki-style)

  • A small eyeshadow brush

With those 5 brushes, you really can do just about anything. Obviously, you can add more to your collection as time goes on, but those really are a good place to start.

3. A good concealer

If you’ve never worn makeup before, it can be challenging to jump right into foundation. Foundation can be challenging to match correctly to your skin tone and skin type. Concealer is a little bit easier; it’s like taking a baby step into foundation, without having to fully commit. If you’ve never worn foundation before, and aren’t sure if you need it, then you might end up not wanting to wear foundation. Some beauty gurus famously don’t wear foundation (like JKissa).

Concealer is perfect; you can use it on your under eyes to brighten, cover any small blemishes, and tone down any redness. But without the cakiness that can happen with foundation. I personally love Tarte Shape Tape; it took me a while to love it, but now I do. I also love the ColourPop concealer.

Finding one that suits you and your skill level, as well as your specific skin type, can take a little trial and error. I love Paula’s Choice’s tips for finding a good concealer.

Beauty Review: Alba Botanica Acne Patches

Beauty Review: Alba Botanica Acne Patches | Writing Between Pauses

Back when I was in middle school, Clearasil came out with these acne patches—little clear, round patches that you could put over zits and pimples with the intention to help them heal faster. They definitely worked, because I used them somewhat religiously for at least 2 years. But then they stopped making them, I stopped looking for them, and I never thought of it again.

However, in the past few years, tons of brands have come out with things that are very similar. And as it turns out, you have been able to buy essentially what Clearasil marketed for years in the pharmacy—it just wasn’t marketed to teenagers. Cool!

Sometimes, physically covering a pimple is the best way to keep yourself from picking on it—I know that’s true for me. I really wanted to try some of these “new” (to me) patches, but often found the cost prohibitive on the ones my friends said really worked. I asked tons of beauty groups and they all recommended K-beauty brands—which is fine and good, but so expensive to order sometimes.

Alba Botanica is a drugstore brand—you can find it at Target—and they sell “Acnedote Pimple Patches”. I looked at them in Target, then backed off at the price. $10, for a set of 40 patches. That felt like quite a bit. (I just looked at the Target website and they are $6 on there—but recently Target has made clear that there are things that are more expensive in store than on their website. So make sure to scan everything with the Target app and get price matches done!) I decided to pass.

10 minutes later, I found the exact same thing in TJ Maxx. For $4. Score.

So, here’s the real question: are acne patches worth it? Do they still work as well as I remember them working in middle school?

The answer is, yes and no.

I had two larger pimples on my chin that I wanted gone, so I slapped a patch on them and left it on overnight. In the morning, both pimples had large whiteheads. I remember this happening when I was younger; if nothing else, the patch would make the pimple get a head so you could pop it. However, I’m at an age where i know that’s not a good thing to do. However, when I peeled off the patches, it peeled the thin skin off and popped them for me.

So I was left with two big scabs.

Yeah, not sure that’s an improvement.

Do Acne Patches Work?

The two scabs did heal pretty fast after that, as I babied them. I decided to try these patches with some smaller whiteheads that popped up around my temples (thanks to my glasses rubbing) and they were much better at getting rid of those overnight, without a damaging scab in its place.

Basically, I think there are two really good ways to use these patches:

  1. To stop yourself from worrying a large pimple (such as a cyst)

  2. To get rid of small comedones

However, my big warning is: these patches do help make zits more “poppable”, which is debatably a good thing. If you have a big cyst, sometimes you just want to be able to pop it so it will stop hurting. In that situation, these are miracle workers; they help drain the inflammation and create a head, so you can get rid of the cyst faster. For comedones, they really do get rid of them overnight.

Are these worth it? Yes. I’m going to keep testing them out throughout the next few months, and try to find other brands to test alongside, but I do like them—even though my first experience was a little negative. I think, as with any beauty product, you have to keep your expectations realistic, especially in terms of what it achievable and what isn’t.

Help! My Foundation Looks Terrible

Help! My Foundation Looks Terrible | Writing Between Pauses

Very rarely do I answer individual “reader” questions on my blog. It’s not because I don’t want to, but because very rarely are the questions people ask me something that I think can apply to most people. When it comes to blogging, I try to keep things applicable across the board so that as many people can find answers as possible.

But sometimes, I get a question that is so universal, I realize I’ve been neglecting writing about it.

Probably the number one question I get—from family and friends, in Twitter DMs, on Instagram, and in blog comments—is this: my foundation looks terrible sometimes. What am I doing wrong?

If you’re someone who wears foundation, you’ve undoubtedly had a moment where you’ve glanced in a mirror and thought, holy shit, what have I done to my face?

For me, it’s always in the tiny mirror in my car. Suddenly in natural light, I’ll notice how orange I look, or how splotchy, or how dry. It’s not flattering and often hard to fix on the fly while out-and-about.

So this question is about those moments: what’s gone wrong and how can you keep it from happening?

Potential Issue #1: Tools

Oftentimes, foundation that goes bad (in terms of: being splotchy, looking like a mask, or being oddly textured on the skin) is a matter of the tool that was used to apply it. Using the right tool for the right type of foundation is key and often requires a little bit of trial and error, what you prefer, and your skin’s texture. (That is: I’m not going to prescribe a specific tool for a specific type of foundation because it can be really variable.)

However, one really key aspect of any foundation tool is this: it has to be clean. So wash your foundation brush or sponge often (at least once a week) and let it dry completely. Always used a beauty blender-like sponge damp (not wet, not dry).

Play around with the tools you use to see what is causing the problem. I have found that using a foundation brush, then a damp make up sponge gives me the best texture, as well as easier application—that’s just what works best for me.

Potential Issue #2: Foundation Formula

Some foundations just don’t work on certain skin types. It doesn’t mean there is anything wrong with the foundation or your skin. It’s just the way the cookie crumbles, after all. A prime example: a lot of people with dry skin simply can’t use the Fenty Beauty foundation. It doesn’t mean that it is a bad foundation or that no one should use it; it’s just a matter of being incompatible skin types and formulas.

If you find that your foundation separates, disappears, or oxidizes, it’s just a bad formula for your skin type.

If you find that your foundation makes you look drier than the Sahara, makes your skin feel and look tight, and is more like a mask than anything else, it’s just a bad formula for your skin type.

Finding a foundation that matches your skin (both in tone, texture, and type) can be a long and somewhat arduous process. But here’s my advice: take a skin quiz on Sephora or Ulta, go in to the store, and ask for some samples. It’s the only way to really test a lot of foundations and see how they wear on your sin. That’s what I did for this blog post on foundation matching and it helped me find my perfect match: Too Faced Peach Perfect Foundation.

Potential Issue #3: Incompatible Products

If your foundation separates, disappears, oxidizes, or otherwise looks like trash really soon after applying, there might be another culprit: your baking powder or your primer. Or both.

When wearing foundation, I often recommend wearing it once without primer and just powder. Once with primer and no powder. Once without anything. And then, once with both. (You can do this, obviously, on days when you’re just at home.) This will help give you an idea of whether your products are even compatible.

Some primers just don’t play nice with certain foundations, depending on their chemical make up. This is beyond my skill level; if you’re better at science than me, you can totally research this further. But some primers don’t work with every foundation (and they, like foundations, don’t work on every skin type). So testing everything separately to see how it plays with your foundation can help you figure out if it’s the foundation itself that doesn’t fit your skin type or if your primer is causing your foundation go bad.

With powder, some are too heavy for certain foundations and can either whisk the foundation away when you brush or pat it on. Or, they turn grayish. Again, this is just a matter of the chemical compounds not playing nice together. It’s funny to think that every time we put on make up, we’re working with chemistry in a small way: we’re layering our skin (which has its own oils, of course) with multiple different chemical make ups, and sometimes they just don’t work together.

Potential Issue #4: Expired Products

If you use foundation really slowly, you might notice that after a while, it starts to look different.

When I was in college, I went through a phase of leaving my foundation bottle open. It dried it out and made it more mattifying. (This was back when I was using basic Covergirl foundation. Not my best moment, surely.) This was not great for the product itself, but I liked how it looked on. However, after a while, it also started to smell really bad. Why? Because my foundation had expired from being left out in the open and from just being kind of old.

I write the date I first open and use something on every make up product I own. (Or, I write it on a list if it’s a smaller package.) Then, I really try to keep to expiration dates on the packaging. You know the little compact looking mark on packages that has a 6m or 12m inside of it? That’s how long you are meant to keep it. For some things, it doesn’t matter—like mascaras—but for foundation, I do try to stick to it.

Expired foundation can be the culprit behind foundation that is separating or oxidizing really bad.

Potential Issue #5: Skincare Issues

Remember how I said when we do our makeup, we are kind of being chemists? This is another example.

I started using a glycolic acid serum that I really like—but I noticed that if I used it before I put on foundation, my foundation would pill. That’s right: instead of laying on my face, it would ball up as I used my brush. No bother, I thought; I’ll just use a sponge. Nope, my foundation was coming off in layers then!

As it turns out, that product just didn’t play nice with my moisturizer or foundation. I had to stop using it if I wanted any of my other products to work.

If you’re noticing problems with your foundation, certain items of your skincare may be the culprit. This is another case where you’re have to test with and without each product to see how it plays with your foundation. If you’ve narrowed down every other factor, this is probably the one—you’ll just have to see what product is making your foundation go off!

My Top 3 Favorite Liquid Lip Formulas

My Top 3 Favorite Liquid Lip Formulas | Writing Between Pauses

Liquid lipsticks are here to stay, it seems. Even as we transition to the trend of glossier lips, I still find most beauty gurus and influencers are using liquid lipsticks as a base—them using gloss on top.

I’m still not a fan of lip gloss. I lived through the early 2000s as a teenager, thank you very much, with my hair nearly semi-permanently attached to my lips thanks to thick, sloppy Victoria’s Secret glosses. I’m not ready to revisit that era, just as I will never revisit low-waisted jeans, peasant tops, or skirts over jeans.

I am, as you probably know, a big fan of a liquid lipstick. Liquid lipstick has all the things I love about lipstick (color payoff, looking put together even when I’ve just rolled out of bed) and corrects all the things I don’t like about lipstick (having to reapply 4000 times before and after eating, risking having it all over my face at any moment).

When it comes to formulas, we all have our favorites. Some people hate a really powedery feeling formula and some people love it. Some people don’t like super drying formulas. And if you’re like me, and you’re getting older, and you find liquid lipsticks feather, you start to get incredibly frustrated by the options out there.

I’ve done the legwork, the research, everything. I’ve tried all the liquid lipsticks I can find and I’m here to tell you my 3 absolute favorite formulas.

But first, let’s talk a bit about my criteria for my favorites.

1) I like a quick drying formula. I don’t like waiting around for my lipstick to dry before I move on.

2) I like long lasting formulas. I should be able to drink coffee and 1) not get it everywhere and 2) not have to reapply afterwards.

3) I like somewhat comfortable formulas. That is, it doesn’t feel like I’ve put a clay mask on my lips.

best liquid lipstick formula

Favorite Formula #1: Wet’n’Wild Liquid Catsuit

If you’ve read my blog before, you know that Wet’n’Wild Liquid Catsuit is one of the best liquid lip formulas… at least in my book. Fast drying? Check. Comfortable? Absolutely. Staying power? Yes. And even better? They cost $5. $5!!! For one of the best liquid lips out there. I’ve written about them a lot before, so I don’t need to say much more except that… if you want the most bang for your buck, get to your nearest Target, Walgreens, or Walmart, and buy at least the shade Rebel Rose.

Favorite Formula #2: Anastasia Beverly Hills

I buy ABH Liquid Lips exclusively at TJ Maxx or Marshalls, because they alway shave a ton. So while I can’t speak to the price range (they’re $20 normally), I can say with confidence that they are one of my favorite formulas. They dry down really fast and are very comfortable. I would actually say the ABH formula is the most comfortable formula of the 3 I’m writing about today. It feels like you don’t even have lipstick on—that’s how comfortable it is. They have great color pay off, of course, and are incredibly long lasting. Plus, the fact that you can often find them for a discount is a huge bonus to me; I’m never one to spend $20 on a lipstick unless it is the holy grail… and these kind of are holy grail liquid lipsticks.

Favorite Formula #3: Too Faced Melted Mattes

When I bought the Christmas set of liquid lipsticks from Too Faced, I didn’t have super high hopes for them. I just really liked the theme. However, they have quickly become some of my favorite liquid lipsticks and the shade Sugar Cookie is actually one of my daily go tos. It’s the perfect pale pink nude. Melted Mattes check all the boxes, of course: they are fast drying; they are long lasting; and they feel relatively comfortable. I do have issues with darker shades, like the Cinnamon Bear shade, feathering—so I make sure to use a liner. However, at $21 a pop, they aren’t something I buy a lot of. However, if you can find gift sets, you often get deluxe sample size (which are plenty big) for a pretty affordable price. I always keep my eyes peeled for them!

3 Must-Have Products for Gentle Exfoliation

3 Must-Have Products for Gentle Exfoliation | Writing Between Pauses

As far as exfoliation goes, I think I’ve worked my way through all the stages.

Stage 1: This is where we all start. Our skin is relatively perfect, but maybe we’ve recently turned 13 and started reading Seventeen. Suddenly, we become aware that something is wrong with our skin and we need to scrub all the layers off. That ad for St. Ive’s Apricot Scrub starts looking mighty tempting and plus, it’s only like $5, so your mom will definitely buy it for you. Or maybe she still has a tube of it in the shower—bonus! You start using it religiously, even though it kind of hurts. It does smell good, at least.

Stage 2: we’ve grown, we’ve evolved, and yet that tube of St. Ive’s is still mocking us, calling our names. But it leaves our skin so smooth. We read blog posts about other things and have our doubts… but St. Ive’s… so smooth.

Stage 3: We throw away the St. Ives and try to find something else. It might the most expensive thing the sales associate at Sephora recommends to us. We aren’t sure if it is any better than St. Ive’s, but hey, it’s worth a shot.

Stage 4: We stop exfoliating because we read a bunch of scary articles about it. Microtears!? Advanced aging?! No thanks.

Stage 5: We accept exfoliating—a gentler, kinder form of exfoliating—back into our lives.


For years, I read things saying that exfoliating would make my acne worse, or better. That it would worsen my scarring, or make it better. I never felt like I had a straight answer.

If you’re looking for a straight answer, I’m not sure I can provide one. Here’s what I can say: if exfoliating in any way makes you feel like your skin is better, why not do it? If you don’t connect exfoliating to any ill effects, go for it. Some skin types will benefit more from exfoliating than others—and deciding if it is for you is entirely personal.

So, when it comes to gentle exfoliating, I’ve narrowed it down to 3 products that I can’t live without. If you’re looking to up your exfoliation routine, I recommend these. And the best part? They’re all highly affordable.

1. A Face Sponge or Brush

I use a charcoal konjac sponge I got at TJ Maxx to gently exfoliating with my favorite cleanser a few times a week. It was about $2.99 if I remember right, but you can find very similar products at Wal-mart, Ulta, Target, and much more—all for under $10, mostly under $5. I have used a face brush in the past (a $6 one from Sephora brand) and while I liked it, I found it was much more difficult to keep clean. No matter what, it should be something that’s not super harsh.

Exfoliating products for winter

2. A Gentle Exfoliating Product

I love my Holika Holika Pig Nose exfoliator; as I said when I reviewed it, it’s an acidic exfoliator that doesn’t require scrubbing, but rather helps to pull dead skin away. I use this a little less than once a week now—maybe once every 10 days or so—on my T-zone and chin. It has made a huge difference in the appearance of my acne scars, as well as my pores. It’s one of my favorite products of 2018! It only costs about $2.99 if you can find it at TJ Maxx or Marshalls, but you can also order it from Amazon quite affordably.

Other products might work better for you. I’m quite intrigued by the new L’Oreal Pure Sugar scrubs, so they’re on my list to try. One thing I do try to avoid is 1) plastic microbeads, as they are terrible for the environment and 2) anything with walnut shells, as they are too harsh to use on my skin.

3. A Great Cleanser

We tend of think of exfoliating as something we should do only once a week… because that’s what we’ve been told. But the truth is, when you wash your face, you exfoliate. It’s just a natural part of the process. We know now that that thing about hot water opening pores and cold water closing them is a myth (I know, that’s a hard one to shake!); and we also know that we don’t need to physically scrub our skin all the time for it to be properly exfoliating. A combination of good daily cleansing, acidic exfoliation, and using a sponge a few times a week can help us have great skin that doesn’t get dull due to congested or dead skin.

I really like Pure Clay cleansers, as well as the Body Shop’s Tea Tree Oil facial cleanser. One important thing I started doing in 2018? Washing my face for 60 seconds each night. Yes, that’s right: 60 seconds. On average, we tend to only wash our faces for 15 seconds, perhaps 20. But if you spend a little more time rubbing small circles with your fingers over you skin with your cleanser for 60 seconds, you’ll notice a huge difference in your skin’s texture. Trust me.

I Tried Personalized Shampoo from Formulate & It Changed My Life*

I Tried Personalized Shampoo from Formulate & It Changed My Life | Writing Between Pauses

When I first received an email from Formulate several weeks ago, I was immediately excited. I had been looking into the myriad of personalized shampoos available—I knew that my scalp issues meant I needed something personalized, but I was put off initially by the cost of other brands I found, as well as their often wishy-washy stance about being cruelty-free.

But from the moment Caroline from Formulate emailed me, Formulate felt different. Firstly, they’re very upfront about their cruelty-free and vegan stance, as well as being paraben free, sulfate free, dye free, and preservative free. I was really excited to try Formulate and I especially couldn’t wait to start washing my hair with the shampoo they sent me.

The process of creating my shampoo (and conditioner, of course) was really easy. I actually filmed it on Instagram (you can watch it in the Formulate highlight!). I love a good quiz, so walking through picking what I wanted from shampoo, telling them about my hair and scalp, and more was not only fun, but helped me think about what I want from a shampoo.

I don’t know about you guys, but sometimes I get so caught up in wanting my hair to look a certain way that I forget other things—like nourishing my scalp, preventing split ends, and preventing breakage. It was nice to be able to pick 5 things for my shampoo and conditioner to really target. The quiz and sign up process took me maybe 15-20 minutes.

The most interesting part of the quiz was when it asked for my zip code. This was so they could pinpoint where I live and adjust my formulation to the humidity, average temperature, and climate of where I live.

You know what else was nice? Being able to pick from a bunch of beautiful scents—as well as the strength of the scent. How a shampoo smells is really important to me, but I always find myself disappointed when I use a shampoo that smells great, but it doesn’t make my hair smell like that later.

I picked the Verdant scent for my shampoo from Formulate; Verdant is a combination of lilies, grass, and Eucalyptus. It’s flowery and herby at the same time. I also picked Strong scent—hoping that it would make my hair smell 24/7 like lilies. (Spoiler alert: it totally does!)

It took about two weeks for my shampoo and conditioner to arrive from Formulate. In the age of Amazon 2-day shipping, that feels like a long time. However, it gives the scientists at Formulate time to look over your quiz, analyze where you live, and make the best possible shampoo and conditioner for you.

The box my shampoo arrived in was beautiful. The shampoo bottles themselves look really cute. There is something so shallow about aesthetic packaging, but I think we all prefer things that look good, right? They also came with two pumps to use, which is good, because I am not good at pouring shampoo! Another cool thing about the bottle design is that both shampoo and conditioner have Braille on the side. You so rarely see this in beauty products, so it is nice to see packaging being adjusted for those who require Braille in their daily lives.

From the first use, the thing I noticed the most was the smell! I’m so glad I went with Verdant; I absolutely love the smell of it. And the smell sticks around for a very long time. (I did, of course, pick Strong for a reason!)

The second thing I noticed was that this isn’t a shampoo that foams up. Like most sulfate free shampoos, it feels more like a thin conditioner. I’ll be sharing some tips next week about washing your hair with sulfate free shampoo, because, trust me, there is a small learning curve! If you’re used to standard shampoos, there is a period of time with sulfate free shampoos where your hair has to adjust to a new formula. I’ll talk about that in my blog post next week, so stay tuned!

(Don’t forget to sign up to win your own formulation! Click here to enter.)

Formulate shampoo review

The Benefits to My (Poor, Sensitive, Abused) Scalp

If you’ve read my blog for a long time, you know that I’ve really struggled with my scalp for the last year or so. It’s been a hell of a journey: I’ve tried just about every shampoo and conditioner under the sun. I spend more money on oils for my scalp than skincare. I’ve tried hyaluronic acid serums on my scalp (helped!), I’ve spent a small fortune on medicated shampoos, and my dermatologist is honestly really sick of looking at my scalp and saying, “I think it’s just dry.”

When I tell you that my shampoo from Formulate has fixed my scalp, it feels a little bit like an exaggeration, but it’s not. One of the big factors I selected for my shampoo was scalp health; I have a very sensitive, dry scalp that has gone through some trauma the last year and it needs healed. So Formulate chose vitamin E oil, along with other soothing ingredients, to help heal my scalp. And it did! From the very first wash, my scalp felt less tight and itchy. After about two weeks, my scalp wasn’t flaky anymore. I’ve had a few flairs, probably from dry weather and me deciding to use a hair mask that I knew would probably make my scalp itch, but nothing like the past. I can honestly say that that is life changing. Not having an itchy, flaky scalp all the time is a huge deal.

Aside from my beautiful scalp (prettiest scalp on the block, if you will!), I’ve also noticed a huge change in my hair texture. I’ve always had very silky, fine straight hair. It has a little bit of a wave to it in some spots; my hairdressers have always described this as “straight-relaxed” hair, meaning it basically conforms to the shape of my head. (A nice description, I think.)

Since I started using my shampoo from Formulate, I’ve noticed a major change in my hair texture. I’ve always had a lot of hair—like an absurd amount, despite how fine it is—but it was pretty lank and took a lot of effort for it to have volume. I’ve had a ton of volume since I started using Formulate and my hair feels a little more wavier—less pin straight and more relaxed, and it doesn’t conform to my head so much. (I know that’s a weird way to phrase that, but how else do I describe that!?) I can only speak for people who have straight hair, but this is a huge improvement for me.

Is Formulate Shampoo Good

Wash Less, With Better Hair

Over the past few years, I’ve been trying to reduce the number of times I wash my hair per week. I know it’s drilled into us that maximum cleanliness means showering (and washing your hair) every single day. However, that can often cause, or make worse, scalp problems, as well as dry out our hair. (And it goes without saying: this all totally depends on your hair type!) I have managed to get down to 3 washes a week, but I’d like to reduce to about 2 washes a week because I find that’s when my scalp and hair feels best.

The great thing about Formulate is I feel like it helps me stretch the time between washes. My hair stays shiny and clean feeling for a lot longer, because I don’t have that residue build up caused by sulfates in shampoo. My hair is generally less oily, but still moisturized and pretty for several days in a row. No oily hair days!

As I mentioned, there are definitely some growing pains associated with going sulfate-free. I read a lot of articles as I started using Formulate and I will share more about this in a follow up blog post, but the number one thing I learned is that it will take several washes (about 3-4 weeks worth) for your hair to feel “normal” again. Using sulfate-free shampoo isn’t like using regular shampoo, but it does leave your hair just as clean (promise).

I can honestly say that the improvement to my scalp has made me want to never switch from Formulate! That alone is enough, but the scent, the way my hair looks and feels, the vegan and cruelty-free stance… it all makes me want to support a great company like Formulate.

The Second Formulation

I loved my Formulate shampoo and conditioner from that first use (honestly, the scalp benefits alone! I know I keep mentioning it, but it really is so huge for me). However, there were a few things I wanted tweaked.

That’s what is so great about Formulate. They work with you really closely in the first few weeks to help ensure that the shampoo and conditioner you use is perfect for you. The more you pay for a shampoo, the better your results often are; as someone who loves saving money, I’ve realized over time that… you pay for what you get, especially if you have a sensitive scalp or difficult hair! Formulate really makes your money go far though.

My initial feedback for Formulate was that I felt like my conditioner weighed my hair down a little bit and left a residue, specifically on the back of my head, that was hard to rinse. I also felt like my shampoo was just a little too drying on my hair. I sent my feedback in and a few days later, a second set of shampoo and conditioner was on its way to me. And the changes were HUGE! No more residue from my conditioner and the shampoo left my hair feeling silky and hydrated again. I’m so happy with my results from Formulate. And I know that if i start noticing any other issues, I can send them a note and get my shampoo and conditioner tweaked to improve.

Personalized shampoo review

This all leads me to the most exciting part of this collaboration with Formulate: I have a giveaway going!

You can enter to win your own formulation by clicking the button below. You’ll be able to personalize your own shampoo and conditioner and get the hair you’ve always dreamed of!

Have you ever tried customized shampoo and conditioner? What did you think?

Disclaimer: As indicated by the asterisk (*) in the title of this post, this post is a collaboration between Formulate and myself. I received product free in exchange for an honest review and promotion on social media. However, all opinions remain my own! Posts like these help me keep the lights on here at Writing Between Pauses. To learn more about my disclosure policy, click here.