5 Best Products from e.l.f. Cosmetics

best elf drugstore products make up beauty

Let’s talk drugstore products for a minute. 

I remember, years ago, when I was 12 or 13 and just starting to get into make up, that drugstore make up was all I really knew. To me, make up was either from the drugstore or from somewhere like Clinique. Clinique felt elderly, a little geriatric (and at the time, it was). 

In the last few years, make up has had kind of a renaissance: brands like Clinique have been reborn and are more popular than ever, alongside other high end brands, like Kat Von D, Marc Jacobs Beauty, and others. And drugstore make up, at the same time, has kind of grown up too. 

No more cheap Bonne Bell chapsticks and Wet’n’Wild eyeshadow that looked purely iridescent on your eyelids. No cheap, oily lipsticks and lip glosses that got everywhere in your purse. No, drugstore make up is more expensive than it used to be (without being as expensive as high end competitors) and it’s way better than it used to be. 

Which is where e.l.f. cosmetics comes in. E.l.f. is one of those brands that everyone knows: they’re at Target; they’re super cheap; and they’re known for being super, super cheap. So cheap you actually wonder just how they do it. So cheap that people tend not to buy it because they think it will suck. 

E.l.f. is one of those brands that people overlook and they shouldn’t. (I would argue Wet’n’Wild, despite its reputation as the make up of my childhood, is another amazing brand.) One reason why both e.l.f and Wet’n’Wild rock is that they are entirely cruelty free and have a pretty large selection of vegan products as well. 

Without further ago, I want to share my 5 favorite e.l.f. products. 

1. Natural Glow Face Palette in Fresh & Flawless

This is the palette pictured in my photo. If you’re wondering, to me, it’s the perfect travel palette. It has two blush colors: a cool-toned peachy pink and a crisp, rosy pink color. Both are very pigmented without making you look like a kewpie doll. It also has a bronzer, which is a great cool-toned ashy contouring color. The last square is the slightly lavender-tinted highlight; it’s not the most “blinding” highlight (as the YouTube beauty gurus would say), but it does the job. This is a great travel palette. The price? $8. 

2. Contour Palette

I wish this had a funkier name, but honestly, it doesn’t really need it. This is the first contour palette I ever bought and, at first, I was disappointed that it wasn’t cream. (I thought it was. I’m terrible at reading, I guess.) I’d only seen cream contours used in Instagram videos and wanted to try them. I ended up giving this a whirl and, honestly, this is another perfect palette for traveling. It has a killer highlight shade, a great brightening shade, and then two great contour shades; I used the lighter shade for most of my face and then the darker shade for my jawline (sparingly). I’ve been using it for 2 years now and, honestly, I’ll never buy another contour palette. I just don’t need it. And guess what? It’s $6. 

3. Aqua Beauty Blush & Bronzer duos

I’m kind of a sucker for blushes. For a long time, I only bought pink-toned blushes, but recently, I’ve been gravitating towards more cool-toned violets and peach shades. What’s up with that? This blush in Bronzed Peach is one of the prettiest colors I’ve ever seen: the bronzer is great for along your hairline and to use instead of contouring. And the blush? Silky, smooth, super pigmented, the perfect blush, honestly. Don’t buy those expensive Too Faced peach blushes; get this baby instead. It’s only $6. Buy two! (The Bronzed Violet is killer too.) 

4. Baked Eyeshadow Palette

Eyeshadow is the one area of drugstore beauty that is still lagging behind. Foundations are great; face products are great; but eyeshadows? Eyeshadow formulas are hard to do, I guess, because I’m still struggling to find great drug store eye products. That being said, I love (love) my Baked Eyeshadow Palette from elf. I have the Texas palette, but I’m really wishing I had the California palette. These eyeshadows are pretty pigmented (with a fair amount of fallout, but again, not bad for drugstore) and when you use a wet brush or your finger… girl, stand back. And it’s $10. Buy all three palettes and you still haven’t paid as much as you would for one Too Faced palette. 

5. Brushes

Listen: brushes are a necessary evil when it comes to make up. I hate buying them because they can be so expensive. But, e.l.f. brushes are so affordable and honestly, work so good. I love the Contouring Brush, the Ultimately Blending brush (perfect for blending out your contour or blush if you get a little heavy-handed), the Blush Brush, and the Total Face Brush (perfect for swiping off excess powder after baking). All of these brushes are less than $7 a piece. Considering a single Morphe brush can be $14+, that’s a bargain. 
Beauty Review: eSalon Shampoo & an Update

esalon shampoo review

A few months ago, I wrote a not-entirely-positive review of eSalon. You can read that here. 

Regardless of my experience, I have gotten a ton (and I mean, a ton) of referral credits because of that blog post. As they piled up, I started to think, “Maybe I should just use these.” 

Ultimately, my issue with eSalon came down to false advertising (don’t say you have violet undertone hair dye if you don’t use blue dye!) instead of a subpar product. eSalon is basically slightly expensive drug store dye; you pay for the extras (that stain guard, baby). I don’t find the quality many different from a box of Garnier Fructis, to be honest. 

That being said, because of all those credits, I’ve ordered a lot from eSalon in the past few months. Like, a lot more than I ever thought I would. Here’s what I’ve ordered. 

1. Hair dye in “chocolate brown” 

To return my hair to my original color (and not the craptastic red shade I’d ended up with the first time), I ordered a hair dye in… dark brown. I sent them a photo of my hair pre-dye incident and they matched it pretty close. My hair is dark, very dark, almost black, but thanks to that red dye, had faded to a weird wishy-washy pale brown. Not cute. It’s back to its original luster now, but like with my past review, even though eSalon says they cover grays for 8 weeks, mine are usually showing by 3-4 weeks. Not ideal, but honestly, not awful. 

2. eSalon’s Heart Lock It Color Care Shampoo and Love Unconditionally Color Care Conditioner

Listen, I really liked the samples of these shampoos I received in my first order, even though the color sucked. So with some credits, I ordered full size bottles. They’re pretty expensive for their size, but they’ve lasted since March, so I guess it’s not the worst. The shampoo and conditioner are bomb and I definitely feel like they’ve helped keep my hair color around longer.

3. Big Love Color Care Volumizing Shampoo

I’m always looking to add volume to my very flat hair, so as my first bottle of Heart Lock It dwindles down, I ordered the volumizing version of their shampoo. I actually love it; it works insanely well. And the bottle matches my bathroom decor so much better. 

4. Get Lifted Root Lift Spray

Because I opted out of the matching volumizing conditioner (since I’m only halfway through my first bottle), I ordered this instead. I love root lifting spray and this one fit the bill because it won’t damage my hair color. I find it works pretty well. Not as good as my tried-and-true John Frieda root lifter… but pretty good. 

If you'd like to try eSalon, you can use my referral link to receive $10 off your first hair color order.

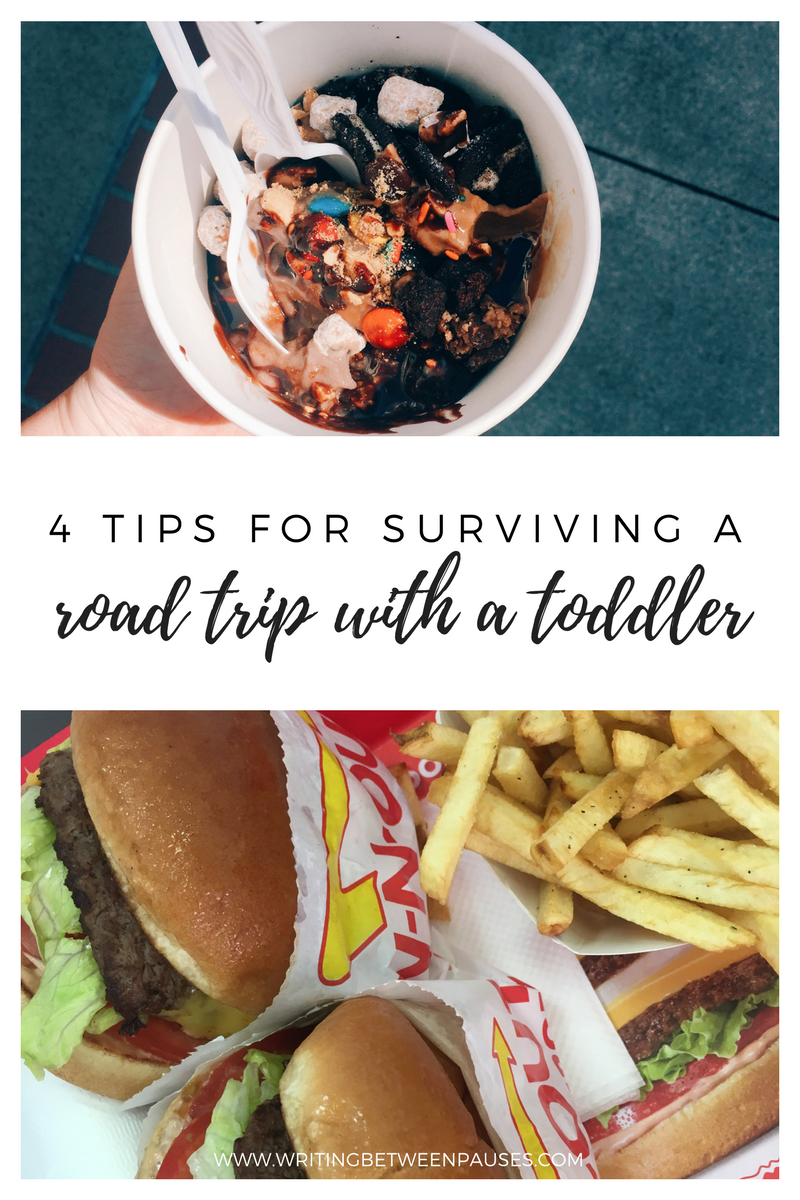
4 Tips for Surviving a Road Trip with a Toddler

road trip with toddler

The trip to Disneyland, from where we live in Oregon, takes about 15 or 16 hours, give or take. 

15 or 16 hours, in a car, with a young toddler, can be torture. We had done a few road trips to places like central Oregon and Idaho, but nothing quite like two solid days in the car through the entirety of California. 

A few of my friends suggested driving at night so that Forrest would sleep. A few of them actually did this and had it backfire around the same time as our trip. The truth is, your toddler is not going to sleep great in the car, even if they normally sleep amazing in the car. If they're going to be in that seat for 14+ hours, they aren't going to sleep there very well. So prepare yourself for minimal naps and early bedtimes in hotels. 

We made it though, with minimal tantrums. How did we do it? Here are our 4 tips. 

1. Buy a DVD player for the car. 

Listen, I know. I always said I would never. But then my son reached toddler age and, you know what? Sometimes, you need to just distract them. A DVD player is perfect. We brought a collection of DVDs for him: Zootopia, Peter Pan, a Sesame Street DVD, a Barney DVD, and Toy Story. By the end of the trip, he was singing the theme from Zootopia whenever he had the chance. 

2. Bring snacks. 

When all else failed, we handed Forrest something to snack on. He is particularly fond of cereal bars, so we brought those, of course, as well as Goldfish, bananas, and apple juice. While sometimes he just made a mess (in the last 20 minutes driving home, he opened his milk cup, dumped it all over himself and the seat, and then mashed a cereal bar into it); otherwise, it was exactly what he needed to get over a tantrum. The first rule of toddlers is, if you can, distract them.   

3. Have someone ride in the back with him or her. 

For us, this was big: sometimes, it seemed like he was just lonely in the backseat. So, we would rearrange things and my husband would ride in the backseat with him. They would read books, watch Barney together, or just point out things along the road. 

4. Stop frequently. 

I hate stopping during road trips. I am goal oriented and, often, for me the goal is getting to our location. But with a toddler, it’s good to get out and walk around. We stopped at every other view point or rest area and got out just to stretch our legs; Forrest would walk around with his safety harness. We’d grab a snack or a soda and sit outside for just a few minutes. 

5 Tips for Staying Cool This Summer

stay cool no air conditioner

Recently on Twitter, I started a thread about staying cool in the summer when you don’t have air conditioning (or don’t feel like you can afford to run your A/C all the time).

Back in 2010, I lived in an apartment in Caldwell, Idaho. That summer, from late June until roughly October, it was over 100 every single day. Seriously. Over 100. I had a rickety air conditioning unit in my apartment, but I was terrified of using it. I did so occasionally in the evenings, but never for more than an hour. The rest of the time, I found creative ways to stay cool. I shared abbreviated versions of these in my Twitter thread here.

I thought I’d expand on my tips to better help my fellow college students or recent graduates out there. But I do want to share a disclaimer: if it is legitimately hot in your area of the world and the temperatures inside your home or apartment are reaching dangerously high, just turn on the A/C. It’s truly not worth damaging to health to avoid a bill. Local social services offices can and will help pay high energy bills. 

That being said, here are a few tips for beating the heat and avoiding the A/C. 

1. Make sure all your windows are covered. 

I ended up buying black out window coverings back in 2010; they now hang in my son’s room, conveniently. But at the time, I bought them because they help weatherproof your home: they keep out both the brightest rays of the sun and keep out the cold in the winter. It’s a win-win. As much as I love having open windows, having black out curtains is the first step to keeping your house cool. 

2. Make sure you weather proof. 

In my older apartment, there were some major gaps in the door frames. I mean, major. I could hear every car that went by, every conversation of people walking on the sidewalk. Seriously. I bought a roll of weatherproofing strip at Home Depot for around $8 and added it to my doorframe. This helps keep hot air out and the cooler air inside. It’s also great for the winter because, of course, it keeps cool air out. 

3. Hang up wet towels. 

This is going to sound bizarre, but stick with me: when you hang up wet towels to air dry, the air around them cools. Seriously, there are articles about this. I frequently did this in my apartment and aimed fans at them. And, really, it worked. 

4. Get the hot air out. 

Whenever I got home from work, back in the day, my apartment would be the worst. Because I wasn’t home, it was stagnant and super hot. I would aim one fan out my kitchen window (the side where the sun always hit and it was the hottest) and one fan in my bedroom window (the shady side of the house): this created a cross breeze through the apartment, bringing in the air from the shady side and pushing out the hot air. It worked a charm. 

5. Wear wet socks. 

You might think I’ve gone crazy, but this was truly the best thing I did to cool down back in the day. I would get a pair of socks and get them really wet, then wring them out; then I wore them around the house. Yes, you’ll leave wet foot prints everywhere, but honestly, it was worth it. At night, I would sleep with a fan aimed at my feet (wearing wet socks) and stay super cool the entire night. Don’t believe me? Try it, I promise it will change your life. 

5 Outfits for the 4th of July

4th of july outfit ideas inspiration

I love writing these posts. You know why? Because I don’t really dress fashionably anymore, but I still pay attention to fashion. I use Polypore on my phone nearly every day, follow fashion and OOTD Instagram accounts, and closely monitor the big trends. I just don’t dress fashionably myself anymore: beyond t-shirts, jeans, and leggings, I don’t wear much fancy anymore. And when I do, it’s the same thing I always wear for fancy events. 

This is a very long way of saying: these posts allow me to share all the outfits I collect for when I have the time and energy to dress super fashionably again. 

At least I’m honest, right? 

For non-Americans, the 4th of July can feel a little confusing. It’s a pretty big holiday here and we tend to take it very seriously. It’s all about barbecues, fireworks, and dressing in red, white, and blue. As well, for most of the country, the 4th of July marks the true start of the summer: in Oregon, it’s usually rainy up until early July, so it’s either still rainy or our first warm day. (Not so true this year or the last few!) However, for most of the country, it’s swelteringly hot by July, so outfits have to include the colors of our flag, but also be designed for being super, duper sweaty. 

With that in mind, these are 5 outfits for some 4th of July inspiration. 

1. The Traditionalist 

Plain and simple, this is a very classic 4th of July outfit and perfect for just about everyone. Whether you’re a single lady or a mom, it’s the perfect summer outfit. It’s also great for if you’re in an area where it isn’t very warm yet. Some cool jeans with a basic tank top, some on-trend sliders, and a cute bag and sunnies—it really doesn’t get more Americana. 

2. The Over-the-Top

Do you love the 4th of July? Like, go to a parade, a fair, fireworks, every barbecue you can, the lake, and everywhere in between love? Then this is your outfit. It’s literal. A cute, breezy red top with a very traditional, A-line polka dot skirt screams old school American; combine with red-white-and-blue nail polish, a cute bracelet, and some star-shaped earrings, and you might as well be the parade. 

3. The Understated

If you don’t want to seem too, you know, into it, this is the perfect outfit. I also love the old school uniform vibe. A cute blue-and-white checked skirt with a slouchy-and-still-breezy button up top, red scarf and your favorite tennis shoes are perfect for a casual barbecue or going to watch the fireworks. 

4. The It-Is-So-Hot-I-Might-Die

Ok, so you’re not going for fashion. This is purely functional. Where you are, it’s hot. Like, step outside and feel like you’ve somehow gotten trapped underneath a huge iron hot. Cute shorts and a tank top are all that’s going to save you; add a cardigan for when the sun goes down and it starts to get cold. But otherwise, keep it simple with your hair up (those barrettes!), some scrappy sandals, and a cool bag. 

5. The Girly-Girl

If it’s hot where you are (like with the outfit above), this is another great option if you aren’t comfortable wearing short-shorts out everywhere. A cute, breezy, crocheted sundress, a big straw hat to protect that beautiful skin, and some scrappy sandals are juuuuuust patriotic enough to get by. Add some red earrings and maybe a blue necklace to complete the look. 

Don't forget to sign up for my newsletter!

Everything You Need for Disneyland with a Toddler (& Nothing You Don't)

packing for disneyland with toddler

Earlier this week, I shared my three tips for making Disneyland with a toddler just a little more enjoyable. (At least, what I will remember for next time! You live and learn, after all.) Now, it's time to talk about what, exactly, you should pack. 

When we first started planning our trip, I downloaded every Disneyland packing list I could find. I devoured packing lists. I read blog post after blog post. I made lists. I bought clear plastic containers at Wal-Mart to pack snacks and more in. I organized and fretted and bought extras. 

Here's the truth: we didn't touch maybe 75% of what I packed. It was just extra. Totally useless. We didn't need it. Maybe in an emergency, we would have needed it, but realistically, in the park, I wouldn't have access to my two plastic tote bins of medical supplies, band aids, life vests, and more. I would only have what was in my very stylish fanny pack and the stroller. 

This leads me to a very stark reality: everyone overpacks for Disneyland. We all do it. Realistically, if you go in the summer (and, if you can, do try to avoid it), it's going to be too hot to wear anything cute and you're going to sweat all over it anyway. Even more realistically, bags get searched going into the park area, so the more bags you have, the more you get searched. 

While going through security one day, the guard complimented me on the fact that I only had my fanny pack and Forrest's small backpack (which is actually a leash, but we'll get to that); little did he know that, originally, I had planned on bringing a cooler, a backpack, and way more crap... only to narrow it down after one very long day. 

The truth is, Disney makes everything available to you. At a price, of course. But what you gain is the ability to spend less time dealing with all the stuff you brought into the parks and more time just enjoying life there. 

With that in mind, this is my list of the essentials you need for Disneyland. 

  • Water. If you're driving, buy a Costco pack before you head down. If you fly, get an Uber to Costco in Anaheim and buy a pack there. Put as many bottles in the fridge as will fit.
  • 1 small bag. I'm talking small here. I bought this fanny pack (or bum bag, if you're British and think I'm very gross) before we left and I don't regret it. I looked extremely frumpy, but I was hands free. It had enough room to hold my ticket, my debit card and license, my cash, sunscreen, lip balm, and a few extra hair ties. I can also use it for hiking in the future.  
  • Sunscreen. Seriously. Just buy 3-4 bottles of sunscreen and take at least one in the park every day. I saw so many sunburned children and it broke my heart. Reapply every 90 minutes. 
  • Two snacks. Not a box of snacks. Not every snack ever. TWO SNACKS. Every day in the park, I packed my son a fig bar (his favorite) and a packet of applesauce. He always ate both, plus other snacks that we bought ourselves. 
  • For younger children: a bottle & formula; a water cup; diapers; and a pack of wipes. I bought travel packs of wipes to keep in Forrest's backpack, which we used as our "diaper bag." 
  • A "safety harness." Some people let their young toddlers run freely in the park because, ultimately, it is safe. However, Forrest is a runner and if I set him down, he would be halfway across the state if I let him. This is why we use a leash. This is the one we have. It gave Forrest some freedom in the park, without me having a panic attack that he was running straight at a pretzel cart. 

That's it. That's all you need. I know, right? Michelle, where's the Motrin? What about the band aids? A first aid kit? Ponchos? Jackets? Changes of clothes? Girl, leave that in the hotel room. If you really need it, you can go get it. If it's urgent, Disneyland does have first aid centers where you can get band aids. If you have small children, they have fully stocked changing rooms in the Baby Care Center on Main Street USA. You don't need to bring your whole kitchen in the park. 

5 Summer Accessories Under $20

summer accessories under $20

I ran a poll recently on Twitter asking what post you wanted to see next: summer accessories, a Disney travel journal, or 4th of July outfits. Most people, it seemed, wanted summer accessories. 

My husband helped me with this by making (surprisingly helpful) suggestions. Without further ado, here are 5 practical, affordable accessories for this summer.

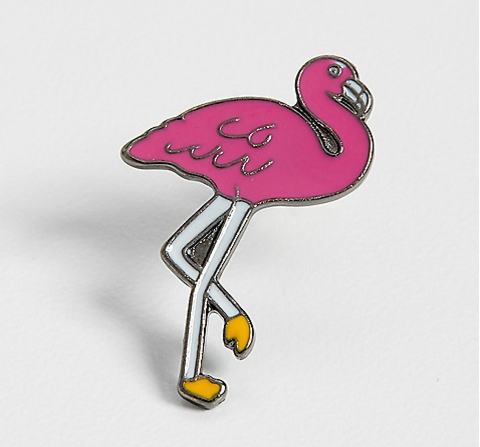
1. Flamingo pin, $3.50 from Maurices

I love flamingoes, so I'm really excited they're still on-trend this summer. This pin is perfect for sprucing up a plain t-shirt or tank top, or adding to a collection on your denim jacket, bag, or hat. Summery, sweet, and simple. And only $3.50!

2. Cactus Water Bottle, $11.50, from ASOS

Being hydrated is important year round, but this water bottle, at a hyper affordable $11.50, is perfect for the summer time. Over the past few months I've become obsessed with cactus print (as has the rest of the world) so this really hits the spot. 

3. Cross Body Bag, $18, from Forever 21

I love a cross body bag for vacations and this one is really perfect. It's big enough to carry a small wallet and your phone, plus sun screen, lip balm, and other accessories. But not so big that you feel like you're toting around half your house. It's available in 3 colors, but I love this dark, rusty red. At $18, it's the perfect price for the summer.  

4. Floral Baseball Hat, $12.50, from Maurices 

Baseball hats are in this summer. This one from Maurices is particularly cute. I'm a sucker for floral print, what can I say? And at $12.50, you can get in on the trend without committing to something more expensive. 

5. American Flag print iPhone case, $7.90, from Forever 21 

"Everyone needs a phone case," my husband said. He's not wrong. I love getting new, fun phone cases and Forever 21 always has so many options. I love this one for the 4th of July; it's cheeky, summery, and fun without being "bald eagle crying on a mountain top" over-the-top Americana. And at $7.90 you can throw a few others in your cart too. 

3 Tips for Taking Your Toddler to Disneyland

disneyland with a toddler

Hi, I'm Michelle and I kind of royally screwed up a vacation to Disneyland. 

Ok, hear me out: I really thought my toddler would enjoy it. As I wrote in my newsletter over the weekend (oh, you don't get my newsletter? You can sign up here), I made the terrible mistake of assuming that my child was essentially a very small clone of myself and would enjoy everything I do. 

Well, lesson learned: you gotta ease your kid into it. You can't just jump on your favorite ride and think they'll be ok with it. Especially if you already know that your toddler is terrified of loud noises and enclosed spaces like elevators. Oops.

In all fairness to my husband and I, we've never really taken a family vacation before. We just didn't know a lot of things. And this trip gave us a chance to figure out how to make the most of even crappy situations. Midway through the second day, I wanted to cry; I felt like I wasn't having fun, like Forrest wasn't having fun. I felt really bummed. Instead of giving in and just calling it a bust and not trying, my husband and I talked it out: we came up with a plan to make our last day in the parks as fun as possible. And you know what? It worked. We really hit our stride. 

So, that's a really long way of saying: we made mistakes; we learned from them; we learned how to have fun regardless. 

This week, I'll also be posting my packing list dos and don'ts, so I won't be mentioning any tips relating to packing in this post. These, however, are my tips for making Disneyland a fun trip--something my husband and I didn't figure out until our last day (which really did redeem the whole trip). 

1. Adjust your expectations.

First and foremost, a toddler cannot and will not experience Disneyland the same way a child, teenager, or even adult does.  Toddlers, especially young toddlers, aren't great at drawing the line between reality and fake yet. To them, a lot of things seem "real" because they don't know any better. So when I took my son on Pirates of the Caribbean, he thought it was real. And terrifying. Can you imagine? 

Toddlers aren't going to want to ride the big thrill rides, or anything extremely dark and loud. To start, stick with the classics: the carousel, It's a Small World, and the Dumbo ride are great. If your toddler is apprehensive, pick a ride they can watch for a while to get a feel for what's going to happen. Also, take advantage of shops, walkthroughs, and character meets. They'll have much more fun with those than most rides. 

2. Download the Disneyland app. 

This really was a lifesaver in the park. The Disneyland app is a place where you can buy and link your tickets and Fast Passes, link your Photopass for character meet and greets, and get a list of waiting times for rides, meet and greets, and restaurants. Seriously. It was great for planning which area to go to next to maximize our time. It's also how we ended up meeting Tinkerbell with zero planning and zero line; we were the first people there! 

3. Establish a good routine.

The maximum amount of time Forrest (age 22 months) could handle in the park was... about 2.5 hours. Yeah, that's it. We got to the parks at 7:30, got in the gates at 8:00, and by 10, he was usually ready for a nap. We would walk back to our room, get him down for a nap, and then go to lunch. We would go back to the park from around 1pm to 3pm, then back to the room again for him to have some chill time: a movie, dinner, and milk, then bedtime at 5:30pm. 

After that, our other family members would stay in the condo with Forrest while Danny and I enjoyed the parks. It was a perfect situation. We got time with our son in the parks and then time with just each other. This won't always be possible for us, but it worked this time. And, hopefully, you'll find a routine that works with you too. You know your child best and you know your child's routine--and for the best vacations, honestly, that should be maintained as much as possible to prevent tantrums.