3 Habits to Stay Organized

3 Habits to Stay Organized | Writing Between Pauses

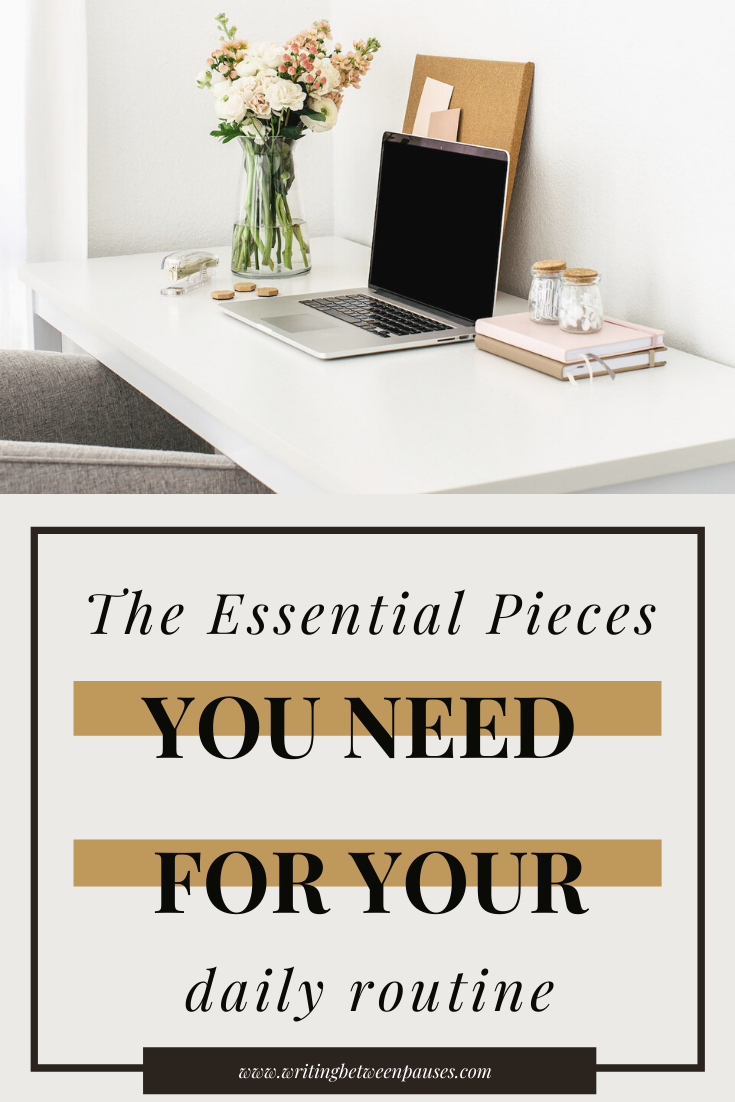
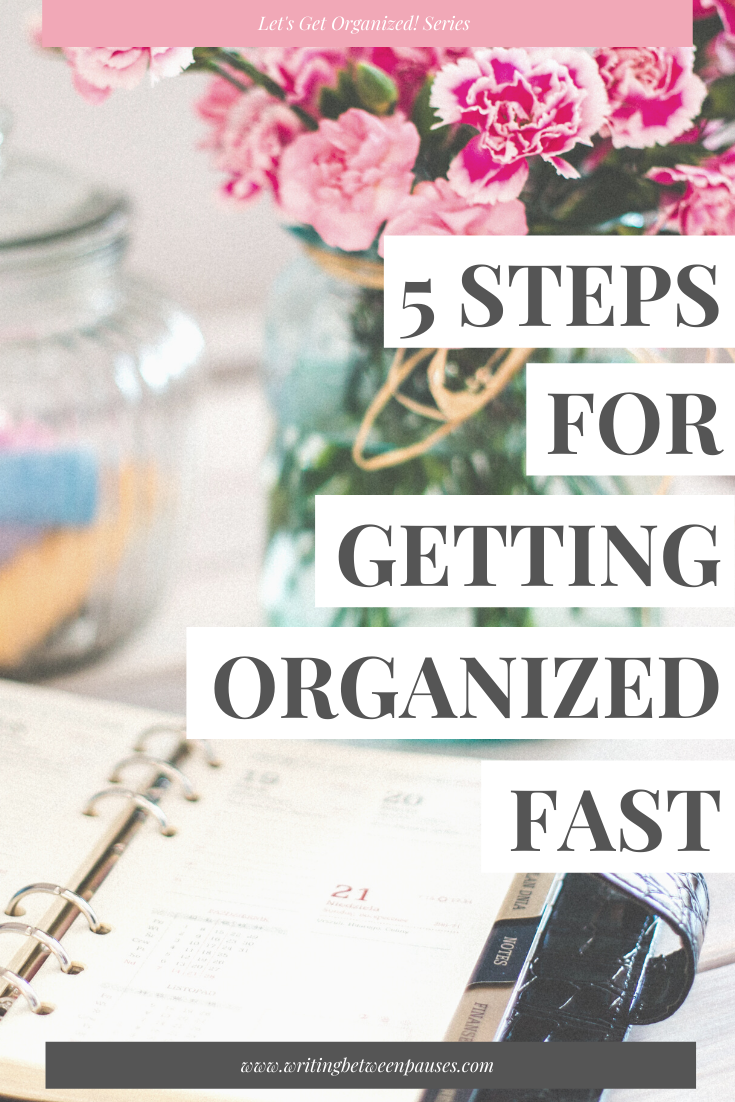
I’m so excited to be sharing the second installment of my Let’s Get Organized series: 3 Habits to Stay Organized. Organization is not about perfection; it’s about having the tools and systems in place to make your life easier, whenever you need it. If you’d like to see May-June’s series on Daily Routines, click here.

Organizing a space is the easy part. You spend a day, or a few days, cleaning out a space, getting everything put away in a way that makes sense, and then it stays perfect forever, right? Right.

Actually, not right. We all know that’s not how it works. We’ve all organized a space and then gone back 2 weeks later and wondered what on earth happened.

Part of getting and staying organized is making it a habit that we work on continuously. A muscle that we stretch and strengthen like any other. It takes routine. It takes patience. It takes a few things that help make it a habit. Here are 3 ways to make organization a habit!

1. Make Your Organization Easy

This one is easier said than done. Basically: make your organization easy for you. There was a great Twitter thread recently about how, for some people, stacked, closed boxes for organization simply don’t work for them. It’s not easy enough. It takes too much time and effort and they know they won’t keep up with it. Open bins, however, work great. While that might not be for everyone, the point is: find a method that works for you. Neat stacks of things? Go for it. Open bins? Yes. Stacked, orderly, labeled boxes? Yes!

Whatever it is that makes organization easy, then incorporate it into your space and life. One thing I struggle with in my office is keeping my desk clear of clutter. I realized recently I need some place to put papers (that I will need to reference later!), random notebooks, etc. I am getting a second bookshelf soon (I know!) and I'll be getting a few open, pretty bins to collect those bits-and-pieces that I need, but don’t have a space for. I’m also getting a filing cabinet soon—it’s long overdue and it will change my office when I finally get one, I think!

Here’s a few ideas of how to make organization easy:

  • Make your organization fit how you use a space. That means, don’t stack things that are basically storage in the pantry; put them in storage!

  • Put everything where it goes the first time—and instead of just shoving it into a closet, take it to the actual closet where it lives. (A prime example of this for Danny and I is our 3 closets that each have 1/3 of our medicine cabinet.)

  • Don’t challenge yourself with your organization. If you really want to be organized, know yourself first—don’t use this as an opportunity to force yourself to try a method you probably know won’t work for you.

2. Make Space for Everything (And If There Isn’t Space, Do You Need It?)

There should be a space for everything you need—and if there isn’t space in way that makes sense, that works, and that’s easy… then ask yourself: do you really need it?

This is sort of a Marie Kondo-esque moment—but not quite that intense. It’s just about simplifying.

Here’s an example: I have 4 tubs of journals. 4 tubs from my entire life. These are important to me. I keep them in a small storage room that is in my office’s closet. It’s a great place to store things I change out pretty frequently or use often, like wrapping paper, decorations for the seasons, extra rugs, tablecloths… that kind of thing. But over the last year, this storage room has gotten insanely disorganized. The primary culprit are these 4 huge tubs of journals. I like to look at them; I’ve referenced them a few times in the past year for random things. But I don’t need them in this space.

They could easily go to the garage! So once our garage is tidied up, that’s where they’re going to go and I’m sticking with it.

All I’m saying here is this: just because something doesn’t work in a space or isn’t needed in a space, doesn’t mean you need to throw it away or get rid of it. It might just mean finding a new space to store it, especially if it’s not something you use frequently or need frequently.

Once you’re really in the work process of organizing a space, deciding what you need versus what you want in that space really is crucial. It will impact how you choose to organize it. And making the right decisions and clearing out things that are just going to complicate the space will make it easier to stay organized over time.

3. Include Reorganization Into Your Routine

My office is a huge bugbear. It tends to be a catch all space where things get put: stuff my mom gives me, stuff that needs to go into storage, random papers, bills… all kinds of stuff ends up there! Right now, I’m still in the process of getting the space cleaned up and organized in a way that makes sense. However, I have started trying to do a quick, 15-minute clean up every evening where I straighten things up, put all the pens back in the pen cup, and at least straighten up my papers.

I also try to take a quick 5 minutes to organize my kitchen at the end of the day: putting things away, straightening random clutter that I need to figure out what to do with, checking the pantry, making sure coffee making stuff is stocked for the morning.

If you make these small tasks of continuously reorganizing and working on a space part of your routine, it makes it that much easier to keep up—and to become a habit. You’ll be more likely to put things where they go rather than just leaving them on the counter or tucking them away in a random drawer if you make it part of your routine to go along after yourself (or your husband, or your kids) and put them where they go. (And obviously, encouraging everyone in your home to do the same thing is the dream!)

Another part of this is, of course, changing your organization when it doesn’t fit. You might think you have a good idea of how to organize a space—but then when it comes to working in your routine and daily life, it just might not. So taking 5 minutes to quickly reorganize the coffee station or silverware drawer so it is more functional is going to make a huge difference and allow organization to be a better habit.

My July 2020 Planner Set Up

My July 2020 Planner Set Up | Writing Between Pauses

The number one question I get asked from friends, family, acquaintances, Instagram followers, and more is: what planner do you use?

We’re all searching for that perfect planner, aren’t we? Planners are highly personal, incredibly tactile objects. If you’re someone who uses a planner, then you know what I’m talking about when I say: a calendar simply isn’t the same thing as a planner. It’s just not!

Part of the reason why I use planners is because I sometimes just need space to write down what is on my brain—it helps me to remember and cement that information. Plus, seeing it written in my own handwriting is often easier for me to recall and connect with.

It’s hard to talk about planners without making exact recommendations: what works for me simply might not work for you! However, I do find people love looking at planners and learning why I (or anyone!) has chosen that planner. So, without further ado, this is my planner set up for July 2020.

Planner 1: My Bullet Journal

July 2020 Bullet Journal Spread

I use my bullet journal primarily as a brain dump and a daily journal. I make a few monthly lists—tasks, my playlist, a list of books I’ve read, and highlights—but then after that, I try to fit about 5-6 days on every two pages for my morning journal session. I have been doing one list from the original 52 Lists every single day since June 1—I’m almost done with that book, then I’ll move on to 52 Lists for Calm. I find this a great way to journal every day without the pressure of knowing what to write. Usually once I’m done with my list, I’ll write a few things on my plate for the day or that I’m thinking about.

This journal originally started as a work journal; I kept work journals at my old agency where I kept track of tasks and notes. I have probably 10+ journals full from over 5 years. This was a brand new journal then when I got laid off—it’s funny to see those first few pages of business-as-usual notes that turned into journaling and keeping track of phone numbers for lawyers and more.

I almost thought about just retiring it: transitioning it to a journal felt very weird and it took me a long time. However, I don’t like being wasteful with journals—so I just keep it moving and those first 25 pages remain as a testament to a very weird time in my life.

This month’s theme was a 70s-ish flower theme. Nothing fancy—just the basics. I really liked it though. For a full flip through, you can check out my Instagram!

Planner 2: My Habit Tracker

Daily Habit Tracker Blue Sky PLanner

This planner is the Blue Sky Habit Tracker; you can find a very similar one here, but mine was not that expensive! I really like this layout because it involves a monthly page to write down your goals, pick your habits to track, and write. I typically use this for non-work things, like reminding myself to drink water or other habits I’m working on building. I haven’t filled out my July pages quite yet (just a little behind!), but this is always one of my favorite things to do at the beginning of each month: pick my habits, write what worked from last month and what didn’t, and what I want to focus on.

This month, I want to intermittent fast every day through the end of the month—so that will be on the list. (Before anyone asks, I use IF to help with my migraines!) I haven’t decided on my other goals quite yet, but that will come.

I also use these pages to write out my household tasks and to write notes for myself, as well as things I want to remember—like quotes or ideas I have for blog posts in the future! At the end of the week, I usually condense these pages into a notebook or word doc to help me keep track of all my ideas and brain dumps.

Planner #3: My Daily Schedule Notepad

The La Mere Weekly Notepad

I get soooo many questions about this notepad. So, here are the details; this is the Lamare Embark Weekly Notepad. I use this for planning each day and keeping track of tasks I need to do on-the-fly. Things like texts from clients saying “can you do xyz really quick?” I’ll jot that down and finish what I’m doing, then take it on. I also try to map out my week here: I’ll look at my Asana task list and transfer things to the day I want to get them done so I have a plan in place. It helps me to be able to glance at my week and know when I have meetings, deadlines, and specific tasks planned.

I don’t really use the habit tracker on this notepad—I tend to use that area to doodle! But I do list my top 3 moments during the week; when something good happens, I try to write it down immediately so I don’t forget! I use the to do section for quick notes as well.

Voila! My planner set up for the week. It’s a fairly simple set up, as I have been trying to use my Asana as project management—rather than trying to have one handwritten to do list! This has been a huge help in managing my clients more effectively—plus it’s tied to the tool I use for recording my time for clients, so that works out perfectly.

How do you use your planners?

3 Tips for Social Media Managers

3 Tips for Social Media Managers | Writing Between Pauses

Social media management isn’t the only thing I do—and, I’ll be honest, it’s not my favorite thing to do.

Back when I first got into marketing, I dreamed of being able to take on social media campaigns, writing witty Instagram captions, optimizing hashtags… I took on other roles in the meantime, like email marketing or blog writing. When I finally got to social media management, I realized that it’s not quite the walk-in-the-park that people think it is.

I do want to start off this blog post with a bit of a disclaimer and explanation: social media management is a challenging, difficult field. It requires a lot of work behind the scenes in analytics and strategy. It goes without saying: just because you happen to have a large number of followers on Instagram personally does not mean you can successfully run social media for brands. You know the basics, for sure! But these are not the same thing and a brand that is selling a product is going to want more from you than perhaps you understand.

This isn’t to say it’s not something to strive for. But I’ve found myself getting frustrated seeing very young girls on Instagram try to pivot to being SMMs…. just because they’ve grown their Instagram (sometimes through blogging groups, sometimes through buying followers) to 10,000 followers. Those simply aren’t the same thing. This might be a bit of gatekeeping on my end, but all I ask is that if you’re interested in this line of work, you understand what you’re getting into, what it means to offer social media management services to a business, and how serious it is to take a business’s money in exchange for results.

All that being said, if you’re new the social media management world, I hope this blog post is helpful to you! I wanted to share 3 pieces of information I’ve learned over the past 6 years that have helped me become better at my job.

1. Social media management requires cooperation between lots of different departments—so make sure you know the entire marketing plan and how you play into it.

Too often, businesses and brands want social media to exist on its own island. They don’t want to provide creative; they don’t want to hire a graphic designer; they don’t have a blog or if they do, they don’t think social media is related to that at all. They just want the results. This is such an incredibly common attitude and it comes from a place of not understanding marketing.

My advice here is this: if you suspect a client is like this, it’s a red flag. You aren’t ever going to be able to do your job effectively; your client is going to get frustrated at the questions you ask; and the relationship will sour pretty quickly.

Social media does not exist in a vacuum, completely separate from other pieces of the business; a good social media manager knows the company calendar, speaks to others in the marketing department, and plays a role in each part of developing a marketing plan for the year.

2. Managing expectations is 50% of your job.

Here’s an example from a client I had at an agency once. When we asked what his goal for social media was, this is what he said: “My goal is to spread rumors about my competition and destroy them politically.”

Yes. He said that.

He wanted to use social media ruthlessly. And unethically. After the meeting ended (it was via teleconference), I turned to my coworker and said, “That’s not something we can do.” She shrugged her shoulders and we both went about our days. I knew what was going to happen though: we would do one month of social media, he would get mad that he hadn’t gone “viral”, and he would refuse further services.

Which is exactly what happened.

The person i am now knows that, during that phone call, when he first made that statement, I should have said: “that expectation is unreasonable. Here are some better goals.” Or I could have talked him through the purpose of why he wanted to do that. Eventually, though, I would have adjusted and managed his expectations so we could provide a better service without burning a bridge entirely. However, I didn’t know that at the time.

Managing expectations is an important part of running any marketing services; your clients need to know what is realistic and what isn’t. Most likely, a furniture company in the midwest isn’t going to go viral—and if they do, it probably won’t be a good thing. The same goes for literally any business in any sense. Managing their expectations of social media, what they want, and what it can do is a critical part of your job—and unfortunately, it just takes practice and experience.

3. Social media is an on-going, rapidly changing business.

What worked for a client last year might not work this week. What was popular a few weeks ago no longer is. The things you expect to perform well suddenly won’t.

Social media management can be very frustrating in this way: you never actually know what’s going to take off and what will succeed. It’s always a bit of guessing game because things change constantly on all platforms.

Here’s an example: in March, many of my clients pulled all their social media when COVID19 shut downs hit. This just felt responsible. Most of them shifted to a week-by-week basis of social media content creation, which increased my stress and the amount of time I worked with each client. However, it was the responsible thing to do with so much changing.

We were just starting to get back on track when BLM protests erupted. Again, clients pulled their social media and social ads. It seems that every single week, something is changing on social media, requiring brands and businesses to reassess what they’re doing on social media. This requires me to be on my toes and able to pull posts at a moments notice. It also means that, in terms of community management (a huge part of being a social media manager), I have to work with their PR (or if they don’t have PR, be their PR) to provide the best possible responses.

A lot of “social media gurus” (again, these are people who grew large personal followings then tried to transition to being a social media manager in the loosest sense of the word—without being too harsh, they are charlatans and much of their advice for businesses is bad) offer these kits or services where you plan your social media months in advance. I can’t begin to explain to you what a bad idea that is.

Yes, plan your calendar out in advance; yes, have an idea of your plan for the year. But I’ve begun to realize that scheduling an entire month’s worth of content for a month or two at a time is a good way to make it so your client finds it challenging to pivot should anything need to change. And now more than ever as social media managers, we need to be able to guide our clients in a way that is ethical and responsible.


Whew! I think that’s everything! Are you interested in social media management? I’m always up to chat about how I got into the industry, how I get clients, and more over on Instagram. Send me a note—I’d love to talk!

5 Steps for Getting Organized Fast

5 Steps for Getting Organized Fast | Writing between Pauses

Happy July! This month, I’ll be posting a series called Let’s Get Organized!, all about organizing your home, your business, and your life. Organization is not about perfection; it’s about having the tools and systems in place to make your life easier, whenever you need it. I can’t wait to share my tips and tricks, and much more. If you’d like to see May-June’s series on Daily Routines, click here.

Here’s something I famously said to a professor: “Sometimes, I’m so organized that I feel like it holds me back.” I can still remember the way she looked at me, her head slightly cocked, and her expression of puzzlement. It didn’t make sense to her.

I’m a naturally organized person: I tend to always put things back where they came from, I love having a place for everything, and it’s very easy for me to get, and stay, organized. But in many ways, having that rigid of a way of thinking can be incredibly restrictive for, say, writing research papers (where sometimes you need to let your mind and interests wander!) or baking cookies with a 4-year-old (who doesn’t understand where anything in the kitchen is).

When it comes to organizing, I have found that it’s not a case of organizing a space and having it stay there. Living spaces are static: they evolve and change, just like we do. A system that worked when you first moved into your home or apartment might not make sense 6 months later, or after you have kids, or whatever!

Here are my 5 steps to organizing your space—whether it’s your office, living room, kitchen, closet, or whatever you need it—fast. (By fast I mean, in the space of 1-2 weekends!)

1. Start with one small place to organize first.

When it comes to getting organized, take it one step at a time. When we moved into our home a year ago this weekend (!!!), I wasn’t focused on organizing. I just wanted our stuff in the house. It didn’t matter where it went. As a result, we have a ton of messy closets, a messy garage, and much more. I still haven’t found my glue gun, which I misplaced at some point during the move.

However, I know if I tried to tackle every single closet and the garage and the living room and the kitchen all at once, I’d get overwhelmed, stressed, and burnt out on organizing. Just yesterday, I told my husband: my goal for this summer is to get our garage organized into a functional space, not just a bunch of stacks of boxes of stuff that we probably don’t even need.

Pick one space to start organizing and stick with that space, and that space only, for your first round. Don’t move outside of that space; don’t let yourself start thinking about those laundry room cabinets while you’re working on this space; don’t deviate from the plan. Pick one space, seriously.

2. Buy what you need for the space—not what’s available.

I was recently listening to the A Beautiful Mess podcast with Elsie Larson and Emma Chapman (it’s seriously really good!) and Elsie had a tip that I had never thought of before: if you need to buy something to organize the space, buy the perfect thing, not just what’s available. I have always just gone to the Dollar Store and bought whatever organizer bins or storage containers I can find. Sometimes, the options are just not great—but I didn’t really worry about it, even if they didn’t look how I wanted them to or even work in the space.

However, I realized that if I’m going to invest the money, rather than buying 3-4 rounds of different organizers at the Dollar Store or Target because they’re all that’s available… why not just save my money and buy the bins that look cute and fit the space and are functional? Why not buy the right size bin organizer, or the right entertainment center, instead of settling? Thanks, Elsie, we needed that one!

3. Focus on function.

If you search “pantry organization” on Pinterest, you’ll get a lot of super cute pantries: cereal emptied into gorgeous glass jars, Oreos stacked Khloe Kardashian-style, spices in teeny tiny glass jars, all organized 1.5 inches apart from each other in a perfectly clean pantry. If there are brand packages available, they’re boujee brands. And there is also this trendy thing going around where you put up a tension rod and use clips to hang individual bags of chips or crackers or whatever.

I can’t begin to tell you how impractical I think all of that is. Yes, while rushing home from Costco, I’m going to put my box of chips on teeny tiny hangers in my pantry, which my son won’t be able to unclip on his own—he’ll pull the whole thing down, repeatedly. The glass jars of Oreos, oatmeal, flour, and spices? Those will get gross. Better to put all those things where they go: the spice cabinet, the baking cupboard, in storage containers that are functional. The glass jars are cute, but they’re not functional. Those Oreos will get stale. Those spices will be exposed to more air and light than they need to. They’re all at risk of being knocked down at any point.

Your organization should be functional, not focused on what looks cutest on Pinterest. Please don’t feel like you have to buy little hangers for your bags of chips.

4. Declutter as you organize.

It goes without saying, but, I will say it: you should declutter in the process of organizing. That’s just kind of the point.

I recently organized my pantry a little bit. We have 4 Halloween buckets, at least 2 of them full of various holidays worth of candy since… 2018? I don’t know why I moved these from one house to another, but I did and, gosh, I am a little embarrassed about it! I threw them away. And I threw away the box of fruit snacks that we’ve had for a year, the boxes of cereal we opened once and didn’t eat, the mac and cheese that we haven’t touched… there are so much I was just holding onto because I didn’t think about it.

Declutter, declutter, declutter! It’s as important, if not more important, than organizing. Even if you don’t have the time or energy to redo the space you want to get organized, you probably have stuff you can toss or get rid of. That will make the space feel new with hardly any effort.

5. Remember that it won’t be perfect.

Taking on the space of your choice isn’t about making it perfect or Pinterest-worthy. It’s just about getting a system in place that works for you and your life! It won’t be perfect immediately. You’ll find ways to keep improving this space the more you use it and interact with it. And you might also find that the needs of the space changes over time. These are all fine things to have happen! We’re aiming for developing a system for a space, not a set-in-stone piece of perfection.

Boost Your Immunity with Easy Salmon with Summer Salad Featuring Hungryroot x Hilma*

Easy Salmon with Summer Salad Featuring Hungryroot x Hilma | Writing Between Pauses

If you’re like me, the last few months have been eye-opening when it comes to groceries. I feel like I’ve never saved so much money (spending less on takeout, not going to restaurants, not going to TJ Maxx every weekend) and, at the same time, like I’ve never spent more on groceries. 

We get weekly grocery pick up orders from my local Fred Meyer (my favorite grocery store, hands down!)—but even though I love Freddy’s, it’s hard for me not to be able to pick up my own produce. Just this past week, I got a completely moldy pack of strawberries and out of the 4 sweet potatoes I ordered, 3 were completely rotten and mushy. The day of my pick up! 

That’s I’ve started using Hungryroot more than ever. If you don’t know what Hungryroot is, let me help you: it’s an online, grocery delivery service that helps you stock your fridge with your favorite groceries. They partner with Beyond Meat, Elizabeth, Joolies, and tons more, plus have their own range of groceries. I’ve written about them a ton before; you can read more here. 

With Hungryroot, I can get some of my favorite staples (like my preferred oat milk, vegetables, and more) delivered to my door. 

Hungryroot recently paired up with Hilma. When they reached out to me for this post, I was so excited. More than ever, I’ve been working to boost and take care of my immune system. While there is a lot of misinformation out there, I truly believe that doing all you can to eat healthy and take care of your body is beneficial. 

What is Hilma?

Hilma is a new brand on a mission to upgrade your medicine cabinet: they focus on natural remedies that are also backed by science. With Hungryroot, they’ve curated a selection of immune-supporting groceries. 

Hilma sent me their Immune Support to try. It has six essential nutrients in one little packet that you mix into hot or cold water. (It’s delicious both ways, but on these hot summer days, I’ve been mixing it with cold water and adding it to my morning smoothie!) It contains Vitamin C, Echinacea, Zinc, Ginger, and Turmeric with no fillers. 

If you’d like to try Hilma, you can take 20% off using my code MICHELLE20! I love Hilma’s Immune Support and I can’t wait to see what you think. 

Easy Summer Salad with Salad and Broccoli

Easy Salmon with Summer Salad

When it comes to dinners during the summer, I have a few requests: 

  • Contains my favorite things about the season (corn!)

  • Easy clean up

  • Tastes good

  • Doesn’t make my kitchen 400 degrees

This summer salad checks every single box! 

Plus, it contains a few of my favorite Hungryroot ingredients—and even better, they are all immune boosting! Here are the ingredients: 

Ingredients:

  • 2 packages of Hungryroot’s Hot Smoked Roasted Salmon (or 2 salmon fillets)

  • 1 package of Hungryroot’s Superblend Salad

  • About 1/4 cup of Hungryroot’s House Dressing

  • Garlic Salt

  • 1 package of Sweet Baby Broccoli from Hungryroot

  • 1 cob of corn

Salmon is so good for you and your immune system because it contains vitamin D, which helps keep your immune system working. Not getting enough vitamin D can actually increase your risk of infection. It also has protein and omega-3s, two nutrients that are vital for a strong immune system. Alongside baby broccoli (so much vitamin C!) and Hungryroot’s Superblend Salad (kale, broccoli, brussel sprouts, and more), this dish packs a one-two punch of immune boosting nutrition. 

Here’s how I made it

  1. Start heating up your barbecue or grill. 

  2. Cut the kernels off your cob of corn. Cook them in a pan over medium heat with a little bit of garlic salt and nonstick cooking spray until they are done and slightly charred. 

  3. While your corn cooks, add 1/4 wish cup of Hungryroot’s House Dressing (so good!) to your salad bowl; I added a pinch of garlic salt and some pepper, but this is totally optional. Add your bag of Superblend Salad and toss. 

  4. Once the corn is done cooking, toss with your salad and set aside. 

  5. Create 2 separate foil packets. In one, add your baby broccoli, a drizzle of olive oil, and some garlic salt. Wrap it up. 

  6. in the second foil packet, place your roasted salmon with a little more garlic salt. (Since this salmon is already cooked, you are just warming it up and creating a crust!) 

  7. Cook on the barbecue for about 10-15 minutes for the broccoli, and under 10 minutes for the salmon. 

  8. Serve! 

So easy and delicious, light for the summer and the clean up can’t be easier. 

Want to try Hungryroot? 

I’m so excited to be able to offer you FREE Black Bean Brownie Batter for life from Hungryroot. Their brownie batter is one of my favorite things—I always have a tub in my fridge for emergencies!. Just use the code PAUSES40 to get 40% off your first order of Hungryroot.

Don’t forget to use code MICHELLE20 at Hilma to receive 20% off your order as well. With both Hilma and Hungryroot, you can have delicious, immune boosting supplies for your pantry and medicine cabinet. 

Disclaimer: Per my disclosure policy, the asterisk (*) in the title of this post denotes that I was provided product for free to review and post on my blog and Instagram channel. However, all opinions remain my own—I created this simple recipe on my own! Posts like these help me keep the lights on here at Writing Between Pauses. I do receive a small commission from use of my Hungryroot and Hilma code. To learn more about my disclosure policy, click here.

Starting My Morning with Cacao Tea Instead of Coffee*

Starting My Morning with Cacao Tea Instead of Coffee* | Writing Between Pauses

Nothing starts my morning like a cup of coffee.

But I’ll be the first to tell you that I know I need to break my coffee habit. (Just typing that sentence hurt a little bit!) Migraines are a huge issue for me and while I’ve gotten way less migraines in recent months, I know that my coffee habit plays a huge role.

I also know that caffeine doesn’t do a lot for my stress level: it can leave me aggravated and on edge.

But… I love coffee. And starting my morning with coffee is a huge part of my routine. And you all know I love routines! Breaking the habit is a hard one.

When Cacao Tea Co. reached out to me to review their product, I was instantly interested. I love chocolate; I love tea; and I love starting my morning with something slightly sweet and delicious. Was this the answer to my prayers?

What is Cacao Tea

What is Cacao Tea?

Cacao tea (which is also known as chocolate tea or cocoa tea) is a 100% natural tea which is brewed from cacao husks (also known as cacao shells). The tea is a loose-leaf style tea which, when steeped in boiling water, results in a delicious tea which tastes like chocolate.

It’s a great alternative to coffee because it wakes you up without containing caffeine. It’s also super gentle and not super stimulating like coffee can be. If you’re in need of something a little more gentle to wake up with in the morning (but don’t like tea!), this is a really great alternative.

Here are a few more benefits to cacao tea:

  • Natural sweetness

  • Heavenly chocolate taste and aroma

  • Delicate stimulating effect, making it the perfect healthy alternative to coffee

  • High in antioxidants

  • Completely sugar-free, caffeine-free, gluten-free and dairy-free.

  • No artificial flavouring, additives or preservatives

How to Brew Cacao Tea

The first time I made cacao tea, I used my tea strainer (a standard metal ball for loose leaf tea) and while I liked that first cup, I knew I needed something better. I checked out Cacao Tea Co’s instructions and they recommend using something covered (like a French press or simply covering your cup). I use my French press to make some for both Danny and I and the difference was huge.

It was so. darn. good. Slightly sweet, chocolatey, and delicious. I was hooked, immediately.

For more information on brewing cacao tea, check out their blog post here.

How to Brew Cacao Tea

My Final Thoughts on Cacao Tea

I’m so glad I got to try cacao tea! It’s definitely provided me with an alternative on days where I know coffee is just going to aggravate a migraine or increase my stress. Plus, it just plain tastes good—so if you, like me, often need that afternoon pick-me-up (but you know coffee is going to keep you awake all night), this makes a great afternoon beverage.

I’m excited to try it iced as well! I think it would be delicious as a cold tea on a hot, summer afternoon.

If you’d like to try cacao tea yourself, check out Cacao Tea Co!

Disclaimer: As indicated by the asterisk (*) in the title of this post, I received product in exchange for this review. However, all opinions remain my own! If you’d like to learn more about my disclosure policy, click here.

3 Things I've Learned in One Year of Freelancing

3 Things I've Learned in One Year of Freelancing | Writing Between Pauses

When I started writing this blog post, I tried to find the previous one I thought I remembered writing around July of last year. As it turns out, I didn’t write very many blog posts last July—I wrote a few of my last beauty reviews and that was it. It wasn’t until August that I wrote a blog post about going freelance—and even then, I didn’t really talk about what had happened, just that I had been laid off and it sucked and I had one of two options. (You can read my first blog post about going freelance here.)

I found the blog post I thought I had written in July and it turns out, I wrote it in November. And again, in that blog post… it was in this blog post that I talked about being laid off and what they meant for me and how I didn’t want it to be the overwhelming focus of my life. (You can read that blog post, about resiliency, here.)

As it turns out, my desire to have the lay off and folding of a company I’d worked at for the majority of my career be the focus of my life wasn’t entirely possible. I’ve still spent time talking about it privately for months; at least once a month, something or other comes up about this company and I have to talk about it or interact with it. I still get calls about this company from the Oregon Department of Employment (fun!) and I still have to wonder: who, exactly, was I looking for?

I haven’t known how to write about what happened to me or this company (agency) that I worked for. It’s not my goal in life to make people miserable or to out people. I love gossiping privately, but this is one of those situations where the gossip isn’t that fun. Maybe because so many people’s lives were at stake. At first, I didn’t feel like it was my story to tell; I wanted my previous employers to be ahead of their own story and reputation and to control the narrative, without feeling like they were pressured by their former employees.

In an ideal world, that is what would have happened. It isn’t what happened unfortunately.

Here’s the truth about my being laid off: I got really, really screwed. My former employers still owe me money—over $5,000 to be precise—and it’s money that, over the last year, I have thought about repeatedly in an “I could really use that as capitol for my own business, to be honest” way. However, I’ve had to deal with the fact, internally, that I will never receive that money.

I will also never receive an apology. I know that now too. And they will never try to get ahead of the gossip or story or rumors about what happened. A lot of explanation is left to employees, which makes it hard for us to talk honestly about our experience without feeling like liars or poor sports, or as if we’re vindictive and out for revenge. None of those things are true.

But how can we talk about what happened when no one is being honest? It’s still not my place to talk about why my former workplace closed. But my decision to go freelance was impacted by one, large fact: I didn’t ever want to be screwed over for money like I was. I wanted to control my money and my product.

I lost all my work for 5 years. I have no portfolio, despite running social media for multiple businesses over 5 years, rewriting websites, writing blog content… it’s gone. All the proof of what I did is gone. And besides, as an agency employee to an agency that no longer exists, I can’t even say, “Well, I did X work for X client while at X”—because that place doesn’t even exist anymore, the bridge with the client has been burned so badly that our work was effectively wiped, and I don’t even have emails to back me up.

At the time I wrote my freelance announcement, I did so with the thought that I didn’t want to spill any “tea” so to speak. I just wanted to make people aware of what I was doing and how it was changing my life. But a big part of my motivation, at that point, was total independence. If a business can go under at any moment, then why not be in control of that business at least? I lost thousands of dollars to a business I had no stake in and nothing to show for. If I’m going to be at risk like that again, it might as well all be on my own shoulders.

This is all to say one thing: going freelance was still an incredibly hard decision. Some days are definitely easier than others. I’ve learned a lot over the last year and I hope that by sharing my story in my career it helps other people make better decisions for themselves and their families.

1. Networking isn’t as terrifying as I thought it would be.

Networking was the big scary idea of freelance that I always dreaded and hated. I didn’t know how to do it and what I did know about it, I didn’t particularly like. It stressed me out in ways that I didn’t really know how to identify.

The truth is, though, that networking is just… being friends with other people.

Networking gets a really bad reputation as being shallow and entirely favor-focused. And, of course, there are some people who use networking very shallowly. That being said, there are lots of people using it in very positive ways that aren’t so bad. I’m one of them!

I genuinely want to be friends with everyone I interact with in a networking way. I want to help them grow. I don’t ever approach anything with the “what can I get out of this?!” mentality. It’s just about building a relationship and seeing what happens. There will be lots of business relationships where I don’t see any “return”—and that’s fine! That’s just life!

So, networking isn’t so bad. And so much of my business comes from networking. I’d be really lost without it.

2. Project management is hard.

If you’re a project manager and you’re reading this, please know that your job is so vital and important.

Because it’s really, really, really hard to manage multiple projects and stay organized. Especially if you’re the one doing the work!

So much of my time goes to admin tasks: keeping Asana organized, making sure my calendars are up to date, invoicing, emails, everything. It all takes so much time. Then, when I start a new project, creating it in Asana, updating tasks, creating due dates… it’s so much work.

Alongside that, managing client expectations is part of project management and, oh my goodness, that is hard too. Staying up to date with multiple clients, keeping them updated, using their various task management and communication systems, scheduling meetings… it takes a lot of work!

This is the hardest part of freelance for me. I thought networking would be my bugbear, but it turns out to be actually managing and organizing projects.

3. Using cycle tracking helps plan my month.

Is this a big disparate to the first two items? Yeah, a little bit.

It was last year that I started noticing something that happened to me month-to-month: I realized that about a week before my cycle started, I had absolutely no energy or motivation. I often let this get me down: why can’t I get anything done?! But then, like clockwork, I would get a huge burst of creative energy usually a week before I ovulated—and I would stay in that energetic phase for about 2 weeks.

As it turns out, my experience is not unique. I randomly googled, “Why am I so creative when I’m ovulating?!” and it turns out, there is a whole system to this. Here are a few great resources I’ve found:

For me, my monthly calendar is broken down week-by-week:

  • The week of my period, I avoid meetings or large events. I simply won’t have the energy and honoring my body’s needs are more important. I usually do a lot of admin tasks during this time, as well as invoicing and planning my month financially.

  • The week before ovulation, I work on calendars for the next month (so in June, I start my July calendars for clients). I’m ramping up my energy and feeling more creative, so this usually works out.

  • The week I ovulate, I schedule meetings, launches, new client consults, and more. This is my most productive week always. I do most of my copywriting and graphic design this week for the next month.

  • The week after I ovulate, I usually schedule in more time to rest after a busy and productive time, focus on admin tasks, analytics, reporting, and client relationships.

A lot of this organization has to do with how my exact cycle lands during the month (which will be different from roughly 75% of the population!)

It has definitely helped me to avoid getting in the habit of thinking, “I’ve lost my mojo, I don’t feel creative or energized by my work!” that then effects the rest of my month. This helps me so much with meeting deadlines. I’m so glad I discovered it and started organizing my calendar effectively.


What a year it has been, huh? I can’t believe we are getting so close. A year ago this week, I was moving into my new house with absolutely no idea what was on the horizon. It’s always good to look back and think about how we’ve changed and what we’ve learned over the last year.

3 Face Masks to Soothe Your Skin

3 Face Masks to Soothe Your Skin | Writing Between Pauses

What a couple of weeks, huh? I feel like the minute I get a foothold on things, everything changes again—for the better in most ways. But it’s hard to be trying to live and work in a world that is in completely upheaval.

For me, during times of extreme stress, the first place I notice it is my skin. A week ago, Danny sent me a funny text message and I was going to reply with a photo of myself making a face. Instead, all I did was stare at myself in the camera thinking, “is that what I look like right now?!” My skin was splotchy, red, dry, dull. Not a good look!

Even worse, I had been keeping up with my routine—but unfortunately, being stressed out about my clients, working, pausing my own content, and more had completely taken over. My skin was on autopilot and it needed help.

It might seem a bit trivial to be writing about this right now. But the truth is, taking care of ourselves as much as we can is just as important as ever. If you’re like me, the self-soothing ritual you enjoy most is taking care of your skin. I’m not writing this to say, “forget about what’s happening” or “let’s move on from what’s going on!” But rather, I’m writing this all to say: you deserve to take care of yourself while also remaining active in an important movement and I hope you are able to take time to show yourself kindness, even if it is in small ways, like buying a new face mask.

Without further ado, let’s talk my 3 favorite face masks for soothing sensitive, irritated, stressed skin.

3 soothing face masks for sensitive skin

1. Hey Honey Show Your Glow Colloidal Gold and Honey Beauty Mask

I received this mask in an Ipsy bag recently and I really love it. It’s pretty gold, smells like honey, and leaves my skin feeling suuuuuper soft. Here’s what this mask promises:

The colloidal gold is an anti-inflammatory which helps prevent the breakdown of collagen and elastin, preventing wrinkles from forming and smoothing the appearance of fine lines, while mica is used to give the skin a radiant glow. 

Honey is also an incredibly soothing ingredient in any face mask, making this one a perfect option for when you want to feel a little lavish while you relax. This mask is best for those looking for anti-aging products, as well as if you have dry skin or are acne prone.

2. First Aid Beauty Pharma Arnica Relief and Rescue Mask

I love First Aid Beauty products—that’s on record—and this one is no different. I also received this in an Ipsy bag and have purchased a full size version of it. It’s relatively affordable (at $32 for a tube!) and feels amazing on. If you’ve never used arnica before, it’s a super soothing ingredient that is often used in bruise creams. I actually keep a tube of pure arnica on hand for when I get a large bruise; if you massage it in first thing, it can reduce the size and color. (Great if you’re prone to bruising!)

This mask contains arnica, calendula, and centella asiatica, 3 botanical ingredients that help heal your skin, as well as soothe it. If you’re experience redness, dryness, or dullness, this is a great mask to try out!

As a warning, it does smell a bit odd (arnica and calendula both have very… interesting smells associated with them). Here’s what it promises, though:

This nurturing mask, which was inspired by the pharmacy, helps relieve the appearance of redness, dehydration, irritation, stress, and tightness. The star ingredient, arnica, is said to have skin-supporting properties that help soothe and smooth. After use, skin appears soft, supple, and dewy.

3. Feel Mindful Palo Santo Soothing Mask

I love Feel products! This one is no different: the Mindful mask (or the Palo Santo Soothing Mask) contains Palo Santo, mushrooms, and niacinamide to reduce blemishes and calm your skin.

I love creamy masks (versus thin or peel off masks) and this one is my favorite. It is thick and rich; you can literally feel how moisturizing it is; and it smells amazing. It contains lavender and chamomile extract as well to soothe skin.

This is the perfect mask for you if your skin is stressed and breaking out; it helps heal existing break outs and prevent anymore from happening, while providing your skin with an extra dose of moisture and soothing.

I often use this mask in particular in tandem with my Aztec Clay mask. If you’re feeling particularly stressed, double masking is really fun; I’ll wear my Aztec Clay (with apple cider vinegar, natch!) mask for 7 minutes, then rinse off, and apply this mask to help soothe my skin and remoisturize. Afterwards, it feels like I’ve just got done having a facial.