Beauty Review: Wet'n'Wild Photo Focus Foundation

Wet'n'Wild Photo Focus Foundation Review | Writing Between Pauses

For the past few months, I'd been hearing nothing but positive, glowing reviews about the Wet'n'Wild Photo Focus foundation. Like the Liquid Catsuit liquid lips, it's highly affordable and reviewers said it had great coverage and wore great. Of course, this got my interested. 

I'm a high end foundation user. Personally, drug store foundations have just never worked for me; the color selection is usually very orange or warm-toned and gets neither very light nor very dark. For that reason, I just never look at drugstore foundation options. So the fact that I was seeing some top YouTube beauty gurus using Wet'n'Wild... color me intrigued, in the words of Natch Beaut

While on a trip to Idaho, I'd forgotten my foundation (ugh) so I ran to Walgreens fully intending to buy this foundation. They didn't have it at the store I went to though and since it was nearly 11pm at night, I instead bought the L'Oreal Pro-Matte foundation (which I liked but it's not cruelty free and it oxidized about 2 shades darker). 

Once I finally finished my tube of L'Oreal Pro-Matte, I vowed to buy Wet'n'Wild Photo Focus. My chance came about a week and a half ago. I picked out the lightest shade, Porcelain, feeling sure that the Shell Ivory shade would be too dark. I bought it after I'd gone to the gym, so I didn't get a chance to try it right away. 

The next day, I cracked it open and... the first thing that hit me was the smell. The smell of this foundation is what I can only describe as extremely chemical, somewhere between the smell of a hospital and paint thinner. It's horribly unpleasant. A little repulsed, I moved forward. 

Another note: I don't like the little paddle that you use to get the foundation out. It's so wonky and inflexible and mostly just drips everywhere. Another notch against this foundation. 

I put a few pools of it on my palette (I use a candle lid) and started dabbing it on. Beyond the smell, the color was a good match, if a little light; the undertone is neutral in the Porcelain shade, so if you're a pale, neutral-undertoned girl, this is pretty perfect. (It's hard to find!) 

I got my trust Beauty Blender and started blending. And... it disappeared. All the little dabs of foundation on my face? Baby, they were GONE. My blender sponge had sucked them up. 

As it turns out, this foundation is water-based... which means if you use a beauty blender or similar make up sponge, this thing can happen where it just absorbs all the foundation. All of it. 

I started over with dabs then used my e.l.f. kabuki brush to start blending. Immediately, The thing I noticed was the foundation was incredibly streaky and just... sitting on top of my skin. It was like I had been sprayed with white out liquid and brushed it with a paint brush. My kabuki brush NEVER leaves streaks that bad. I kept going, but no matter how much I blended, how much I worked, it just sat on top of my skin and didn't blend. 

Next, I try the beauty blender again and, thankfully, they blended out the streaks and seemed to help the foundation settle down. Every now, after using it daily for about 10 days, it applies super weird and requires so much work to get it to actually blend into my skin. For a drugstore foundation, it has decent color match for pale tones (FYI, the darkest shade is Mahogany and it's definitely still pretty light)--but the process I have to go through to blend! 

How does it wear through the day? I follow a process where I use setting powder after my moisturizer, then do my foundation, then a very light layer of setting powder. This foundation wears just about as well as any other foundation I've tried; after about 4-6 hours, it starts to break down around the corners of my nose and between my eyes (which are my two biggest trouble spots). My chin occasionally gets very oily with this foundation, but I can't figure out the correlation between days when it does and doesn't. It might just be a matter of application and powder on those days. 

My final thoughts: Is this foundation good? For drugstore, it's ok. It's only $5.99 at Ulta, so if you're in the market for trying a new foundation, it's not like dropping $34 on the new Fenty foundation only to dislike it!

The pros for me are that it has a great neutral undertone and it doesn't oxidize. 

The cons are the smell (It is VERY strong and very chemical-y, for lack of a better word), the difficulty of blending, and the areas of breakdown. The coverage is definitely medium, but not a miracle worker like many YouTube beauty gurus seem to suggest. 

I wouldn't rate it as better or worse than any other foundations. It wears about as well as any of them; if you get significantly oily like I do, you'll need a blotting powder or blotting paper throughout the day. 

4 Tips for Taking Better iPhone Photos

4 Tips for Taking Better iPhone Photos | Writing Between Pauses

While I do own a DLSR camera, I find myself often too busy to actually use it. Lugging a large camera downstairs to take photos, all while trying to get everything done quickly, isn't super practical with a toddler. For that reason, I often use my iPhone to take photos and then I edit with A Color Story. I wanted to share my process and tips for taking my photos using my iPhone. For beginner bloggers (or really anyone!), it's totally possible to take all your photos with an iPhone--no expensive camera needed! 

1. Light Matters

Taking Better iPhone Photos

My usually process for taking photos is to get as close to a window as possible, but to avoid any direct sunlight. That means, my bedroom window in the morning or kitchen patio window in the afternoon: I get a good amount of light in these two spots, but because of the direction of the sun, it's not a super harsh direct light. Why should you avoid direct, bright sunlight? It will cast a harsh shadow over your photos that your iPhone camera can't correct and will ultimately make your photos look washed out. 

2. Pick a Consistent Background

Taking Better iPhone Photos for Blog

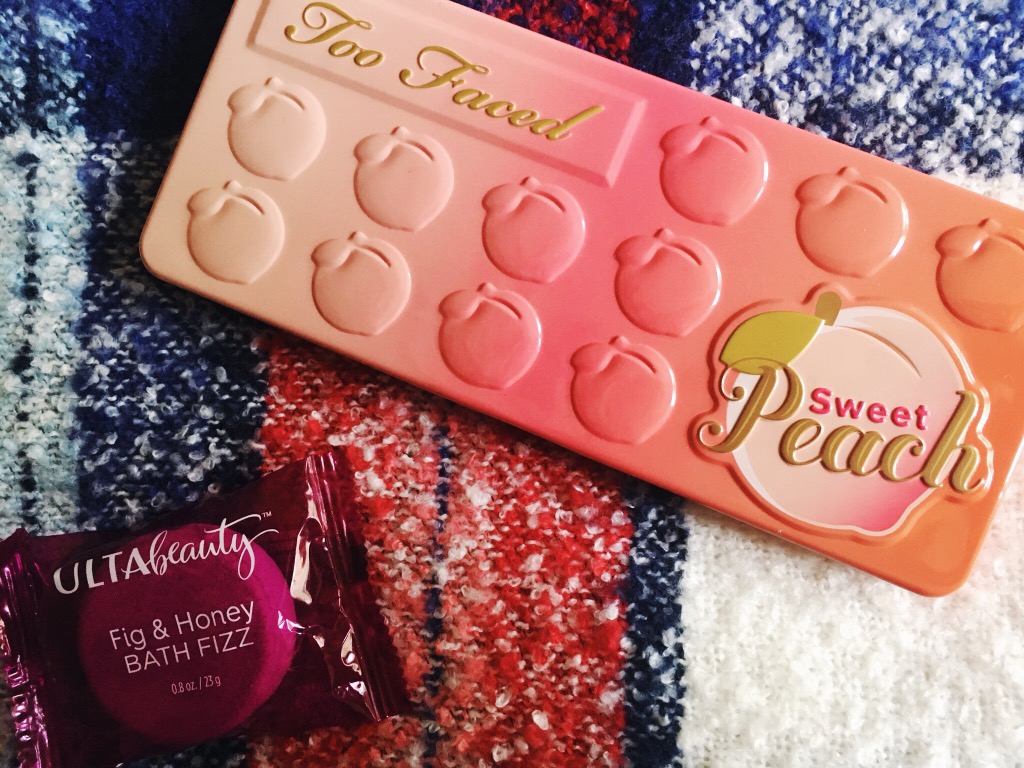
You may notice that I typically use a plaid background for my photos. Why? Mainly, I just like the look of it. While the typical white marble or white fence backgrounds are popular among bloggers, I didn't want to have to go buy a specific prop just for photos. I use my favorite blanket scarf! A lot of why I do this is to have a specific "style" of photo of my own--and also, I know how photos on my favorite background will look and I have worked out a way to do the best editing with this background. To me, this just makes it easier to take photos because I know how to edit them right off the bat. 

Some people like all white or solid color backgrounds for this reason, but for me, the plaid helps me angle things in a way that I like. 

3. Use an Editing App

Taking better photos with iPhone

As I mentioned, I use A Color Story to edit my photos. I find this the easiest app to use, mainly because I love the look of A Beautiful Mess's photos and their filter packs are affordable and really good for a variety of photos. Below, there is a step-by-step of how I edited the above photo. I took this photo in indirect sunlight outside. 

Step 1
Step 2

Step 1: I use the Disco Ball filter from the Good Vibes pack at less than 50%. Disco Ball increases the brightness, but doesn't increase shadows; it also makes everything a little "whiter". I like this filter to start out because it evens out the color really well. 

Step 2: I use the Palm Springs filter at less than 50% next. It's also from the Good Vibes pack. Just like Disco Ball, it brightens and whitens--but Palm Springs also gives a nice airy, light look to the photo while keeping it very clear. Contrast increases slightly. At this point, I'm just looking to make sure the white in my background is looking white instead of gray or cream. 

Step 3
Step 4

Step 3: I switch to the Seasons pack. Seasons is a pack you have to pay for, but at only $2.99, it's super affordable and I love these filters! FIrst, I use the December filter at around 50%. December increases contrast and shifts the color to be more blue or neutral (depending on how yellow everything is looking). I love how it punches up greens and blues in photos! This helps my photos look nice and vibrant. 

Step 4: I then apply October at less than 50% (I prefer closer to 30%). October is an extra step that I don't always use. It increases red and warm tones (notice how the red looks a little more vibrant and the orange in the leaf is more intense); for this photo, I just felt like it needed the warmth punched up a little more about I applied December. 

That's my exact photo process! It's easy to use and play with to get the look you want for your photos. 

4. Practice Makes Perfect

photo (20).jpg

There are still times when I don't get photos right. For example, in the photo above, I love the light and contrast--but the white of the scarf still looks gray and dingy; as well, the color of the flowers could be brighter in comparison to the red-black-and-pink tones of everything else in the photo. However, by practicing consistently and working to take better photos, I feel like I am always improving and getting better at my technique. 

Beauty Review: My First ipsy Bag

Beauty Review My First ipsy Bag

I really debated blogging about my ipsy bag. Not that I didn't love it (I do), but because it seems like there are at least 100 ipsy bag reviews every week. Nearly everyone I know gets ipsy now and reviews are a dime a dozen. 

But that being said, I also really wanted to share my thoughts on ipsy and my very first bag. I feel very late to the party, because I hate subscription services and I've avoided them like the plague. But for my birthday, I decided I wanted an ipsy subscription for 6 months--just to see if I ended up liking. Without further ado, let's talk about what I got, whether I liked it, and what I wish I could change. 

This is what I got in my first ipsy bag: 

1. Luxie Beauty, Rose Gold Medium Angled Brush

I love brushes and I feel like I can never have too many eye shadow brushes. The appeal of this one seems to be that it is rose gold--so it is very pretty, but it's not rose gold! The handle is pink and the metal part is bronze. There is no part of it that's rose gold. No problem though, as long as it works, right? It is very soft and fluffy and seems ideal for blending... except it's angled. It's too fluffy to work as an angled brush, but it's too angled to really effectively blend. So far, I've used it to dab on a good concentration of shadow to my outer corner, than blended with my favorite Urban Decay brush. 

2. ColourPop Cosmetics Lippie Stix in "Glam Bag" 

I love lipsticks, so I was excited about this one. The color is very pretty--a vibrant, dark pink. The formula seems to have amazing staying power. My only issue is that... this is a September bag. This color is not "September" to me. It's definitely a summer color, which some people would love, but seasonally, it's not something I'll be wearing right now. See me in April! 

3. Pixi by Petra Beauty Blush Due in Peach Honey

Another product I was very excited for and was pleasantly surprised by! I'm hesitant to call this a "blush" exactly--it's very, very shimmery, so it strikes me as more of a highlighter. But it does put a little bit of color on, so I'll forgive them for that. It's nice to have a subtle blush-and-highlighter combo that isn't pure gold or really dark. I really love this product! Also, it works great as an eye shadow. 

4. Elizabeth Mott Pop! Goes the Shadow in Toasted

I was so nervous about this eye shadow. I've heard rumors of people getting essentially this same shade over and over and over again. And while that's probably true, I actually really love this eye shadow. It's pigmented; it's smooth and buttery; it applies really well dry and wet. I've used as an all over color and an accent color, as well as on my under eye, and I've enjoyed every look. Now, if I get this color times 6, I'll be a little annoyed! 

5. Manefit Beauty Planner Masks in Mugwort and Lily 

I love a face mask and these K beauty masks (that's Korean-based brands) got me really excited. So far, I've only used the Mugwort type (it's for pore care) and I really enjoyed it. The packaging is super pretty and the mask itself smelled really good; I also noticed a serious decrease in my pore size after using it. This was a great new product to try out! 

Overall, what did I think of my first ipsy bag? 

There were some losers and in general, I'm not a fan of the physical bag they sent. (It's a plain black bag with spiked faux leather.) However, overall, I enjoyed playing with everything I received and I'm excited for my October bag! 

Want to try ipsy? Use my code here!

5 Tips for Managing Your Blog's Facebook

5 Tips for Managing Your Blog's Facebook Page

I'll be the first to admit that my blog's Facebook page is often the last thing on my list. I can stay on top of Twitter and Instagram easy; Pinterest, I tend to fall behind on; and Facebook? If I have time, I'll throw a post Facebook's way... but not usually. 

However, I've been researching and researching to find out the best ways to manage Facebook without actually spending a ton of time on it. My time is limited and I'd rather have my 30 minutes of relaxing by scrolling through Instagram than having an extra 30 minutes of work (is that lazy?). Here's what I discovered. 

1. Use a scheduling tool that doesn't suck. 

The secret to managing social media, as most people know by now, is using a scheduling tool. I'm on the record as hating Hootsuite; it's probably my least favorite app, and yet, it's insanely popular. It's ugly; it's wonky; and accounts constantly need refreshed to stay connected. No thanks. 

I recently started using Later and it's a game changer. Later allows you to connect 3 accounts (Facebook, Instagram, and Twitter are my go-tos) and you have about 30 posts per platform per month in the free version. That's one for each day. Not bad! Later is also visually based, so it allows you to store your best photos and use those, instead of having to constantly uploard and re-upload each individual photo. Genius. 

2. Pick a schedule that works for you. 

Some articles suggest that you should post on Facebook as much as possible. Obviously, this naturally increases your reach--but it doesn't necessarily increase your engagement. In fact, it puts you at risk of annoying your followers. I post once every two days on Facebook (when I, uh, make the effort) because I just find this works best for me. 

3. Write Facebook-specific content. 

Occasionally, it's nice to write a Facebook-specific post--like a special announcement, a giveaway, something, anything. You can promote it in your other social media channels, but since Facebook has a higher character limit, it's a great place to play with micro-blogs and experimental content (like, say, a baking feature you've been thinking of adding to your lifestyle blog). 

4. Tease blog posts. 

Facebook is a great place to tease future blog posts: to provide that little sneak peak at what's coming next. Again, you can promote these sneak peaks on other social media channels, but thanks to that character limit, Facebook is a great place to get feedback and hype people up.  

5. Don't stress about numbers. 

One thing I've learned from my day job is that Facebook numbers deviate more than any other social media channel. Facebook's algorithm (like Instagram's these days) is incredibly wonky. Some days, I will have only blogs I follow have posts in my timeline; the next day, it's all my mom friends. There really doesn't seem to be a correlation. So above all else, if the numbers jump around week-to-week, don't stress about it. It will even out! 

Beauty Tips: Why I Decided to Quit Dairy

Why I Quit Dairy | Writing Between Pauses

For the past 6 years, I've had cystic acne. I've tried just about everything I could to get rid of it: expensive skincare, prescriptions from my dermatologist, rounds and rounds of antibiotics, going on a different birth control pill, quitting birth control entirely. The only thing that really made my cystic acne go away was being pregnant--but that only lasted about 20 weeks! 

After trying just about everything, I had resigned myself to my fate: I'm just someone who gets cystic acne. That's just the reality. I have extremely oily skin, some kind of slightly hormonal imbalance (trust me, I've always been down that road of tests), and that's it. It's just a perfect storm. 

(You can read about my other oily skin essentials here.)

However, after getting involved in skincare, I was talking about my chronic cystic acne in a beauty group I'm in. Another member asked a serious question: have you considered cutting dairy out of your diet? 

And here's the thing: I love dairy. Milk in my coffee and tea, hot cocoa made with milk, cheese, mashed potatoes with butter and cream... I love dairy. It's probably up there on my list of favorite foods. I am also not anti-dairy: if you ethically source your dairy products (which I do!), you can effectively avoid any of the most negative aspects of dairy products. 

However, I also know about the connection between severe acne and dairy. For some people, dairy can make their skin worse because of the hormones in it. (And note: these hormones aren't bad for you, but for some people they are disruptive.) 

This was something I'd always wanted to avoid. Why? Because I love dairy. But I'd done everything for my cystic acne: I double cleanse with oil to help unclog my pores (I recently switched to pure jojoba), I use tea tree oil and black African soap religiously, I buy all the right expensive skincare, and I love a good clarifying skin mask. But I couldn't shake my worst cystic acne related to my cycle. 

It was time. I had to do it. I had to cut out dairy. 

Obviously, making such a huge dietary change doesn't come out of nowhere. When Forrest needed me to cut out dairy for 4 days, I cried.

So I decided to make changes small: I started with my coffee. My dairy creamer was out; I replaced it with an almond-based creamer from CoffeeMate. (Note: it's really hard to find low sugar almond milk creamers. If anyone has any suggestions that also don't have that horrid aftertaste from the almond, please let me know.) 

Next, it was the milk I use; I used Califia Farms unsweetened almond milk for several weeks, but Califia Farms is having some problems, so they aren't available in stores now. I switched to O Organics Almond milk and it's pretty good (except it has a minor aftertaste). 

Next up on my list of things to drop: butter. I love buttered toast and I'm allergic to soy, a major component in many vegan butter alternatives. Finding a butter alternative that is both dairy and soy free is taking more research than I had previously thought it would. 

The thing that's been easiest to drop, surprisingly, is cheese. I don't really miss cheese (although the sprinkle of parmesan cheese on pasta is rough) as much as I previously thought.... except when it comes to pizza. 

Here's to hoping that all this work finally (FINALLY) gets rid of 6 years worth of cystic acne. 

Have you dropped dairy to help your skin? Let me know how it went in the comments! 

5 Beauty Products I Love Right Now

5 beauty products.png

I've been meaning to write this post for a long time, but to be quite frank, I was waiting until I had five really good beauty products that I felt passionate about. I've been very so-so on beauty products lately: I think the more I learn about beauty, make up, skincare, everything, the pickier I get. It's like I used to think drugstore eye shadows were all about as good as it got; now I couldn't be pickier! 

These five products legitimately fill me with such excitement! It's hard to contain, truly. Let's jump right in. 

1. Soap & Glory's Peaches & Clean Deep Cleansing Milk 

I bought this face wash, originally, in a pinch: I needed something cheap, I needed something immediately, and I needed something that would just take my make up off. Soap & Glory is on a list of questionably cruelty-free companies, so I don't want to promote it as 100% CF. However, if you have sensitive skin and want to replace a micellar water that is totally absolutely not CF, it's a good option. This face wash isn't like other face washes: it's more like a thin lotion. I love using it first to remove my make up, then following up with a second face wash or exfoliant. It also smells amazing, just like peaches, and if I use it alone, it leaves my skin super hydrated. 

2. eSalon's Get Lifted Root Spray

eSalon has been such a hit-and-miss for me, but this root spray has been rocking my world lately. I have very flat hair, but also a lot of hair: so the longer my hair gets, the flatter it gets because of the sheer weight of it on my head. This root spray has been making the days I wear my hair down just a little bit more bearable; it lasts my entire day at work without touch ups and gives me just the right amount of volume, without making my hair feel like a sticky mess. 

3. The Body Shop's Tea Tree Face Wash

I love tea tree oil for break outs. It can be really harsh though, so I always worry about using it every day. However, the Body Shop's Tea Tree face wash has truly changed my mind on that front. I use this as a follow up to my Soap & Glory Peaches & Clean Cleansing Milk. Originally, this little bottle was an impulse buy at Ulta; however, I have since also purchased the full size bottle (I just haven't opened it yet). I am obsessed with this face wash. It's done a really good job of keeping smaller break outs under control for the last few months. If you're oily and acne prone, this is the perfect face wash and it's surprisingly affordable. 

4. Ulta Beauty's Rose Gold Palette

When I first bought this palette, I didn't have super high expectations. I just wanted the free gift Ulta was offering that week (it had a mascara and a bunch of other full size products; I can't help it, I love anything free). However, I've been using this palette almost every single day. The colors all follow along the lines of being muted, mauve-y pink and rose shades, with a deeper purple and a gray; the metallic row has a great selection of matching metallics. It's great for creating a monochromatic look. The metallic shades do need a little assistance (I use some of my Mario Badescu Aloe & Green Tea spray on my brush) to really pop, but for such a cheap palette ($16 after a coupon), it's totally worth it. 

5. SMACK! Beauty's Anti-Wrinkle Retinol Serum 

This was a bargain buy at TJ Maxx and I have to admit, I'm sad that I'll have to repurchase it somewhere else now. It was only $6.99 at TJ Maxx, so if you see it at your local shop, grab it. I alternate this serum with my Ole Henriksen Transformation Gel, just to avoid drying out my skin too much. I consider this serum a major contributor to my reduced break outs in the last two months. Retinol is used for anti-aging, but it also is a great chemical exfoliant to help prevent break outs and cystic acne. This was a great addition to my skincare routine! 

Healthy Finger Food Ideas for Picky Toddlers

Finger food ideas.png

The number one question that gets posted in my mom groups is, of course, "Are your kids eating, like, AT ALL?" What is it about being between 18 and 24 months that turns toddlers into the weirdest eaters of all time? Kids who used to happily eat just about everything suddenly reject things they used to love and demand buckets of ketchup with everything. 

Forrest definitely has his moments of refusing to eat anything, but thankfully, I know I can usually get him to eat a few tried-and-true things. But some of our former staples (like quesadillas and grilled cheese sandwiches) are now on his "no" list. You read that right--he refuses to eat cheese now. 

To make mealtimes easier, I started experimenting with finger foods that I could use to either substitute what he was already eating (without resorting to a peanut butter and jelly every single night) and were a little healthier. These are what I came up with. 

1. Tiny Pancakes

I make Forrest banana and egg pancakes (like the kind you see on Pinterest, here is a good recipe, although I add diced up fruit, cinnamon, and two tablespoons of flour as well); for snacks and lunches, I will sometimes make "tiny pancakes." This is just a tiny dot of batter on the griddle. A few dots adds up to a little bowl of cute pancakes, something he can snack on during dinner or after his nap. They're easy and at least it's not a handful of Teddy Grahams, right? 

2. Steamed, Diced Carrots with Ketchup & Ranch

Every mother is now staring at their screen like, "you're joking, right?" I know, this sounds like a disaster waiting to happen, but trust me. I could never get Forrest to eat carrots... if I left them whole. I steam him a few baby carrots for lunch nearly every day and was basically throwing them away untouched.

One day, I decided to dice them into pieces, toss them in a little butter and garlic salt, and present them with some ketchup and ranch for dipping. He ate every single one. This may be further proof that toddlers will eat nearly anything with their favorite dips, but I think it made him think those pieces of carrot were something else. This is now a staple for lunch and dinner for him. If you have a microwave steamer, it's especially easy. 

3. Veggie Nuggets

Forrest will eat chicken, fruit, and carbs until the cows come home. But veggies are where we really struggle. I've really discovered that he needs his veggie disguised--either in applesauce pouches or in nugget form. 

We buy our veggie nuggets (this is my favorite brand and variety, you can get them at Whole Foods and most grocery stores). But I have made them before and they're surprisingly easy. I like this recipe for them, because it includes lentils--perfect for if you worry your toddler isn't getting enough iron. 

Getting Back on Track

getting back on track.png

In my newsletter a few weeks ago, I wrote about how I'd been having really bad anxiety lately caused by a mix of macro and micro issues. For me, macro issues are global: things are happening every single day that just feel, well, bad, and it can be very scary. Micro issues are personal, individual, smaller issues that give me anxiety. The macro puts me in an anxious mood; the micro issues push me over the edge. So that when I freak out about a bunch of bugs in my living room that I need to vacuum up despite being terrified of bugs, I'm actually freaking out about the threat of nuclear war. 

For that reason, my blog, my Instagram, and my newsletter have been kind of all over the place. I tell myself that, for the sake of my mental health, I need to take a break. So I do. Then I feel bad about not blogging, about not writing my newsletter on Friday evening so it can send on Saturday, about not scheduling a blog post all week despite having a very clear editorial calendar set up. 

Then I get more anxious about it. And thus, the cycle continues. 

I've been thinking about this a lot lately. I love blogging; I love that it gives me something to do that isn't horribly high-pressured outside of my day job. I can experiment with methods here that I can use in my day job. I like having a sense of purpose in everything I do and blogging gives me something to do in my downtime. But I know I can take it a little too seriously. Almost too seriously. 

I get very overwhelmed very easily, despite the fact that I seem to always be looking for something new to take on! I've let myself get too overwhelmed because I try to stay up to date on everything: politics, blogging, what's happening in content marketing. It does not help that I often spend evenings working for my day job, doing tasks for social media and more in the time between when my son goes to bed and I do. 

So what's a girl to do? 

As I've written before, I know I need to work on forgiving myself. I know I live a relatively easy life and, for that reason, I often feel like I can never slack off because I need to earn what I have. As well, I know I need to be easier on myself when it comes to finishing things; it doesn't have to be perfect and my version of success doesn't have to be others versions of success. I don't want to be a blogging phenom; it's hard when the measure of success in the blogging community is a certain level. But realistically, I don't want hundreds of thousands of people reading my blog or emailing me! 

A few months ago, I was doing a great job reducing my anxiety through working out, giving myself real time where I didn't do anything, and saying "no" to new tasks. I know I need to take that on again, so this is a way to hold myself accountable. If you're struggling right now too, I hope you join me.