How to Eat a Better Breakfast When You Don't Have Time: A Daily Harvest Review *

How to Eat a Better Breakfast When You Don't Have Time: A Daily Harvest Review* | Writing Between Pauses

When I originally started writing this, my lede was this: when you’re a mom, you’re busy.

But then, I sat back and really thought about that. When it comes to being busy, or feeling short on time, or feeling so frazzled/stressed/anxious that buying everything for a breakfast that isn’t just a peanut butter sandwich feels like a marathon… there really is no competition. Lots of people are busy: people with kids, people without kids, people with full time jobs, people without full time jobs. If it becomes a competition, we’re all going to lose.

So, that’s it: you’re busy. I totally get it. I’m busy too. Most mornings, by the time I have Forrest sitting at the table eating breakfast, or dropped off at my mom’s house, I feel like I’m already ready for a nap—but then I have to jump into work, or get ready to drive to work, or get to the grocery store, or start running errands, or clean up my house because it’s such a mess I can barely stand it. Breakfast needs to be something I can get quickly—usually toast or a bowl of plain Cheerios (very balanced, huh?) and a second cup of coffee. Or (the worse option) I stop at Starbucks on the way to work and grab a breakfast sandwich, which is delicious, but not necessarily in line with my goals for my nutrition, you know what I’m saying?

There is no right way to eat breakfast. Some people really thrive on toast and eggs for breakfast. And while that’s a delicious way to start the day, it’s also something that feels really heavy for me—and while I eat it a lot, I’m not necessarily always happy with it. It’s just… the thing that is easiest. However, it makes me feel super tired after a while because it is so heavy. I know I’d feel better eating something else, but planning ahead is hard: I always have bread and I always have eggs and it’s easy to just slap them together.

That’s why I was so excited to try Daily Harvest. I love smoothies, I tend to eat them as snacks, but sometimes in the morning, I just crave a nice smoothie. Smoothies are a great option for easy breakfasts because you can make them fast and drink them on the go—no needing to sit down with a plate of eggs or a bowl of oatmeal. Also, I’ve seen ads for these smoothies everywhere; they really are killing the digital marketing game.

I received 6 smoothies from Daily Harvest. I picked the following flavors:

Easy breakfast recipes for busy moms
  • Strawberry + peach

  • Ginger + greens

  • Dragon Fruit + Lychee

  • Cold Brew + Cacao

  • Pineapple + Matcha

  • Chocolate + Hazelnut

My favorites of those 6 are the Strawberry + Peach, Pineapple + Matcha, and Chocolate + Hazelnut in that order. Danny loved the Ginger + Greens, but it wasn’t my favorite; it was good, but just a little “vegetable-y” for me.

All of these cups cost about $7 per cup; I know that sounds like a lot, and the price varies depending on whether you choose a Weekly or Monthly plan and how many cups you want per box. But, I did a little pricing at my grocery store; and the cost of the fruit, plus everything else that is in the smoothies (chia seeds, oatmeal, apple cider vinegar, and other supplements), would cost a lot more per cup or smoothie. If you’re making a big batch, or freezing them yourself, it would be worth it; but if you’re like me, and just interested in getting something quick, it’s a great option.

When I first got these cups, I was a little worried about what they would actually look like; but whenever I open one, it’s literally just like looking at the best frozen fruit you’ve ever seen! You can see each distinct ingredient.

Making these smoothies is easy too; you just add your preferred liquid (I use almond milk or juice if I’m making them to share with Forrest, or the Hungryroot Energizing Green Juice or Almond Milk Maca Matcha if it’s just for me) to the top of the cup, then throw into your blender and blend! The cups come with lips that include a hole for a straw, so it’s all in one and so easy to take to work or do chores.

The thing I love most about Daily Harvest is that each cup has such a variety of fruits and vegetables in it; whether it is kale and spinach, or squash and beets, you can get a few servings of fruits and vegetables all in one smoothie without having to worry about actually buying all those things (and trying to combine them yourself!)

Being able to pick different smoothies with each order is such a great thing, because you can try things that you normally wouldn’t choose. An example is I wasn’t sure I would like the taste of lychees; I’ve never had them before. However, I loved the Dragon Fruit + Lychee smoothie. But what if I hadn’t? If I’d bought all those ingredients myself and then hated it, I would be so bummed! By being able to test just one smoothie at a time, it lets me expand my tastes in a way that doesn’t make it feel like I’m throwing money down the drain.

I’m excited to be able to offer you a code that gives you 3 FREE cups! That means if you choose a 7-cup box for your first weekly shipment, you would save about $21. If you’ve been wanting to try Daily Harvest, this is a great way to do it—and you always have the option to skip week-to-week and cancel at ANY time! Use the code below to get your 3 free cups!

If you’ve tried Daily Harvest before, let me know! I’d love to know what you think. I love the convenience of these cups & they have given me great ideas of smoothies to make. Are they something I would order week-to-week? Probably not; but as an occasional order for a busy week or a time where you know you’ll need some easy options, they are really perfect!

Disclaimer: I received a box of Daily Harvest cups in exchange for review. As well, I receive a small kickback whenever you use my affiliate code. This is denoted by the asterisk (*) in the title of this post! However, all opinions remain my own. If you’d like to learn more about my disclosure policy, click here.

Beauty Review: My May 2019 Ipsy Bag

Beauty Review: My May 2019 Ipsy Bag | Writing Between Pauses

She’s back, baby!

By “she’s back,” I mean, I caved and started getting Ipsy bags again because I like paying $10 for 5 products every month because it’s just… easy. And I get to try lots of things. And also they have the Glam Bag Plus now, which is $25 for 5 full-size products and I’m very intrigued. Listen, that’s a lot of excuses, but let’s just go with… she’s back, baby!

Giving myself a break from Ipsy (and trying out Birchbox in the interim) honestly felt like a really great choice. When I restarted my Ipsy, I felt refreshed and ready to get some new products. And as a bonus, I happened to restart just in time to snag a few of the deluxe samples they usually sell for $3-6. Last time that I happened, I tried the super popular Sand + Sky clay mask. I’ll share what I got in that sale at the end of the box, but otherwise, let’s jump in to this Ipsy bag review!

As aways, you can read all my Ipsy bag reviews here. You can also sign up for Ipsy using my link here.

Is an Ipsy glam bag worth it?

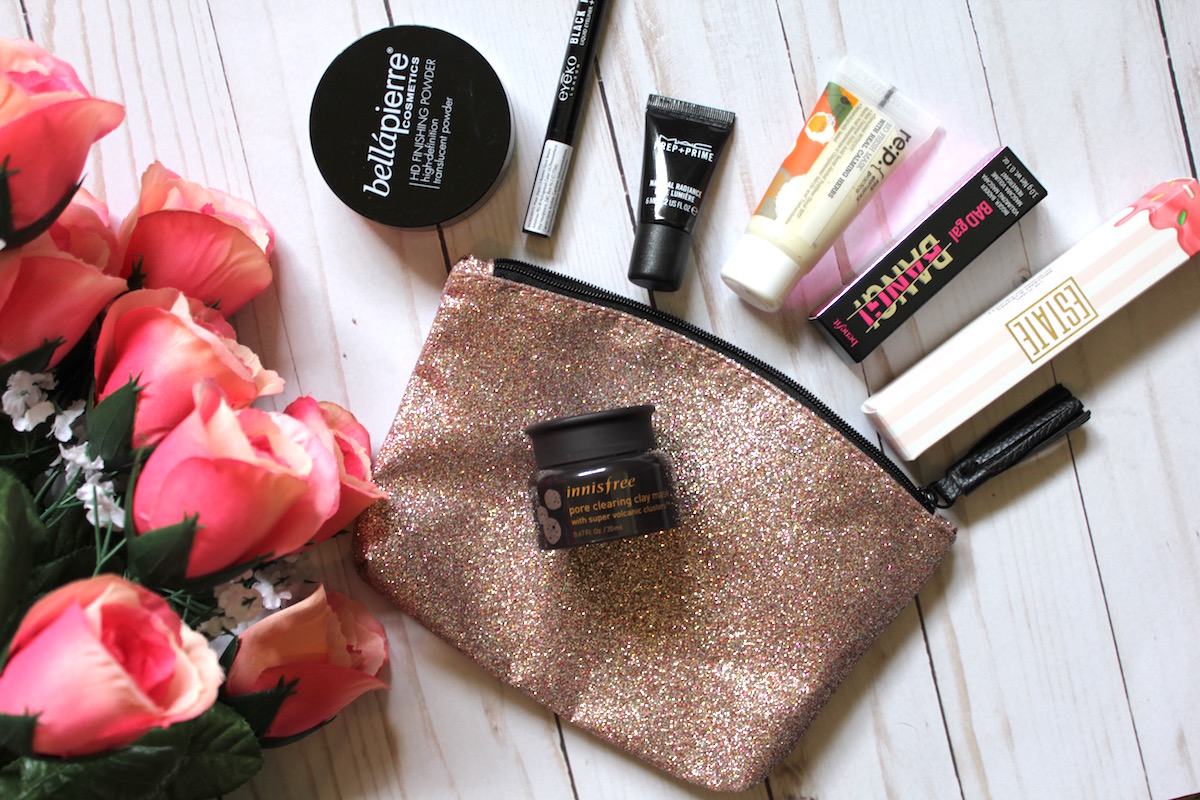
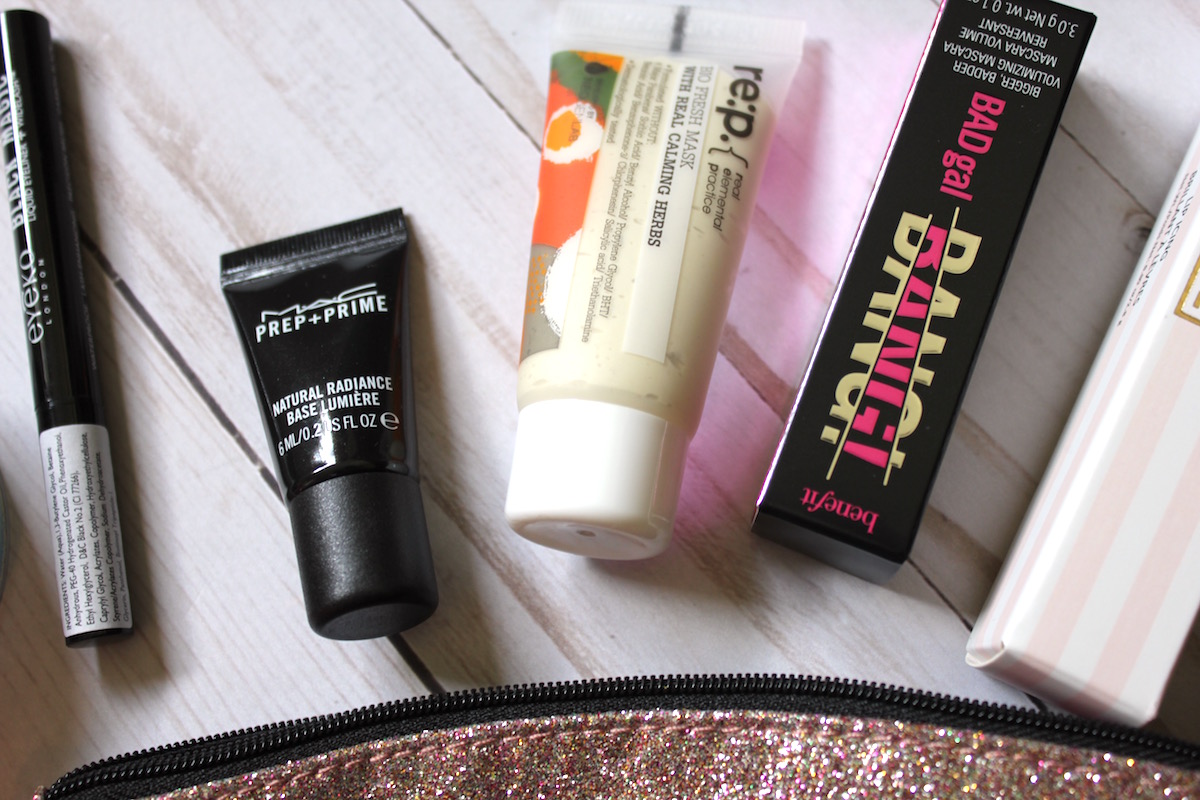
1. BAD Gal Bang! Mascara from Benefit - $13

This mascara is the reason I don’t trust beauty gurus (especially the huge ones on YouTube). This mascara sucks. All Benefit mascaras suck! Can we stop pretending they are good? They are all gloopy, flaky, and nasty. I’m tired of the propaganda! Benefit does not make good products and I’m tired of talking about them and their shtick. Anyway, I knew I wasn’t going to like this and surprise, it turns my lashes into absolute spiders legs, so let’s just chalk this up to they had to include this sample due to a contract. This travel size (deluxe) sample costs $13 (seriously, $13 for mascara that is worse than something you’d buy in a drug store). (Someday, I’ll write an entire post about how much I dislike Benefit, but alas, today is not that day.)

2. Translucent HD Finishing Powder from BellaPierre Cosmetics - $35

I love a powder and so I was very excited to try this one from BellaPierre, a brand I’d seen in a few YouTube videos, but nowhere else really. This powder appears to be a full size; it weighs 6.5g and the It Cosmetics Bye Bye Pores comes in at about 6.8g, so that seems right to me for full size. Comparatively, the It Cosmetics Powder costs $29 for 6.8g and this powder costs $35 for 6.5g, making it quite spendy. It is a decent powder: not as mattfying as It Cosmetics (my ride or die), not as pretty on the skin as the Hourglass Veil powder (but still more effective). It’s a good in-between powder for when I’m having a day with very dry skin or the weather is quite dry already.

3. Bio Fresh Mask with Real Calming Herbs from RE:P - $4.92

I love a clay mask and I love that this one is soothing! During my cycle, I have a few days where my skin gets very flushed, sensitive, and red. I am so excited to use this mask then to help calm down my skin a bit. It smells really herby, for lack of a better word, with a lot of chamomile. I have worn it once and quite liked how it made my skin feel, but I’ll need to test it a few more times throughout the month to see. A full size tube is 130 g for $32—this sample tube is 20g, which is fairly sizable and I will get quite a few uses out of it.

What comes in an Ipsy Bag?

4. Prep + Prime Natural Radiance in Radiant Yellow from MAC - $4.93

I’m not a huge fan of MAC products, but I have heard good things about their primers. I was a bit flummoxed by this primer as they sent me the color “Radiant Yellow”. Now, on the skin, I don’t notice any color, but on the Sephora website, it says specifically that Radiant Yellow is intended for deeper skin tones. They have a pink shade that they recommend for Fair to Medium skin tones. This isn’t MAC’s issue, but just one of those times where I find myself saying, “WTF Ipsy!?” I haven’t noticed that this makes a huge amount of difference to my foundation; I am not a primer user, I don’t find it effective for my skin type (and I think many skin types would benefit from not using primers), but I wanted to give it a fair shot. On the upside, it hasn’t completely wrecked my skin or made my foundation slide off. A full size tube is 1.7 oz and costs $42; this sample tube is 0.2oz, which is fairly large considering the amount you use.

5. Lip Icing in Drip from Estate Cosmetics - $10

I could not find this exact color on the Estate Cosmetics website, but all of the other Lip Icings are $10 per tube. Which is fairly affordable for a really nice lip gloss. I don’t love lip glosses, but I’ve been getting a ton of them in subscription boxes (and recommended to me) lately, so clearly the tides are turning against me and my matte lipsticks!! I’m not prepared for that to happen, but whatever. I do like this gloss; it’s a pink shade, like most glosses, and looks like… lipgloss when you put it on. I’m so biased against lip glosses, I survived the lip gloss trend of the early 2000s, and I don’t want to repeat it because they all look the same. It doesn’t matter what color the lip gloss is, it’s going to look like shiny lips once you put it on and it’ll be gone in 20 minutes!

6. Pore Clearing Clay Mask from Innesfree - $6

This was a bonus item which I bought for $6. I’m so glad I bought this because it’s just like the Aztec clay mask that everyone gets from Amazon, but doesn’t wreck my skin nearly as much. It dries down so tight and sucks everything out of your pores. If you have a break out, you need a mask like this to help those suckers dry out. I’ve already worn this twice and I’ve gotten compliments on my skin within 24 hours each time—which never happens. I have bad skin, guys, but this really takes the care in terms of clay masks. Will absolutely be buying a second one.

7. Black Magic Liquid Eyeliner from Eyeko - $6

I’ve been looking for a Kat Von D Tattoo Liner replacement for actual years. KvD is a mess and if you don’t know the story, hop onto your friendly neighborhood Google and take it for a spin. She’s been a mess for a long time, but it’s been aggravated in the last few years and especially the last year. I don’t want to tell anyone what they should spend their money on, but I vote with my wallet and it’s a “no” from me. That PSA aside, I’d heard good things about the Eyeko Liquid Eyeliner, so when I saw a sample for $6, I went for it. And honestly, it might be better than Kat Von D! It’s black, matte, and a brush tip, which means it’s 100 times better than a felt tip (I said what I said). I’ve worn it every day for a week and the only downside is that, unlike Tattoo Liner, it is water soluble, which means it wipes and comes off much easier.

Final Thoughts

In total, this Ipsy bag, without my special items, comes to a total of $67.85 in value, which is highly inflated by the powder sample and the Benefit Mascara. I really don’t think that mascara sample is worth $13—I’d say about $5, tops, and that’s being very generous—and while I like the powder, it feels like such a small amount. $35 does seem a bit… outrageous, and I frequently pay $29 for powder! Am I hypocrite? Anyway, that’s a fairly standard value for a bag, but I feel like they added the powder purely to bring it up. I like a lot from this bag: the gloss is middle-of-the-road, I like it, but I resent it; the primer is ok; I love any mask that comes my way; the powder is good; and the mascara is going straight into the bin.

All-in-all, a fairly OK bag. I’m hoping next month, things pick up thanks to my reviews. As with any Ipsy bag, I always find myself thinking, well, I didn’t like these things, but at least it only cost $10 for me to try it. It’s not like I bought a full size Benefit mascara only to find out it sucks; it’s also not like I paid $35 for a tiny amount of powder! That’s the beauty of Ipsy, really.

My Favorite Hungryroot Foods & How to Get Kids to Eat Them

My Favorite Hungryroot Foods & How to Get Kids to Eat Them | Writing Between Pauses

You guys know I love Hungryroot. I’ve written about them a few times and as they’ve changed how they deliver food, I’ve grown to love them even more. Hungryroot is a great way to supplement your weekly grocery shopping with quick, convenient options. I wanted to share a few of my favorites, while sharing my tips for getting (slightly picky) kids to eat them.

If you want to try Hungryroot, you can use my promo code PAUSES2021 for free brownie batter when you sign up! Click here to visit Hungryroot and sign up for your first box today. I promise, you’ll love it as much as I do.

1. The Superblend Salad Mix

Sometimes, you meet a salad mix that is just absolutely perfect. I have a love-hate relationship with salads in general; I find them delicious, but hard to make and eat. Plus, buying lettuce and all the ingredients for a great salad can be expensive—and it all goes bad so quickly, I can barely use it all.

I know this is not an attractive photo, but superblend salad + brown rice + ground beef is the perfect burrito bowl.

I know this is not an attractive photo, but superblend salad + brown rice + ground beef is the perfect burrito bowl.

Enter the Superblend Salad mix, which has a combination of (wait for it) Brussels Sprouts, Napa Cabbage, Kohlrabi, Broccoli, Carrots, and Kale. It is…. perfect. When I tell you this salad mix works for everything, I mean it. Salads? Sure. Taco bowls? Yep. Coleslaw for tacos? YUP. In wraps? For sure. You name it, I’ll eat it. I’ve ever sauteed it for stir fry and it’s good that way too. It’s so freaking good.

And get this: even Forrest likes it. A sprinkle in his burrito (beans and rice only please, no cheese) (yes, he hates cheese) for a little crunch, or on his taco as coleslaw. He also likes a little sprinkled on top of his ramen when I make that at home, because he’s a cultured toddler like that.

But in all seriousness, this is a salad mix that isn’t droopy or plain; it has crunch, it has variety, it has flavor. It’s so, so good and perfect for using with kids. Like I said, it totally works as a coleslaw mix. A few suggestions: use on tacos, barbecue chicken sandwiches (!!!), or alongside fried (or baked!) chicken. Mix with ranch dressing and serve in a BLT wrap. There are so many ways to add this to the things you and your kids are eating anyway, for extra nutrition.

2. Superfood Almond Butter

A classic waffle topped with Superfood almond butter & syrup—this is Forrest’s favorite breakfast!

A classic waffle topped with Superfood almond butter & syrup—this is Forrest’s favorite breakfast!

We are bit peanut butter fans in our house—and swapping classic (aka sweetened, not very good for you) peanut butter has been a huge challenge for us. I’ve yet to find an almond butter that I love as much as I love JIF (and lemme tell you, I love JIF). However, Hungryroot’s Superfood Almond Butter is the closest thing I’ve found. Here are a few ways we love it in our house:

  • On toast with slicked strawberries or peaches on top

  • On waffles with syrup

  • In smoothies with banana

  • As a dip for apple slices in the afternoon

  • Mixed with oats as a crumble for pumpkin bread

  • Paired with local honey in an almond butter & jelly sandwich

  • On top of my morning oatmeal

  • Danny mixes a hearty dollop into his Kodiak Cake Flapjacks every morning before going to work.

This almond butter is just perfect. It’s not too sweet, but not too plain; it tastes like almonds without being aggressive; and it’s seriously healthy. It has almonds, chia and hemp seeds, coconut sugar, goji berry powder, and pink Himalayan salt. Honestly, it’s perfect. The packaging is also perfect because it’s easy for me to put the entire thing in my bag; it comes in a resealable tube not unlike a packet of baby food. It’s easy to dispense and great for traveling.

3. Brown Rice & Quinoa Blend

I am terrible at cooking rice (like, really bad at it), so these Brown Rice & Quinoa Blend 90-second pouches from Hungryroot are basically the answer to my prayers. Finding quick cooking brown rice, as well as quinoa, is like running a gauntlet, but Hungryroot pretty much took the baton from me and ran the entire race. They actually snapped their fingers, ala Thanos, and got rid of the race. These are perfect for nights where you have leftovers you need to use: leftover taco fixings? Make a burrito bowl. Leftover stirfry? Heat it up! Just need a quick dinner? Some brown rice and salad greens and call it a night! They are perfect.

Forrest loves rice and beans, so I pretty much can always make him happy with a scoop of homemade refried beans (just heat a can of low sodium black beans and mash with a fork, voila, homemade refried beans) and a scoop of rice. Add a few torn of tortillas (or even better, some of the Sprouted Wheat wraps from Hungryroot) and he is set. It’s a quick, easy dinner for a toddler who loves one thing and one thing only: carbs.

4. Energizing Green Juice

Personally, I love a green juice—the more vegetable-y, the better. And this one from Hungryroot really fits that description: it has cold-pressed cucumber, apple, celery, lemon, spinach, ginger, kale, mint, and parsley. It mostly tastes like cucumber water with a hint of lemon. If that doesn’t sound like your thing, go ahead and try it, you might be surprised.

However, this makes an excellent non-dairy base for a smoothie. Forrest and I love smoothies; it’s our normal afternoon snack. Here are a few of my favorite smoothie combos:

  • A bottle of green juice + pineapple, watermelon, cherries, & a frozen banana

  • A bottle of green juice + 1/4 cup of canned pumpkin (you can freeze this in tablespoon size ice cubes and it makes a great ice base too!), ginger & nutmeg, a banana, and a little bit of honey

  • A bottle of green juice + strawberries, a frozen banana, and a big spoonful of the Superfood Almond Butter

These are our three absolute favorites. Even better is to make a smoothie then freeze into popsicle molds for a quick, super healthy popsicle on hot days. This is Forrest’s absolute favorite treat during the summer and being able to offer a healthy option with the energizing green juice makes it even better.

5. Red Lentil Fusilli

Do you find yourself making spaghetti, like, 3 times a week in your house? Sometimes, it’s all I want to eat; it’s all Forrest wants to eat; it’s all Danny wants to eat. It’s so quick to boil some noodles, crack open some sauce, and move on with my life. That’s why I love that Hungryroot now has some quick grain options—including plaintain luinguini! But my favorite is their Red Lentil Fusili; I’ve also loved lentil pastas, they are a great, easy swap and they don’t taste any different from regular noodles. But you get an extra dose of iron, protein, and fiber.

Obviously, you can pair this pasta with any sauce (we are partial to red sauce in our family) and your toddler will probably wolf it down. However, Hungryroot also has some great, kid-friendly sauces, like Superfood Tomato Sauce (a classic!), Beet Pesto, Chickpea Pesto, and Garlic Parm.

If you had told me a few years ago that I was regularly eating red lentil pasta with chickpea pesto sauce, I would have told you that that wasn’t possible; I was a tried-and-true box of pasta and jar of store brand marinara sauce lover. But this really is just a better option—and it’s delivered to your door!

Update: there are SO many great products available through Hungryroot now—I’m planning to write an updated post on this topic soon!

Final Thoughts

Hungryroot isn’t just for adults, is what I want you to take away from this. If you want your kids to try new foods, and develop a love of some healthier foods, Hungryroot is a great way to do so. Plus, it’s just so easy to pick a few things and have them delivered to your door. No wandering through Whole Foods, trying to decide what to pick; no spending more than necessary. That’s why I love the subscription element; you pay the same price every week and get exactly what you want! These are just a few of my favorite items, but if you follow me on Instagram, you can frequently see what Hungryroot foods I’m eating every day.

Again, don’t forget you can use my code, PAUSES2021, to get 40% off your first order!

hungryroot promo code

Disclaimer: I am a Hungryroot affiliate, which means every time you use my code, I will receive a small kickback. Posts like this help Writing Between Pauses keep going! This post was written on my own and all viewpoints expressed remain my own. I just really love Hungryroot! If you’d like to learn more about my disclaimer policy, click here.

Beauty Review: Prana Dry Brush*

Beauty Review: Prana Dry Brush | Writing Between Pauses

About 7 years ago (yes, 7 years ago), when Google Reader was still alive, I read a blog post from someone I followed about dry brushing. I can’t remember her name, or her blog’s name, but that memory of her raving about dry brushing stuck with me. Whenever I heard it mentioned, I’d think of that blog post and think, maybe I should try that?

But then I never actually did anything about it. I stayed curious about dry brushing, but in the chaos of my life (getting married, buying a house, working on my career, working on this blog, having a baby, successfully raising that baby into a toddler), I never got around to. I mean, I just bought a jade roller, guys. When trends pop up, I try my best to get on the train, but often, I’m running behind the train in two different shoes and my hair in a messy bun.

So when Prana Brush reached out to me about trying their dry brush, I knew I wanted to try it immediately. I jumped on a phone call with Jessica, who told me all the great things about the Prana brush, how it worked, and what it did. And honestly, I was on board. It didn’t take much convincing. I’ve had 7 years to stew on this, I was ready.

What is Dry Brushing?

What is Dry Brushing?

Dry brushing is exactly what it sounds like: you use a brush to gently “brush” your skin, usually moving towards your heart. You do this dry—not with a loofah in the shower, not by dampening the brush. This helps exfoliate your skin and prepare it to be washed in the bath or shower, as well as improving your lymphatic system’s health, minimizing the appearance of cellulite, and helping circulation. There are tons of other benefits to dry brushing too.


The Prana dry brush

When I first received my Prana dry brush, I was impressed by how well made it was and how soft the bristles felt—while also being seriously exfoliating. I tried it the first time that day before I jumped in the shower. The number one thing to remember about dry brushing is that you aren’t scraping your skin or going hard on this brush; it’s just a gentle motion. I noticed a huge difference in the dry skin I always have on my ankles and elbows almost immediately!

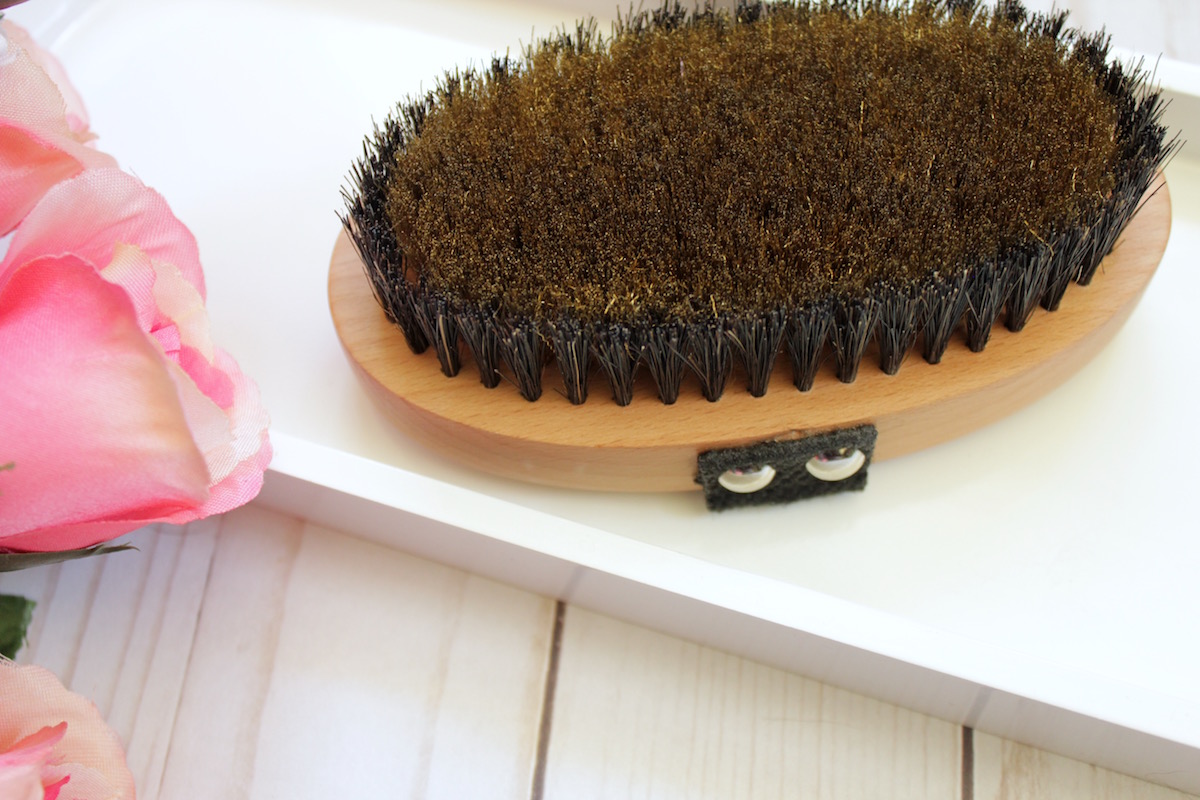
Dry Brush with Copper Bristles

The Prana dry brush is different from other dry brushes because it has ionic copper bristles in it, as well as standard bristles. You can see them in the picture above. I know “ionic copper bristles” sounds incredibly harsh, but I promise you, they’re really not! The ionic copper bristles “create a natural friction between the ion-charged copper bristles and your skin,” which is incredibly good for your skin.

This brush is designed to be used dry, of course, and doesn’t require cleaning. Copper is naturally antibacterial, so there is no need to wash this dry brush as you would a normal brush. After I used it, I just carefully tapped it on the side of my tub to remove any dry skin that it may have picked up. It came in a beautiful cardboard box that I am using to store it on my windowsill (in the chaos of packing, at least).

You can learn more about dry brushing from Prana Brush here.

Final Thoughts

So, was dry brushing worth the 7 year way?

In short, absolutely! I’ve noticed a huge difference in my skin, especially on my legs, which have often been a “problem area” for me. I have strawberry skin, which means my hair follicles are visible. I’ve always decreased this by using self tanner, or wearing tights as much as possible, but I’ve found since starting to dry brush, I’ve noticed a huge difference in how these spots appear! My skin is also smoother and softer, absorbs lotion better (no slick seal feeling when I get into bed!), and doesn’t have any problem dry spots. Since it’s only 2 weeks, I can’t speak on the other benefits of dry brushing, but I’m excited to see how I feel in a month or two. I’ve definitely struggled with my energy levels in the last 3 years (thank you, postpartum depletion!) and so if this helps me get my body back in fighting order, I’d really love it.

Have you ever tried dry brushing? What did you think?

Beauty Review: Birchbox, May 2019*

Beauty Review: Birchbox, May 2019 | Writing Between Pauses

Last month, I shared my first Birchbox to show you what the new, redesigned Birchbox offers. If you didn’t catch that post, you can read it here. However, as a summary, here’s the jist: Birchbox is now $13 a month (depending on the plan, but that’s the average) and doesn’t just come with 5 samples, but at least 5 with a few bonus samples. Last month, I got 7 samples, including a Sunday Riley Luna Oil sample which I am still using a month later. (Such a good deal!)

This month, I’m going to share a more traditional review of Birchbox. If you’d like to sign up with Birchbox, you can do so by clicking here*.

Is Birchbox Worth the new Cost?

Here’s What I Got:

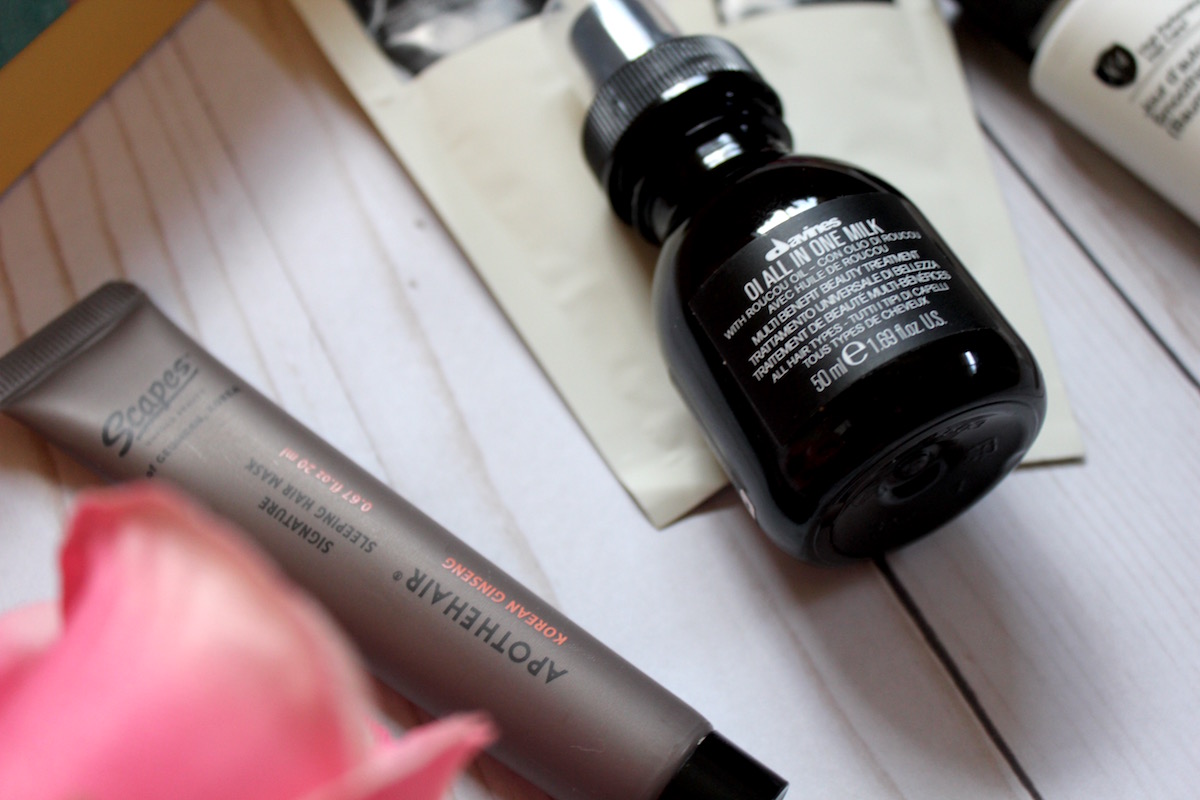
Davines OI All in One Milk (50ml/1.69oz) : “This nourishing leave-in treatment detangles while adding volume, shine, and heat protection.” A full size of this hair milk retails for $34 and contains 4.56 oz/135 ml, making this sample roughly $12.50 in value. It is a fairly large sample. I really like this one, as I can spray it on my hair when it is dry or wet and it helps tame frizziness (especially as it has been humid and rainy here in Oregon). It also smells amazing.

Dr. Lipp Moisturizing Colour Tint in Sweet Potato (3ml): “This high-shine tinted lip balm uses just four natural ingredients… Organic edible sweet potato pigments give it its flattering pink shade.” I actually received a full size of this product from my Ipsy bag several months ago. The full size is only 5ml, making this deluxe sample worth about $5 (the full size is $8.95). I am almost done with my tube from Ipsy, so I guess it’s good I got a second one!

Kiehl’s Ultra Facial Cream (0.25oz/7ml): “This ultrahydrating moisturizer is rich without being greasy and sinks in without leaving behind any residue.” This was my sample pick this month; the samples were pretty lackluster, but I’ve never tried any of Kiehl’s facial products. I quite like this moisturizer, as I’ve been breaking out a lot lately and my skin has been dry, dry, dry (I think it’s from the recent changes in weather here). A full size sample retails for $30 and contains 1.7 oz, which makes this sample worth about $5.60. This cream didn’t make me feel greasy either, which is always a plus!

Marcelle Xtension Plus Skyline Mascara (0.14oz/4.2ml): “This clump-free mascara’s ultraskinny brush helps curl and lift every last lash while adding length and definition for a wide-eyed appearance.” This sample is about a half-size, which is pretty good! A full-size retails for $15, making this about $7.50 in value. Mascara is always a hard one for me, as mascaras often don’t do what I need; I have very long, full eyelashes, but they are quite thin. I’ve yet to find a mascara that adds volume without being clumpy af, and, unfortunately, this one only seems to lengthen. Nice, but not what I need!

Number 4 Jour d’automne Smoothing Balm (1oz/30 ml): “Prep damp hair with this styling cream, which contains tiny molecules that penetrade each strand to minimize frizz, add touchable texture, and protect against heat damage.” This is about 1/5 the size of a full size bottle, which retails for $30, valuing this sample at about $6. This is one of 3 leave-in hair products I received (I’ll touch on this in my final thoughts), but I quite like it still. My hair, as everyone probably knows by now, is very long, very thick (I have a lot of hair), but very fine and straight that tends to get frizzy with fly-aways. This seemed to make a huge difference.

SCAPES Apothehair Signature Sleeping Hair Mask (0.67oz/20ml): “Apply a dime-size amount of this herb- and oil-rich leave-in conditioner to damp hair before bed to wake up to smoother, hydrated hair. No need to rinse out, just style as usual.” A full size of this product retails for $25 and has 125 ml; that values this sample at about $4. Honestly, this is probably my favorite product of everything I got; it smells amazing and made my hair feel absolutely lovely. And $25 for how much you receive is pretty amazing, considering you only need a teeny tiny dollop.

Davines OI Shampoo (0.4oz): Nice, a shampoo packet. This shampoo promises to be ultrahydrating, which is fine. It says it protects hair from UV rays, which I quite appreciate. I did get tons of compliments on my hair after using this, but since I only received a packet (it was just a bonus item), it’s hard for me to know if that’s because of the leave-in conditioner or this shampoo.

Davines OI Conditioner (0.4oz): Another packet! I did quite like this conditioner even if I only received a packet of it. It reminded me a lot of the Shea Moisture Manuka Honey mask that I like to use: a little lighter than that, but very hydrating and rich. It made me hair feel lovely and I almost wish I had saved it to use alongside my preferred shampoo, just to see what it really did for my hair.

What Kind of Samples do You Get in Birchbox?
Kiehl's Ultra Facial Cream
Hair Masks from Birchbox

Final Thoughts

The total retail value of this box is about $44.60. That includes a very generous $2 each for the shampoo and conditioner packets. While $45 would be quite the shocking price for a bunch of sample (and deluxe sample) size products, for $13, I definitely don’t baulk at it.

My one issue, if you couldn’t tell, is that 8 things I received, 5 of them are hair products. And of those 5 hair products, 3 are leave-in products! Thats honestly just a bit too hair-heavy for me, when I tend to be quite picky about my haircare products. While I did like all of them, I found myself frustrated at having to space how when I tried everything; if I used it all at once, how would I know what did what!? It also doesn’t give me a well-rounded amount of things to try, especially as one of the non-hair products I’ve received from another subscription service.

Are you a Birchbox subscriber? What did you receive this month? I actually had wanted one of the curated boxes, but it had sold out by the time I was able to get in to select my item or box for the month!

Disclaimer: As noted by the asterisk (*) in the title of this post, this is a sponsored post with Birchbox. I am a Birchbox affiliate and any links to the Birchbox site are affiliate links and also marked with an asterisk. I received a 6-month Birchbox subscription in exchange for blog posts. Posts like these help me keep Writing Between Pauses going! However, all opinions remain my own. If you’d like to learn more about my disclosure policy, click here.

Beauty Review: Hourglass Vanish Seamless Finish Foundation & Veil Powder*

Beauty Review: Hourglass Vanish Seamless Finish Foundation & Veil Powder | Writing Between Pauses

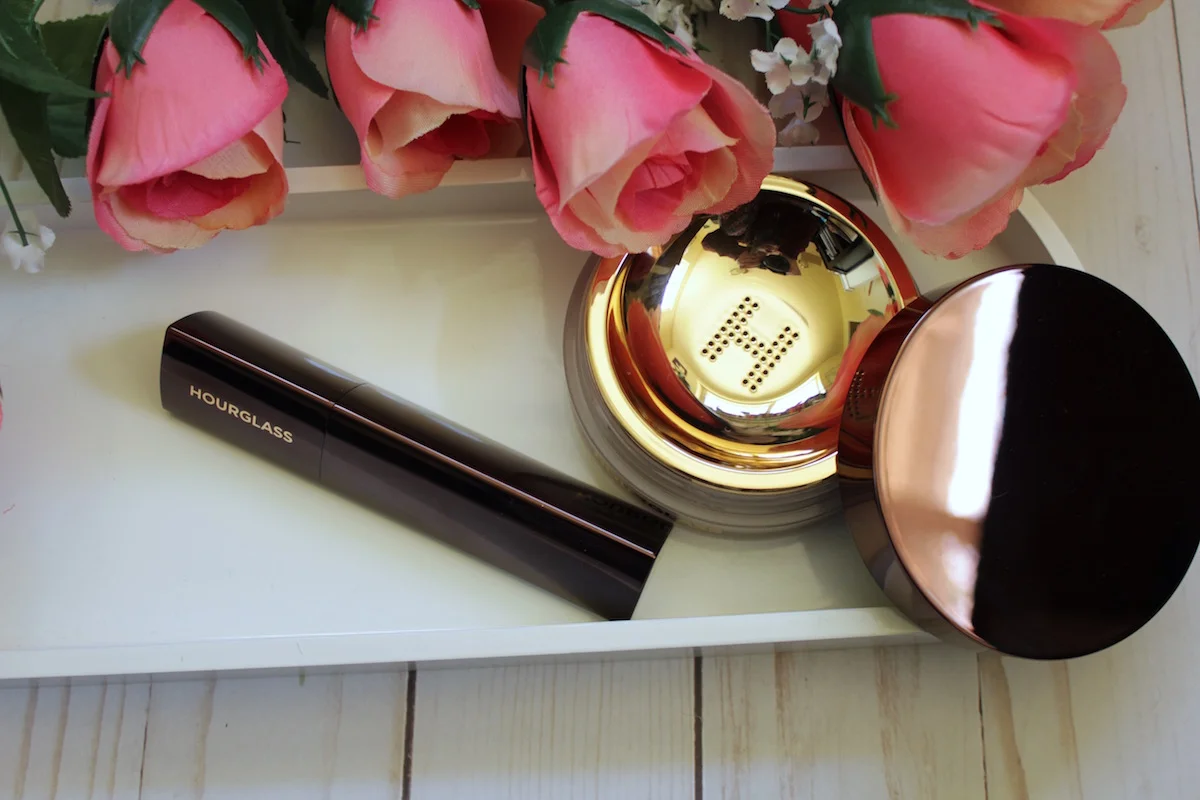
I love a new foundation. Having problem skin (I hate that phrase, but why is it the best way to describe everything?), my base makeup is one I almost always wear, even when I’m running late. Foundation & powder are crucial items for me, so getting the opportunity to review the Hourglass Vanish Seamless Finish Foundation stick (it’s that triangle shaped foundation stick that every beauty guru uses in their videos—seriously) and the Veil Powder is really a dream come true.

Like with all my foundation reviews, I gave myself a few days to experiment with this foundation and how I applied it. Here’s a rundown of each of my wear test methods:

  1. Clean face, moisturizer, foundation blended with kabuki brush, veil powder on top

  2. Clean face, moisturizer, It Cosmetics powder, foundation with brush, veil powder on top

  3. Clean face, moisturizer, foundation with sponge, It Cosmetics powder & veil powder on top

I felt like that gave me the most variety of how I applied it. I’ll share what I think worked and what I think didn’t later.

First, let’s talk about this foundation.

Hourglass Stick Foundation

The Hourglass Vanish Seamless Finish Foundation Stick (phew!) retails for $46 from Sephora. That is a pretty steep price point, especially as you only receive 0.25 ounces! For reference, the average foundation comes with 1 ounce as a standard measurement. However, this foundation has been everywhere. So I expected to be impressed: with a price point like that and so much hype from the beauty world, I found myself very easily swayed.

Here’s what this foundation promises:

A weightless, waterproof foundation with long-wearing, concentrated coverage in a custom, triangular component for fast and easy full coverage on-the-go. This long-wearing, waterproof formula provides up to 12 hours of coverage, contains double the amount of pigment versus traditional foundations, and adjusts to your body temperature to effortlessly blend into the skin. Multiple shades can also be used to contour and highlight.

I knew from the get-go that this promised to be a full-coverage foundation. From the videos I’ve watched, it definitely seemed to cover everything. But as we know, a lot of YouTube beauty gurus use blurring filters, which can make their skin look a lot better.

I received the shade Alabaster, which promises to be fair, with a cool undertone. As with most foundations, I found this to be a lie; it swatched very yellow/orange on my forearm, which made me pretty nervous from the start.

My first application, however, I felt like it matched my skin tone pretty well. My first wear test, I used a brush to apply it, as I’ve found in the past that stick foundations work best with a brush. However, I did feel like the brush left my foundation looking pretty streaky.

How Good is Hourglass Stick Foundation

Let’s discuss the powder for a minute as well. The Veil Translucent Setting Powder also retails for $46 for 0.36 ounce (so about 1/3 of an ounce). Comparatively, the It Cosmetics Bye Bye Pores powder (my favorite powder, review here) is $30 for 0.23 ounce (about 1/4 an ounce). So that’s a pretty standard size, but still pretty steep in price. Here’s what the powder promises:

The magic of Veil transformed into an ultra-refined loose powder designed to give skin a naturally flawless finish. This finely-milled, weightless powder is formulated with soft-focus light-reflecting particles to instantly blur imperfections and minimize the appearance of pores, fine lines and wrinkles for effortlessly smooth skin. The translucent formula can be used on all skin tones for an invisible, natural skin finish.

You know I love a powder and I immediately loved the texture of this powder. It felt so heavenly when I swatched it; it’s so finely milled and soft. I don’t know how else to describe it. I was so excited to use it.

Hourglass Foundation Wear Test

The first day I wore this foundation, as I said, I applied it with a brush, then applied the powder. I didn’t use my usual It Cosmetics Bye Bye pores powder. (I already linked the review, but this powder really is my holy grail. I always go back to it. It’s that good.) Within a few hours, my nose was almost entirely bare of foundation, which is pretty standard if I don’t use my It Cosmetics Bye Bye Pores. So, strike 1 for the Veil powder. However, on other areas of my face, the foundation had held up well. Despite the streakiness, I did really like the finish and even though I had been hesitant about the color, it didn’t oxidize or anything. It is not a matte finish, as it is a cream formula, and it is very full coverage without feeling heavy. I didn’t notice it getting cakey or gross, but it did slide around—again, probably because I didn’t use my holy grail powder.

On second wear test, I decided to try my tried-and-true method of using It Cosmetics Bye Bye Pores as a base underneath my foundation. (This is the Wayne Goss method; if you’re oily-skinned, I highly recommend it!) However, this made it slightly harder to blend the foundation; I found it dried before I could get to brush it. It became a bit of a mess. However, once I applied the Veil powder over top, I had salvaged it a little bit. And honestly, I love the finish of this foundation combined with the Veil powder. The Veil powder really is beautiful on the skin. However, even with this method, I found it broke down, especially around my nose, within 3-4 hours.

For my third wear test, I think I found the best method: clean face, moisturized, then apply foundation with a sponge. Even though I usually apply cream foundations with brushes, something about this stick foundation definitely did not play nice with my brush! It looked great with a sponge and just as full coverage. I found I did not have to use any concealer with this application, as my undereyes and blemishes were covered. Then, I mixed the Veil powder with a little bit of my It Cosmetics Bye Bye pores; this gave me the gorgeous finish that the Veil powder has, while also setting my oily skin. This made my foundation last about 6 hours, which is pretty much as good as it gets for me, with only a little breakdown around my nose and no cakiness.

I know this picture to the left is a Snapchat photo (I love that filter, #noshame), but it’s the only photo I remembered to snap all day during the third wear test. I felt so pretty with this foundation on—and honestly, it doesn’t get much better than that. I’m going to keep playing around with applications for this foundation, but I’m pretty pleased that this method works best for me and my skin type. I’ll address other skin types in my final thoughts!

Beauty Guru Hourglass Foundation
Hourglass Vanish Foundation Stick

So what’s my final verdict?

If you are oily skinned, this foundation, like most foundations, will need a little work. As a cream foundation, it is best for normal skin types and maybe even dry-skinned cuties, as it is quite “moist” as far as stick foundations go. The powder is beautiful, but I don’t think it does much for oily skin. If you were going to a short event, the powder would actually probably be perfect: not too drying and absolutely gorgeous on the skin.

If you have dry skin, this foundation might require some testing. Without having dry skin myself, I don’t want to make any absolute calls. However, the powder would be perfect if you have dry skin; the finish is so beautiful and it doesn’t really mattify at all. It’s just really pretty.

If you have normal skin, how lucky are you, honestly? Just kidding; this foundation is really perfect if you don’t have any skin issues, but are looking for full coverage.

Would I repurchase these items? This is where I start to second guess myself. $46 is a lot for a foundation, especially one that, while nice, isn’t the best foundation I’ve ever used for my skin. As well, $46 for a powder that is pretty, but not super effective for my skin? I probably would say I wouldn’t repurchase either one of them. I like them, but I don’t absolutely positively love them—and that’s a big difference.

Want more foundation reviews?

Here are a few more foundation reviews like this one that I think you’ll love.

Disclaimer: As indicated by the asterisk (*) in the title of this post, I received this items from Influenster in exchange for an honest review. However, all opinions remain my own! To learn more about my disclosure policy, click here.

Beauty Basics Guide: A Complete Guide to Brushes

Beauty Basics Guide: A Complete Guide to Brushes | Writing Between Pauses

The number one question I get in my day-to-day life, as well as in my email, and in comments, is: what brushes do I need if I’m new to makeup?

I’m definitely not the first person to be asked this question (and I’m definitely not a makeup expert, just someone who likes a little makeup), but I do have my own ideas of what makes a good “starter brush” collection.

Back when I started getting into makeup, I bought a really, really cheap brush set at Walmart that I used for years: it had a big fluffy face brush and a blush brush, as well as a selection of not-very-good eyeshadow brushes. These brushes shed hairs like it was their job, always rinsed out black (not a great look), and were more plastic than anything else.

I’ve since moved on from that era of my life (although I only recently finally threw away the last of those brushes, it was nearly 15 years old! I’m ashamed), and thought I’d share the advice I usually give to people who ask me what brushes I recommend for daily use.

Face Brushes

Face brushes are, as seems obvious, brushes you use on your face: for foundation, powder, and blush, as well as highlighter and contour. I use a ton of face brushes every day, but when it comes to basics, I only have two recommendations.

Best Face Brushes

1. A Good Kabuki Brush

A kabuki brush is a dense brush that works well for putting on foundation or buffing things out. I use my kabuki brush for:

  • applying cream foundations

  • blending out my contour

  • blending out my blush if I put on too much (it happens)

  • applying my baking powder

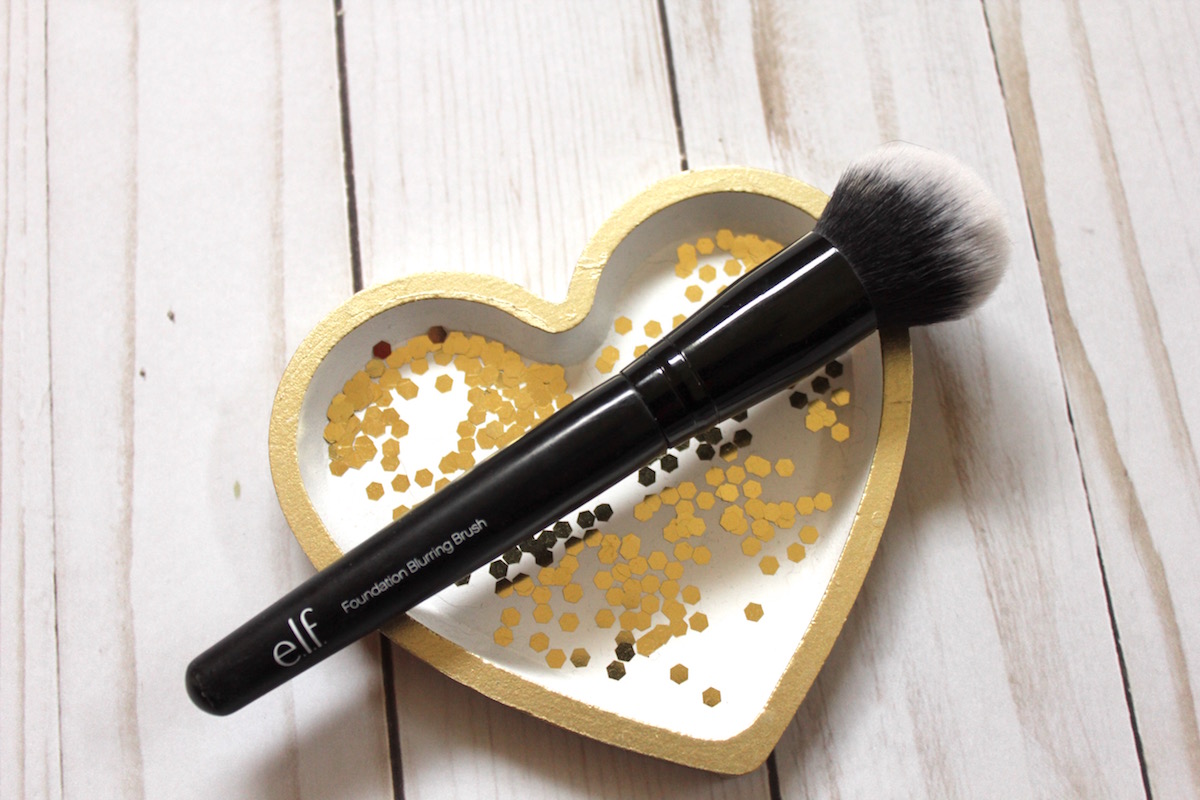
I use an elf flawless selfie brush; it was $6. You really can’t beat that price. (Technically, it isn’t a “kabuki” brush, but it looks and acts just like a kabuki brush.) I’ve used this same brush, buying new ones every year or so, for years; it is super affordable. But because you use it to applying foundation and oilier products, you need to wash it extremely regularly. Overtime, that can cause mold and mildew, as the bristles are so tightly packed. So keep your eye on it and if you notice it looking (or worse, smelling) funky, toss it and buy a new one.

What Face Brush Do I need
Learning to Use Brushes

2. A large, fluffy face brush

This brush is large and fluffy. It’s perfect for:

  • Applying powder or brushing away excess after baking

  • Applying blush

To me, a fluffy face brush is the most essential brush you need, but that might be own bias, as I wear a lot of powder. The brush I have here is a FARAH face brush; you can find a similar one here. However, elf, as usual, makes a really great affordable version.


Eye Shadow Brushes

For me, those two face brushes are all you need for your entire face; you can use both of them for foundation, powder, blush, contour, whatever else you need. From there, it’s just eyeshadow brushes.

What Eyeshadow Brushes do I Need
Eye makeup brushes
Tapered Blending Brush

Tapered Blending Brushes

You’ll need at least one, but I prefer to have two. Sometimes, I apply color with one, then work on blending and diffusing with the other. But really, that’s just a personal technique. My two favorite brushes are the tapered blending brush from FARAH and the Elizabeth Mott tapered blending brush.

These brushes do just about everything:

  • Blend eyeshadow

  • Applying color

  • Applying highlight

If you have any eyeshadow brush, this is really the one to pick.

Packing Brush
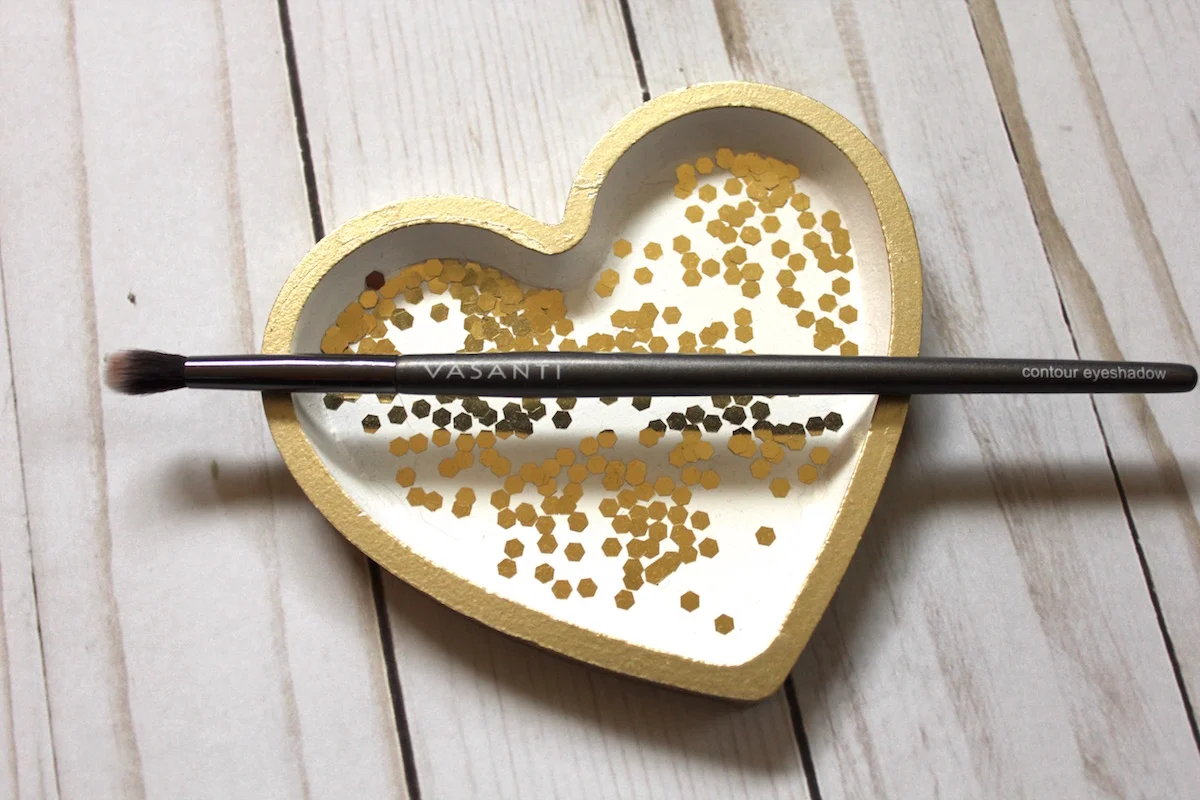
Contour Eye Brush

Packing Brushes

Packing brushes are designed to applying color to the lid before being blended out. If you’re doing more complicated looks, these brushes can be a great way to pack on color before blending out. My two favorites are from my Ipsy bags, but I like this one from Elizabeth Mott.

Brush Sets

In general, a great way to save money and get a variety of brushes is to buy a set of brushes. Here are a few of my favorite sets.

Travel With Me: Sunriver, Oregon

Travel With Me: Sunriver, Oregon | Writing Between Pauses

I’ve been going to Sunriver, Oregon for a long time. I think the first time was when I was 7 or 8, or at least in that age range. Sunriver is technically a resort town, or a planned community, and my family has been renting houses there for a long time. In recent years, my family decided to purchase a home in Sunriver as an investment property, which has been great for helping us take more vacations!

(You can read my previous post about traveling to Sunriver with a toddler here.)

Sunriver is located in central Oregon, about 20-30 minutes from Bend. This means visitors have access to basically all of Bend easily—that means more restaurants and shopping, as well as attractions like the High Desert Museum and the Lava Caves. I’ve been going to Sunriver for so long that I feel like I have a very set routine—but it also means I feel like I know just about everything there is to know.

Rarely ever do I do travel posts, but it’s been something I wanted to start sharing a bit more.

Sunriver Oregon
Wine in Sunriver Oregon

We headed over to Sunriver on Friday evening. Forrest had been having a pretty rough day; he’s been having more separation anxiety from me lately (something he has literally never had before!), and got sent home from school he was so upset. We had a good talk about learning to calm himself down. It probably didn’t help that we’d had a big day Thursday and his nap and sleep schedule were totally off. However, we made it to Sunriver on time to eat dinner.

We ate the Village Bar & Grill. Like most of the restaurants in Sunriver, they have a smaller menu than most people are used to, but they have really good, if slightly expensive, food. I got the Blackened Chicken Caesar Salad, which was spicier than I expected (but still good). Forrest got typical kid food: a hot dog and fries.

After dinner, we made our way to our house. Sunriver had some permanent residents, but is mostly rental houses; my family owned a small house previously, but recently sold it to purchase a different home. It was my first time seeing it and it was as lovely as I’d been told it was!
Forrest played for a little while and then we went for a short walk on the bike path, before I put him to bed. I drank a glass of wine and relaxed with my family for a while before going to bed myself.

Sunriver Bike Paths
Sunriver Walking

The next day, I went for a walk myself in the morning. The best part about Sunriver really is all the bike and walking paths. It is still pretty chilly in the mornings in Central Oregon, so I had to bundle up. However, I was excited because I was going to pick up Danny around noon.

Danny had been at a teaching conference in Eagle Crest, which is also not far from Bend. I planned to pick him up so he could join us in Sunriver.

When I got back from my walk, I helped clean up after breakfast and played with Forrest a bit. He was feeling antsy and excited, but really, really didn’t want to nap at all, despite waking up at 3am. (Yes, he woke up at 3am. Kids and vacation are often harder than I expect.) While I tried to get him to nap, the rest of my family played Yahtzee, which is a Sunriver family tradition.

Once he woke up, I got him ready for the rest of the day and we blew bubbles outside for a while. Then, when my mom got back from a walk, I borrowed her car to go get Danny. He was as excited to see the new house as I was, so we didn’t stop much on the drive back.

The afternoon was spent showing Danny the house, going on a walk, then going out to dinner for my brother’s birthday.

The Village at Sunriver
Sunriver Bookstore

On Sunday, we planned to have a barbecue, so I baked my brother a birthday cake. Then, I went on another walk alone—then a walk with Forrest, because he insisted. When I got back, my mom and brother were planning to go on a walk as well, so of course Forrest wanted to go on that one as well! I think Forrest walked a total of 6 miles!

Once they got back, we headed to the Village to pick up a few things at the grocery store. Forrest had also been promised a book by my mom, so we went to Sunriver Books to pick one out. He picked an ABCs of Oregon book, which I was really proud of; he’s been very interested in letters and knowing what things say lately. We headed back to the house and started working on lunch.

Sunriver Oregon Vacation

We headed home not long after lunch. It’s such a short drive between Sunriver and Eugene, only about 2-3 hours (depending on traffic and the weather), it makes it easy to take small weekend trips. I’m already so excited for another trip. There are so many things I love doing in Sunriver—the bike paths along the river, as well as the horse stables, shopping at the Village, bike riding, and visiting the High Desert Museum, as well as exploring Bend—it’s hard to pack it into one trip!

Have you ever been to Sunriver? What’s your favorite thing to do?