Feeling Stuck? Here Are 10 Blogtober Ideas

Feeling Stuck? Here Are 10 Blogtober Ideas | Writing Between Pauses

Are you a blogger? Are you taking on Blogtober this month?

Thinking up 31 topics for blog posts throughout the month can be a huge challenge. My advice is always to plan your content in advance, work ahead as much as you can, and take shortcuts whenever possible (like using stock photos when you schedule your posts, but add in your own photos later if you want to).

I wanted to share a few topic ideas for when you’re feeling really stuck for content this month--whether you’re doing Blogtober or not! Many people modify Blogtober: instead of posting every day, they post every other day, or just more regularly than usual. It’s up to you, and I hope you find these ideas helpful!

For Lifestyle Bloggers

1. Daily Diaries

These used to be such popular blog posts--back when people used blogs essentially as journals! It is so fun to do day-in-the-life posts occasionally and an autumn version would be really fun.

2. Things I Love

Things I love (or TiLT) posts used to be very popular--I’m doing them myself this Blogtober, just like last year! They are fun, short posts that can highlight some of your favorite bloggers, tv shows, podcasts, and more!

3. Inspiration

Every Sunday during Blogtober, I do Inspiration Sunday--it’s a series I started back in 2010! Seriously! I share photos, stories, and more that have been inspiring me to write, to create, or just to think. If you’re like me and addicted to saving pretty pictures every month, inspiration posts are a great way to show them off.

For Beauty Bloggers

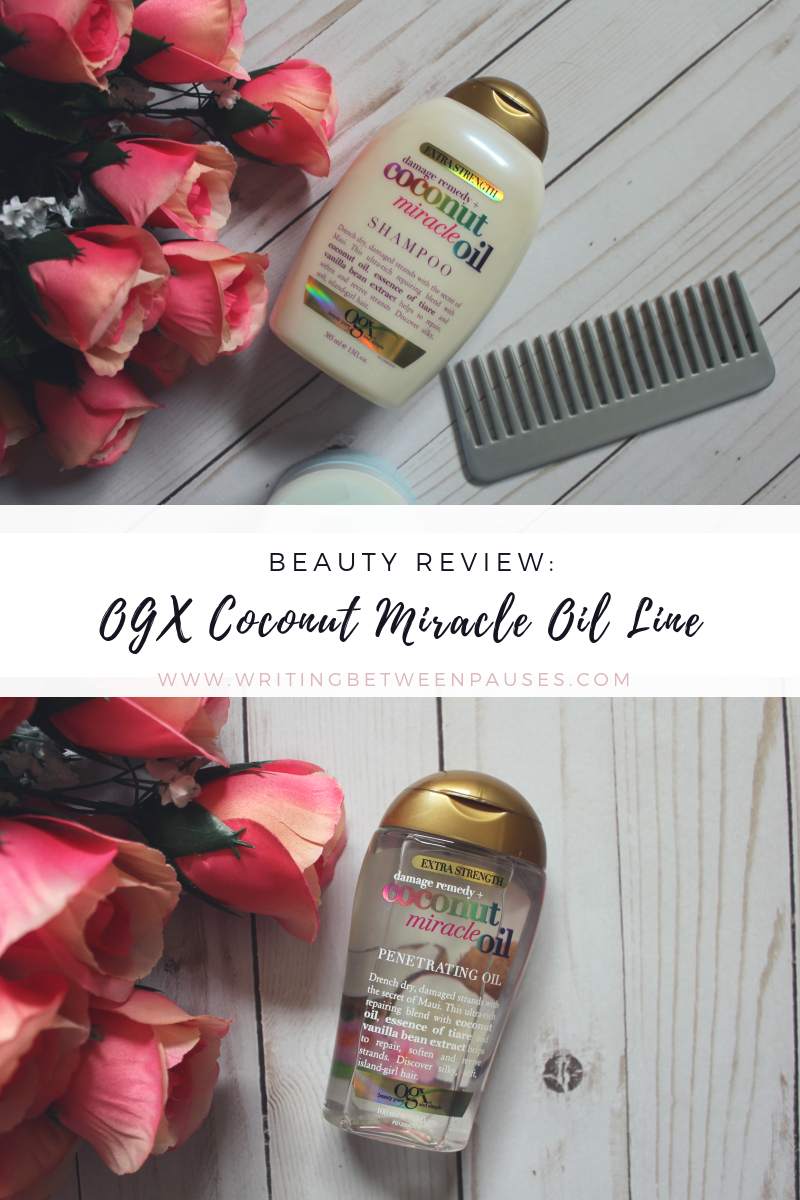
4. Favorite Autumn products

What products are you favoring this month? You could even divide this into pieces: lipsticks, blushes, powder, foundations. The change in season often means a change in makeup trends. What’s on the radar? Share what you’re loving! I’ve got a bunch of these posts coming up this month.
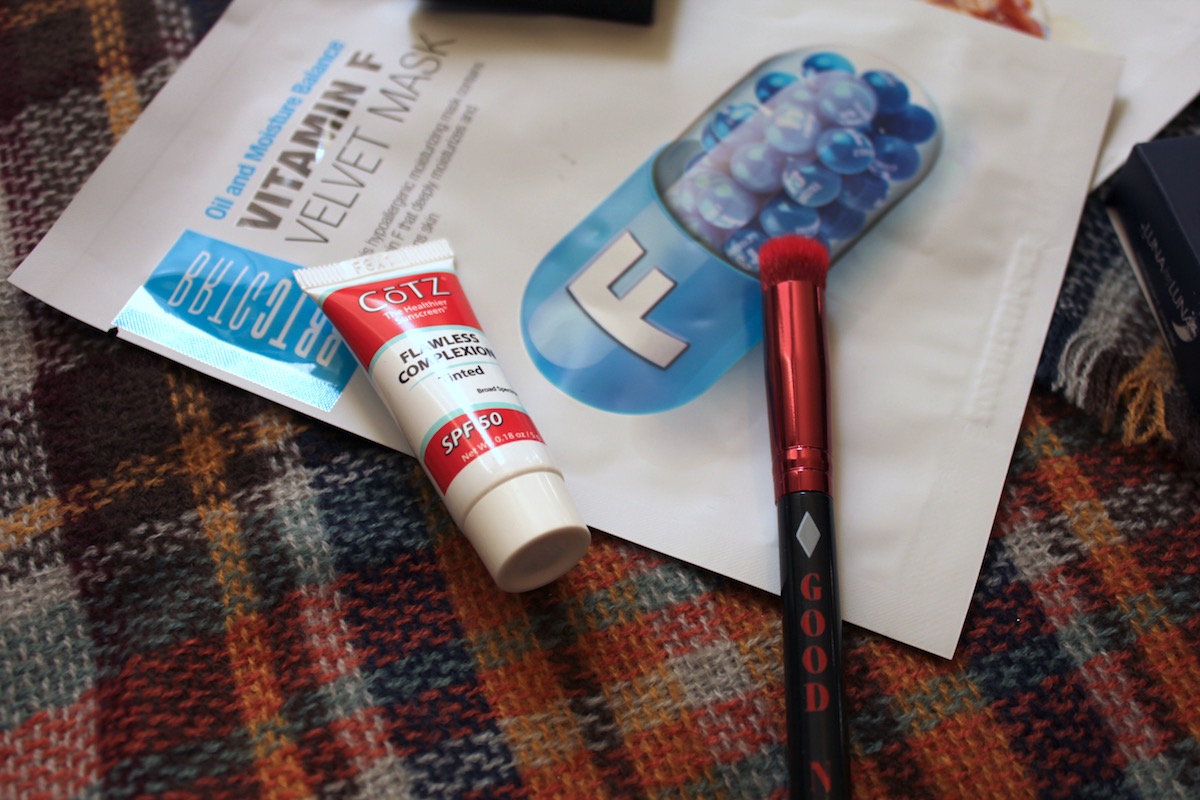
5. Skin products

Change in season, change in weather, change in skin! How do you handle the changing season? Depending on your climate, some people become drier in the fall and winter or more oily due to humidity! What products help you keep your skin looking snatched?

6. Nail polish roundup

Nail polish trends change rapidly. Remember when everyone was obsessed with mint candy apple from Essie? Same. What nail trends are we seeing this year? Or, what nail tutorials have you excited to paint your nails? Show off some fellow bloggers, post your own nails, and more. There are so many ways to take this!

For Mental Health Bloggers

7. SAD Awareness

For many, the change in season--slightly drearier weather, less sunlight hours, more time indoors--can be really difficult! For mental health bloggers, discussing SAD can help break the stigma. Even though I love Autumn, I struggle with SAD, especially once winter starts. Sharing tips for aleviating SAD can be really helpful!

For Everyone

8. Favorite post roundups

Seen some amazing posts from your favorite bloggers? Write a roundup (sometimes called a carousel). These are so fun to do because you can really highlight some voices that need boosted.
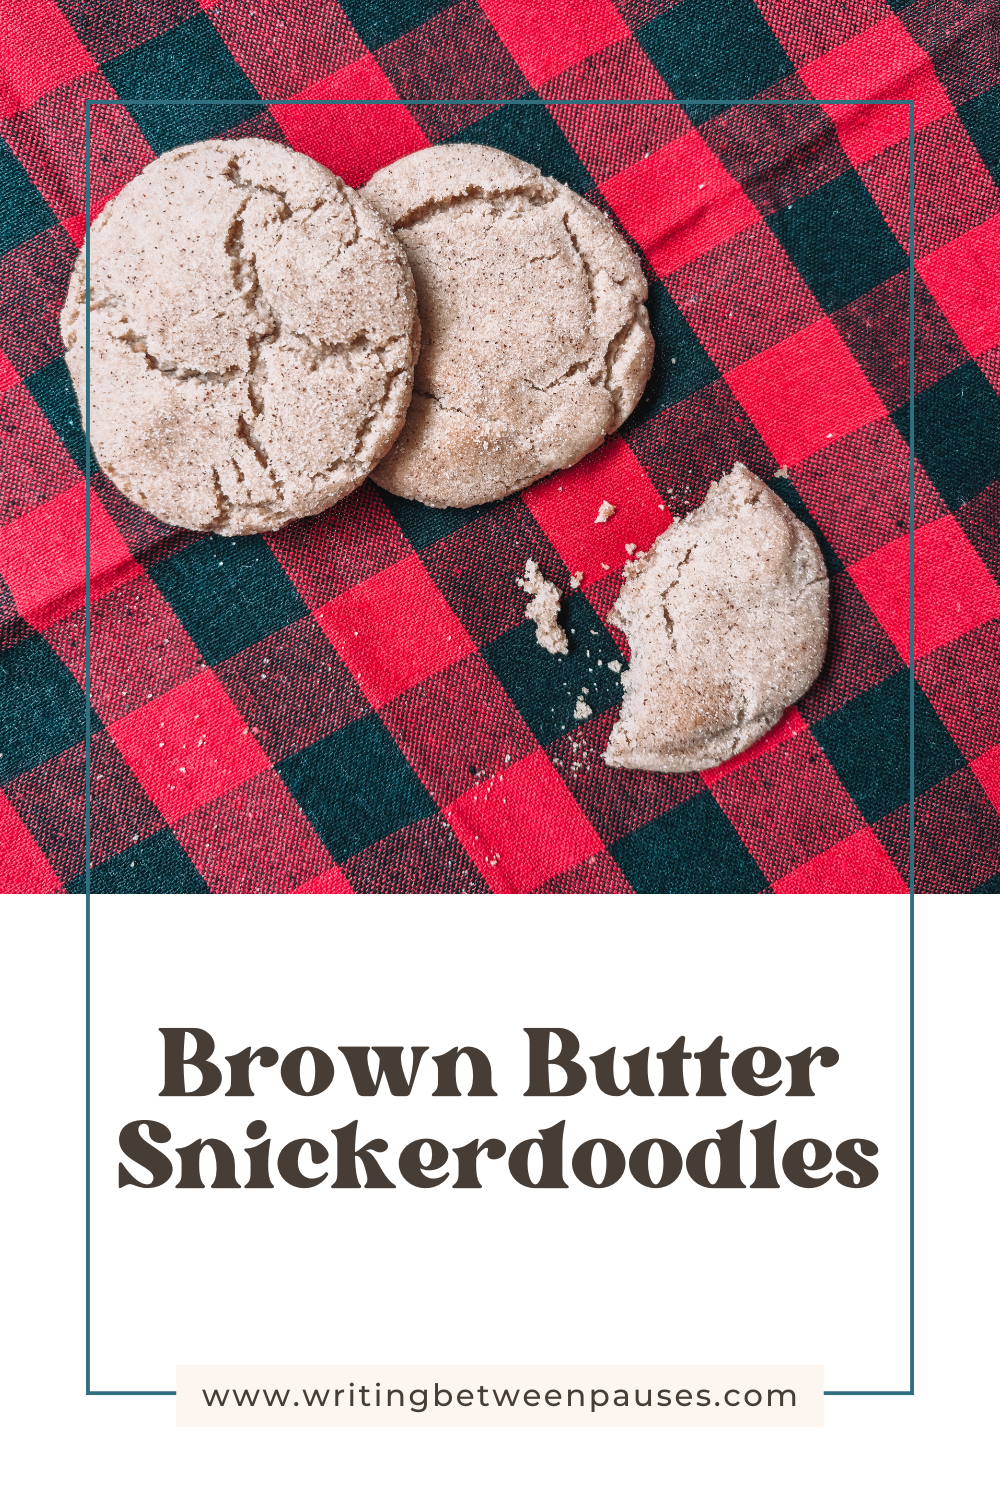
9. Autumn memories

What’s your favorite memory from Autumn? The first Halloween that you remember? What are your Autumn traditions? Share it all in a blog post!

10. Why I Love Autumn

Autumn fanatics, what’s your favorite thing about Autumn? Writing a blog post that highlights your favorite parts of Fall can be really fun to just get out--you can share tons of photos, link to past and present blog posts, and just spread that Autumn spirit!

My 3 Favorite Autumn Teas

My 3 Favorite Autumn Teas | Writing Between Pauses

Last year, one of my most popular Blogtober posts was this one: My 4 favorite Autumn teas. It was one of those posts that I didn’t expect to be quite as popular as it was, but hey, I wasn’t complaining!

This year, I decided to share 3 more of my favorite teas for Autumn! Danny & I are year-round tea drinkers, but I shift more with the season than Danny does, as he only drinks herbal teas. So, here they are, my 3 favorite teas for Autumn this year.

1. Salted Caramel Black Tea from Bigelow

Salted caramel is, perhaps, my favorite flavor of all time. The first time I drank a salted caramel mocha from Starbucks, that was it. I had never really liked caramel, but salted caramel is a different animal. This tea is perfect for when you’re craving something sweet and a little salty. It also smells absolutely amazing.

2. Pumpkin Spice Tea from Zhena’s Gypsy Tea

This is one of the few pumpkin spice teas I’ve found that contains actual tea: African Rooibos, to be exact. It also has ginger, cinnamon, nutmeg, vanilla, and more to help give it that spicy, sweet taste and pumpkin flavor. It does have some orange spice in it, so it is not as “traditionally” pumpkin spice as, say, a PSL… but it reminds me almost of a mulled wine. It’s really good and perfect for those crisp, Fall mornings.

3. Apple Cider Spiced Tea from Bigelow

This is an herbal tea, which means Danny can drink it--and good thing too, because he loves apple cider. I’ve never been a huge fan, but this Apple Cider tea may have changed my mind! It’s not too strong on the apple flavor, which is probably why I like it. Danny and I have it with honey. It is perfect for the evening, when you’re sitting down to watch TV or a movie before bed. Heavenly!

3 Best Candles for Autumn

3 Best Candles for Autumn | Writing Between Pauses

It’s finally here: Blogtober (and October). This is the month I look forward to most throughout the year: it’s my birthday month, the start of the holiday season for me, and include Halloween, one of my favorite holidays. I love the colors of falling leaves; I love pumpkin patches; I love warm, spicy scented candles, orange holiday lights, thick scarves, and boots. I love everything about Autumn.

I’ve been looking forward to Blogtober for ages. It hasn’t been far from my mind since the beginning of August. Yep, that’s when I started making graphics, drafting posts, and getting everything scheduled. I know that seems quite early, but posting every single day takes a lot of advanced effort!

Without further ado, let’s jump into the first post: 3 candles perfect for your home, apartment, or bedroom this season. When picking scents, I stuck to my favorites: I like sweet, spicy scents, as well as more herbals scents. I hope you love these ones as much as I do! And don’t forget to leave me your favorites in the comments.

1. Leaves from Bath & Body Works

If I had to say a favorite candle from Bath & Body Works, it would be this one (or maybe Kitchen Spice, which they don’t make anymore). Leaves is scented with apple, nectar, and clove spices, making it the perfect almost apple cider scent: not too apple-y, not to sweet, very Autumnal. To me, this candle can also smell very pumpkin-like, as well as that smell of crisp leaves. Nothing gets me in the Fall spirit quite like this candle!

2. Hickory Clove from Decoware

My husband picked out this candle--and he picked a winner. I’m a huge fan of the smell of clove; it is so perfectly spicy. It reminds me of gingerbread! This candle promises “musk-infused oakwood” scent with “warm amber, spiced evergreen, and autumn herbs alongside clove and vanilla bourbon.” It reminds me a lot of the Spiced Bourbon candle that I got at Bath & Body Works last year! It is absolutely lovely. We’ve been enjoying having it in our bedroom the last month or so.

3. Sage & Citrus from Yankee Candle

I rarely buy Yankee Candles full price; you can often find them at stores like TJ Maxx for about half off, which is pretty decent. That’s how I found this Sage & Citrus scented candle. This is a less stereotypical Fall scent, but if you’re looking for something that is a little more herby and light, it is absolutely perfect. I love the smell of citrus, but especially around Autumn, I like for everything to be more orange-scented. This candle has notes of lavender, as well as patchouli and musk, so it’s perfect for a more “masculine” scent.

4 Things To Do To Prepare for NaNoWriMo

4 Things to Do To Prepare for NaNoWriMo | Writing Between Pauses

It’s NaNoWriMo prep season. If you don’t know what NaNoWriMo is, I have a blog post for that. But long story short, NaNoWriMo stands for National Novel Writing Month, an event where everyone tries to write a 50,000 word novel in 30 days.

I’ve participated in NaNoWriMo since 2010; I’ve won 5 times so far, which means I have 5 50,000 word novels floating around. For some, NaNoWriMo is a chance to binge write a novel they’ve been working on for years. For others, NaNoWriMo is just a fun month to write a novel.

For me, NaNoWriMo is all about having fun, writing a novel that I want to read, and feeling the joy of success afterwards. Usually, by November, I’m feeling a little “burnt out”—I spend most of my waking hours grappling with words in some form of another. I work as a digital marketing content strategist and copywriter; I maintain a blog; and my main hobby is creative writing.

However, oddly enough, November is often the thing that refreshes me for the next 12 months. It is sandwiched between my two big blogging challenges, Blogtober and Blogmas, so by January 1, I’m feeling decidedly ready for anything.

I’ve written a lot of posts about NaNoWriMo previously, especially about how I handle the task while also caring for a child. I’ve shared my planning strategy for NaNoWriMo, my typical prep, my tips for succeeding, and preparing for NaNoWriMo in 3 steps.

Every year, I feel like I tweak my NaNoWriMo process just a little bit in a way that makes a huge difference in my ability to succeed. This year, I want to share not just how I am preparing for NaNoWriMo, but also my schedule for doing so. So these 4 steps are all about setting deadlines for myself.

Ready to prep for NaNoWriMo? If you’re planning to go for your first NaNo this year, or you’re an old timer like me, I hope you find some value in this timeline. Let’s jump in!

1. By October 10: Pick a Topic & Sketch Your Plot

By October 10, you should know the basic form of your novel: the genre, what happens, and a few climactic points you want to hit in your writing. This is always my first step when beginning to prepare for NaNoWriMo (and I’ve outlined it in detail before in my posts). But my basic process is to have a notebook or Google doc dedicated to notes for my novel where I include all the basic information. This includes:

  • All my characters names, basic descriptions, and basic information that may come up (like birthdays, important events, and character traits)

  • A synopsis of the novel

  • and at least 3 important plot points, twists, or scenes I need to include for the plot

From here, I can begin working on the outline of my novel.

2. By mid-October: Write an Outline

Speaking of outlines, I always write from an outline for NaNoWriMo. That is: I’m a planner, not a pantser (aka flying by the seat of my pants). I divide the 50,000 word minimum into 10 chapters of 5,000 words and then divide each chapter into 5 1,000 word scenes. I then plan out each scene in basic detail: my point for a scene might be anything from “introduce [character]” to “[character 1] fights with [character 2]” to already fleshed out dialogue and scene details. They can be vague or descriptive. But the important thing is: I get the outline on paper so that I never find myself stuck on day 10 of November.

I try to have my outline completed and in a Google doc by October 15, or October 20 at the absolute latest. This makes the run up to November way less stressful.

3. By October 20: Sign Up on NaNoWriMo

This is a basic step, but every year, I find myself scrambling to remember my NaNoWriMo password. It was only last year that I reminded myself (by putting it on my calendar) to log in to NaNoWriMo.org before November 1 to set up my novel. Tracking my word count is a lot easier when I use the NaNoWriMo website because it gives me a daily word average, an average words per day I have to write to get to 50,000 words, and much more, as well as a graph of how I’m doing comparatively to everyone else. Plus, to officially win, you have to validate through the NaNoWriMo website. So, sign up at nanowrimo.org by October 20!

4. By October 30: Plan Your Writing Schedule

I’ve mentioned before that in November, I keep my schedule really strict when it comes to writing. I set aside two hours every night (or on the weekend, every morning) to really get writing done. And in that time, I have to meet my daily goal or exceed it. If I don’t, I’ll probably fall behind—and once I fall behind, it’s really difficult to catch up again! So, by the end of October (but before Halloween, because obviously, you need that night to celebrate!), have an idea of what your writing schedule will be. Maybe you’ll take your laptop to Starbucks every day during lunch to write. Or maybe, you’ll wake up an hour earlier to get writing done that way. No matter what, pick a schedule that works for you—you can even test it out a few days in October to see if it’s good for you—and stick to it.

Beauty Review: My September Ipsy Bag

Beauty Review: My September Ipsy Bag 2018 | Writing Between Pauses

I look forward to September all year and then, I swear, it flies by so fast, I can barely catch my breath! I can’t believe I’m writing this post exactly one week before Forrest’s birthday. And funny enough, I’m awake at 6:25 am on a Sunday… and Forrest isn’t. As if a switch flipped this past week, Forrest has finally started sleeping past 5am—and let me tell you, I really missed my early mornings of writing blog posts and drinking coffee in a completely quiet house!

Ok, so, let’s talk Ipsy: I gave a walk-through of this bag on my Instagram story last week (you can rewatch it in my beauty highlight) and… I was very underwhelmed. I’ll cover that more completely at the end, but I just want to know everyone’s thoughts: is there a point where subscriptions start getting boring?

As always, you can read my past Ipsy bag reviews here. And don’t forget, if you want to try Ipsy, you can sign up using my code here.

1. Luna by Luna Cosmetics Translucent Powder, $18 

Hello? 911? This isn’t a translucent powder.

I was so beyond excited to get a translucent, apparently setting, powder in my ipsy bag. I use powder more than any other product, easily, and so trying new ones is really fun for me. I don’t really know what this is supposed to be, but it’s not a setting powder or even a translucent powder. It is identified as the color White Sand and I can only assume that it is a repackaged highlighter. Because that’s what it looks like when you put it on! Let’s check at what they promise, shall we?

Our pressed formula offers multiple ways to utilize it while creating a flawless finish. It delivers both a natural and matte finish, blends eye shadow and is perfect for creating a flawless no makeup makeup look.

This formula promises no flashback and no color residue, meaning it is intended to be totally translucent and mattify your makeup. It doesn’t do that. There is something pearlescent about how it looks on the skin and that look stays throughout the day. It’s as if I covered my face in highlighter! The formula is more creamy like a highlighter would be as well and it doesn’t really set anything. In fact, it made my undereyes look so white and stark, I actually scared myself in the mirror.

I’ve received a few products from Luna by Luna and they have all been disappointing, from lip crayons to eyeshadows. This was a big disappointment in this bag.

Morphe Highlighter in Spark
BRTC Vitamin Mask Duo

2. Morphe High Impact Highlighter in Spark, $14

I’m very, very over highlighters at the moment, so this is a second bust for me as I most likely won’t use it. This highlighter promises to “create [an] explosive, prismatic effect so you can glow all out.” That sounds nice! It is a pretty highlighter, but it is also just a champagne-y, bronze-y highlighter. Just like the other 10 I own! (Also, I could not believe a single highlighter from Morphe is $14! Aren’t their eyeshadow palettes $20 total? Excuse me?)

3. Luxie Beauty Harley Quinn Detail Flat Definer 110, $20 

I love a good brush and this is a good brush,. It’s really cute and designed in a Harley Quinn style that I really appreciate. Here’s what the website says about it:

Liquid and cream concealers blend like crazy with the LUXIE 110’s densely packed bristles and versatile capabilities. Whether you want to mask those pesky dark circles or achieve a full coverage base, the LUXIE 110 is no joke when disguising spots or blemishes. You’ll find the charm of the LUXIE 110 irresistible as is also doubles as the perfect brush to smudge product around the water line and corners of your eyes.

For whatever reason, Ipsy had identified this as an eyeshadow brush and in the photo, I thought it was a flat, short brush for blending your undereye eyeshadow. However, in person, I realized it is a small stipling brush—another brush missing from my collection! Ipsy, if nothing else, has been great for giving me makeup brushes that I need. This one is lovely and blends eyeshadow like a dream!

4. BRTC Velvet Mask Duo, $4.50 each ($9 total) 

Face masks, as you well know, are something I love. These are from a Korean brand, BRTC, so I could only find purchase links through a (reputable) third-party website which has them listed at $4.50 each, which isn’t a bad price. I received the Vitamin F Velvet Mask and the Vitamin C Velvet Mask. Vitamin C and my skin do not get along (it makes me break out like absolutely crazy), so I don’t plan to use that mask. I did use the Vitamin F mask and gosh, it left my skin silky soft and super hydrated. Here’s what the masks promise:

* The Vitamin C mask revitalizes dull and tired skin, leaving it dewy, glowy, and gorgeous.
* The antioxidant-loaded Vitamin F mask regenerates and protects skin while preventing fine lines.

I’m never disappointed by a face mask, really, so these were lovely in a bag of “meh”.

Winky Lux Eyeshadow in Ursula
Ipsy Bag September 2018

5. Winky Lux Eyeshadow in Ursula, $10  

This single shadow is actually from the Mermaid Kitten palette from Winky Lux, which you can view here. There is something a bit repulsive and infantilizing about the “kitten mermaid” concept to me, but that’s neither here nor there except to say it was a big turn off the moment I saw this eyeshadow. As well, I’ve written before that purple eyeshadows are the hardest to create in a pressed form; purple pigments just… don’t like the eyeshadow process. And like every other eyeshadow I’ve received in the shade purple from ipsy, this one is no different. Once I start trying to blend it, it’s a dark gray-brown. It’s not ugly, but it sure isn’t purple! It’s also odd that Winky Lux, a brand known for their lip products almost entirely, took the risk of sending out purple eyeshadows in Ipsy bags. It’s not a great first impression!

Bonus Item: Cotz Flawless Complexion Tinted Sunscreen

I received a bonus item again in this ipsy because I’m trying to use my points. I picked this tinted sunscreen and I thought it would be a reasonable size. Well, as I shared on my Instagram story, it is not a reasonable size. It’s tiny! Teeny tiny! I can’t believe I cashed in 300 points for it. That being said, it’s a lovely tinted sunscreen and I’ve been wearing it every day as lightly as I can to make it last.

Ipsy Bag in September 2018 Review

Final Thoughts

This was just a bit of a bummer of a bag, wasn’t it? It’s funny because this is the first one that came with a makeup bag that I really, really like and will probably use for a long time… but the products are, to say the least, really disappointing!

In total, the value of this bag is $71. To me, that feels highly inflated: the “translucent powder” absolutely is not worth $18 and the eyeshadow isn’t worth $10. I’m still stunned by the price of individual Morphe highlighters (almost as much as one of their eyeshadow palettes), especially as you can get the same highlighter for $4.99 from Wet’n’Wild. $71 feels suspect to me, but I don’t know if my reasoning is clouded by my disappointment with my recent bags!

Am I jaded with Ipsy now? Has anyone else felt like this? I really loved Ipsy until the last 2 months, but I don’t know if it’s really disappointing bags or if I’m just over it as a concept. Anyone felt this way before? Let me know in the comments!

Beauty Review: OGX Miracle Oil Line

Beauty Review: OGX Miracle Oil Line | Writing Between Pauses

Another day, another shampoo review.

A few months ago, I reviewed the OGX Coconut Oil Shampoo, which I quite liked. It did a lot to help my scalp, which was in pretty poor shape. As I wrote in my post about hair masks, I recently discovered that my scalp problems are mostly hormonal and my goal has become to soothe my scalp as much as I possibly can.

One thing I started noticing in the last 6 months had nothing to do with my scalp: split ends. I hadn’t had a hair cut in 3 years (it’s been 3 years ago this week actually!), when I was pregnant. It was just one of those things that got away from me. But since I don’t use heat styling, I don’t really get split ends as bad as I should. However, I was having a lot of breakage and split ends by the end of July. It just kept getting worse and while I knew the solution was to get a hair cut, I still kept putting it off. (But that’s really another story entirely, isn’t it?)

My hair started getting very dry during the summer. Not just my scalp, which was still flaring up occasionally, but my hair started to feel rather straw like. The problem really got bad when I was sent some shampoo to try and it absolutely destroyed my hair to the point where I had to email the company and cancel the sponsored post. It was bad, bad, bad! Just the absolute worst shampoo I’ve ever used on my hair. It made my hair dry and brittle, the ends seemed to start splitting at an alarming rate, and I was looking really ragged!

So at Target, I decided to treat myself to two pieces of the OGX Coconut Miracle Oil line because my hair needed it. I got the Coconut Miracle Oil shampoo and the Coconut Miracle Penetrating Oil. Here’s what the shampoo promises:

Create an island girl escape in your shower with this ultra-moisturizing formula for thick to coarse hair. Help repair, soften and revive damaged strands and discover silky, soft island-inspired hair.

And here’s what the Penetrating Oil promises:

This Penetrating Oil is the key to your island escape, to help revive your senses and your strands. This rich oil helps to calm frizz and tame flyaways, leaving hair silky soft and shiny.

Basically, both these products are intended to moisturize and help repair hair. Technically, they are both for hair types that are not mine (thick, wavy hair seems to be what they are advertised for), but since my hair was in such need of heavy repair… I knew I had to try something.

The shampoo especially is lovely. After one use, my hair was much less dry and brittle (from that awful shampoo!) and within a week or two, it was looking back to normal again.

The oil has become something I use daily: I apply it in the morning to help take impressions out of my hair (as my hair is so fine it often stays in a ponytail wave for a long time) and to help calm down visible breakage. It is also great for getting rid of static and frizziness when I do blow dry my hair. I have also noticed the oil helps my scalp when it is flaring up, feeling sore and flaky; I try not to apply it directly, but by moisturizing my hair, it does lend moisture to my scalp.

I have found both did a lot to help repair my hair from the damage I put it through, both from not getting a hair cut for my son’s entire life and from using a shampoo that really did a number on me. They are also both really affordable products, so if you’re hair needs a little TLC, they are absolutely a great option.

This line also include a dry shampoo, which I am very, very interested in trying. I rarely use dry shampoo, as I have found that it either leaves white marks in my dark hair or makes my scalp burn a bit (thanks sensitive scalp). However, I am really curious as this line is so moisturizing and lovely, I’m sure the dry shampoo is great too.

4 Face Masks to Try This Autumn

4 Face Masks to Try This Autumn | Writing Between Pauses

Face masks are one thing that I started doing just a year or so ago… and I’m not sure I can ever go back to not doing them. There is something so soothing about a face mask. It might help your skin. But many people say it’s not really enough to make any difference in your skin, that you need to use product semi-regularly to see a big difference. And while I enjoy the potential skin benefits, that’s actually not why I do masks: I just find them really fun and I spend a lot of time looking at different face masks.

I put together this post of my 4 dream face masks for Autumn. I’ve tried two of them, but the other 2 are on my wish list.

1. Watermelon Glow Jelly Mask from Glow Recipe

Relive the glory days of summer with this delicious, jelly watermelon mask from Glow Recipe. (Is that too salesy? I swear, I’m not trying to be salesy.) This mask is perfect for anyone struggling with dryness (the heating goes on and suddenly, we’re all very dry), uneven skin tone, or dullness and texture issues. It also comes in two pieces, which makes it much easier to cover your entire face and have it actually fit, so you can mask while doing housework or other tasks.

2. Pumpkin & Honey Glycolic Mask from Andalou Naturals

This mask is perfect for the season. It contains vitamin C, which helps with surface pigmentation, uneven tone, and dark spots, as well as helps with cell turnover. Pumpkin puree provides natural enzymes which remove dehydrated cells to brighten up your skin. Manuka honey is soothing and helps to heal any blemishes (very nice). Glycolic acid helps to dissolve and exfoliate dead skin cells to get a lovely, smooth complexion. This mask smells amazing (just like pumpkin with a hint of sweet honey) and feels great on.

3. Cold Plunge Pore Mask from Ole Henriksen

Hit the slopes with this Cold Plunge Pore mask. Ole Henriksen makes some of the best products for those with oily, acne-prone skin and this mask is no different. Here’s what this mask promises:

Take the plunge for smaller-looking pores—instantly. Deeply purify and diminish pores with an exhilarating chill. Inspired by the “cold plunge” part of a Scandinavian sauna cycle, this cooling clay mask detoxifies, controls oil, and reduces the look of pores. The innovative formula harnesses the power of alpine willow herb and snow lotus—antioxidant-rich botanicals that have adapted to thrive in extreme cold—to soothe, mattify, and refine pores. Add cool water, and the turquoise clay mask thaws into a luxurious lather that sweeps away excess oil and impurities.

It’s absolutely perfect for anyone who wants to cleanse and shrink their pores, improve their skin’s texture and appearance, and control oiliness.

4. Pumpkin 24K Gold Sheet Mask from Too Cool for School

I’ve been getting targeted ads for this mask for weeks and, I have to say, it intrigued me so much I went in and bought one. It was just so cute! I immediately loved it: it smells amazing, feels amazing, and left my skin feeling super soft. I’ve been very dry lately (probably a combination of the change in season and turning on the heat in my house) and it helped a lot with that. Here’s what this mask promises:

This environmentally conscious, and skin-friendly bio-cellulose mask provides the optimal base for holding active ingredients. Holding up to 100 times its dry weight in fluid, it fits like a second skin and delivers intensive benefits. Superfood pumpkin’s soothing nutrients relieve dry and flaky skin, beta carotene adds a natural dewiness, and vitamin A supports natural elasticity.

It’s a lovely mask and absolutely perfect for Fall!

Product Review: Starbucks Cold Brew at Home!

Product Review: Starbucks Cold Brew at Home! | Writing Between Pauses

Over the summer, I developed a serious cold brew problem. The Vanilla Sweet Cream Cold Brew at Starbucks is one of my favorite drinks of all time: it is really coffee-flavored, lightly sweet, and perfect for a cold day. It's also not super calorie heavy; 110 calories for a tall is actually pretty decent. And compared to other drinks at Starbucks, it has 14g of sugar--which is still a lot (about 3.5 teaspoons). Hence, why it's not an every day treat! 

While cruising Target, I noticed that Starbucks now sells packs to make cold brew at home. They come in a variety of flavors, but for around $8 for a box that makes one pitcher, I decided to just get the regular version. 

Cold brew at Home
Making cold brew at home
Is Starbucks cold brew at home good

The instructions are quite easy. However, it does take 24 hours from start to finish. You fill a pitcher with 4 cups of water, add the two giant tea bags of coffee grounds, and pop it in the fridge for 24 hours. Yep, 24 hours. When it's ready, you add another 4 cups of water, remove the big packs of coffee (carefully, I accidentally broke one), and your cold brew is ready to enjoy. 

Minus the fact that it took 24 hours (I don't know why I thought it would be 4-5 hours max!), the cold brew it produced was delicious. It tasted just like the cold brew you would get at Starbucks; with a packet of Truvia, a tablespoon of salted caramel creamer, and a tablespoon or so of almond milk, you have a lower-sugar Sweet Cream Vanilla Cold brew at home. 

The pitcher made about 8-10 servings of cold brew for me. At $8 for a single pitcher, that evens out to $1 or less per serving, which was pretty good considering a drink at Starbucks is $3 or more. Ultimately, it saves money and you can control the calories and amount of sugar in your drinks more effectively. 

Fall is fast approaching, so I've been experimenting with cold brew and pumpkin spice. Let me tell you: it's just as delicious with a little Pumpkin Spice creamer and almond milk! If you love cold brew, but are tired of spending so much money at coffee shops, these are a great option.